I have to admit that before I took the plunge and tried an air fryer, frying with air seemed to be a bit of a contradiction of terms. I know enough about cooking to know that true frying can only take place in the presence of fat. Perhaps I had dismissed the legitimacy of the air fryer before I even gave it a chance, but I could not ignore the buzz these machines have created in the world of home cooking.
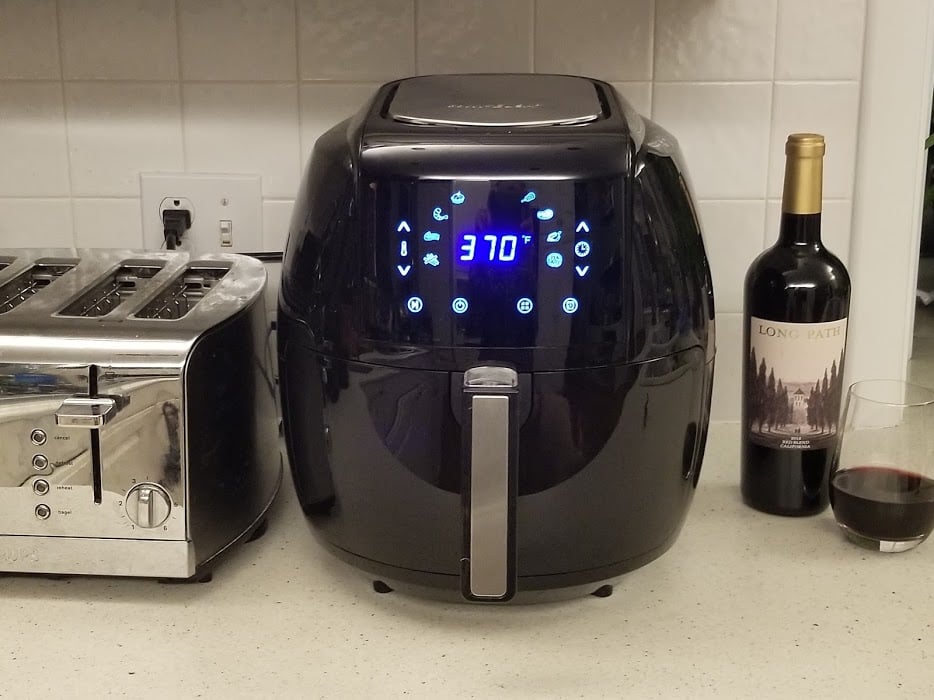
There are so many versions available today, each offering something a little different in terms of functions, set-up, size, and capabilities. The only way to really know if this machine is a good fit for your cooking needs is to sort through the features in order to figure out what it does best.
In this article,I will give you a cook's eye view of the Gowise 5.8-quart air fryer that I have tested in my own home kitchen, highlighting areas where it excels and what could use improvement. I will then go on to compare it with some other models of comparable size, cost, and power. My goal is to shed light on its functions and capabilities so you can make an informed decision before adding an air fryer to your arsenal of kitchen appliances.
Table of Contents
What’s in the Box?
Opening a boxed appliance can be a little bit surprising and sometimes overwhelming. I always prepare myself for the worst, anticipating the possibility of an assortment of parts that require a manual to decode, identify, and sort through, but this machine could not have been more simple.
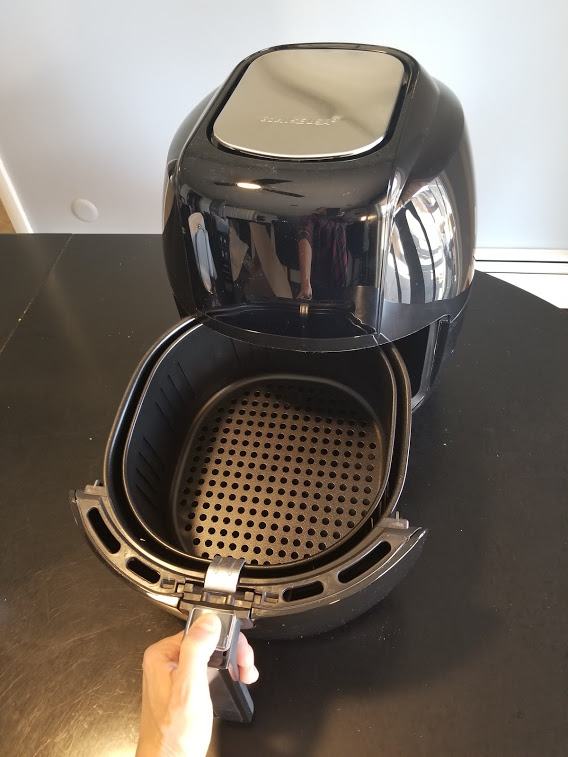
After opening the box, I simply removed a styrofoam insert and easily lifted the fully-assembled unit with everything in place. It was wrapped in plastic and tape to keep the basket from shifting during shipping. Within seconds I had it on my kitchen counter. I wasted no time which was certainly a plus for this machine.
The parts really come down to the air fryer itself, the inner fry basket, and the pan it fits into.
One addition to this model that I found quite helpful is the recipe booklet that is provided by Gowise. I can't necessarily attest to the deliciousness of these recipes, but with 100 options, divided into 5 sections, I found myself thumbing through its colorful and enticing pages with a bit of anticipation.
What is in the box:
- Air fryer unit with attached power cord
- Pan
- Inner basket
- User Manual
- Recipe book
How Does the Gowise 5.8Qt Air Fryer Look/Feel/Sit?

At first glance, this machine has a rather sleek, modern look with its shiny plastic exterior and rounded egg-like shape. It stands about 14 inches tall and fits easily under my kitchen cupboards. At 12.5 inches wide and 14 inches deep, due to the handle that protrudes from the front, I felt it was rather compact, weighing in at 17 pounds.
The LCD Control Display on the front of the machine blends into the front when it is not in use. I opted for the black color (it is also available in white, red, and purple) making the screen just part of the shiny black aesthetic.
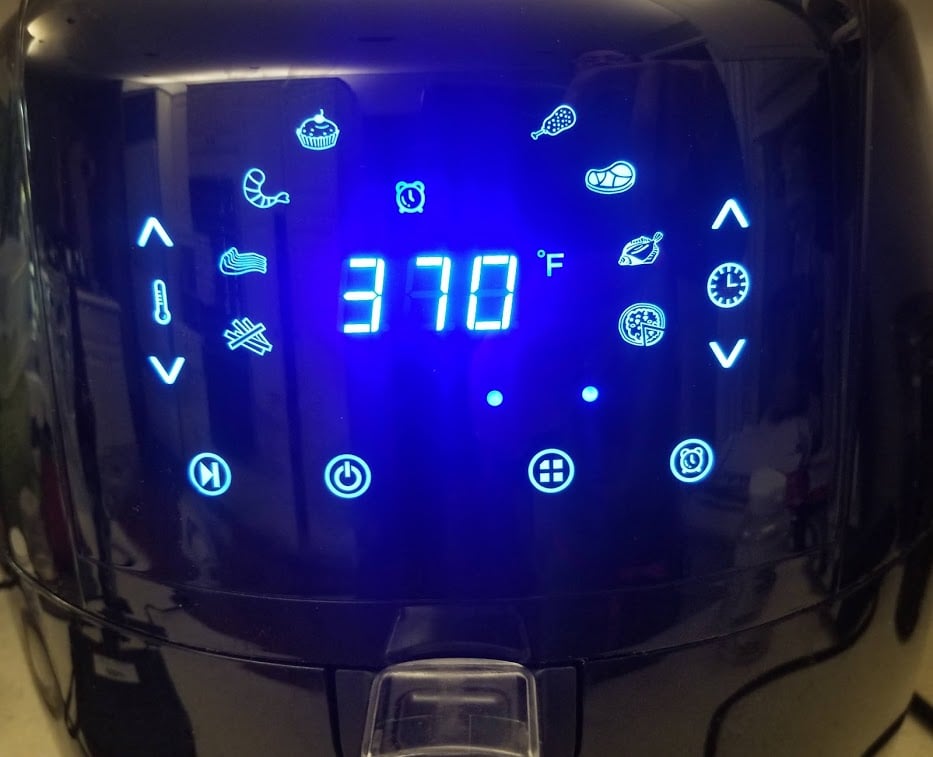
When the machine is in use the blue LED control panel illuminates with 8 pre-set cooking programs, as well as temperature control, timer, pause, start, menu, and alarm icons which disappear when the unit is off, leaving just the power icon illuminated.
How Easy is it to Set Up?
This air fryer was a breeze to set up after taking it out of the box. In addition to the important safeguards and a detailed illustration of the product structure, the manual provides a breakdown of the control display that illuminates when the machine is in use. I felt the guide provided easy to follow directions with illustrated steps.
There are some important points made in the set-up section of the manual that should not be overlooked. Specifically, it covers the way the basket clicks into the pan, as well as the way to properly clean the air fryer in order to extend the life of this air fryer.
Perhaps to avoid some more common cooking problems with the unit, the manual includes a cooking guide with temperatures and times and a list of troubleshooting tips.
Cooking Bacon
The first thing I decided to cook was bacon; something quite simple and certainly something that my family enjoys. When I cook bacon at home, the cleanup is the part that I dislike the most, so I was open to the possibility of finding a new way to give them what they like with less mess.
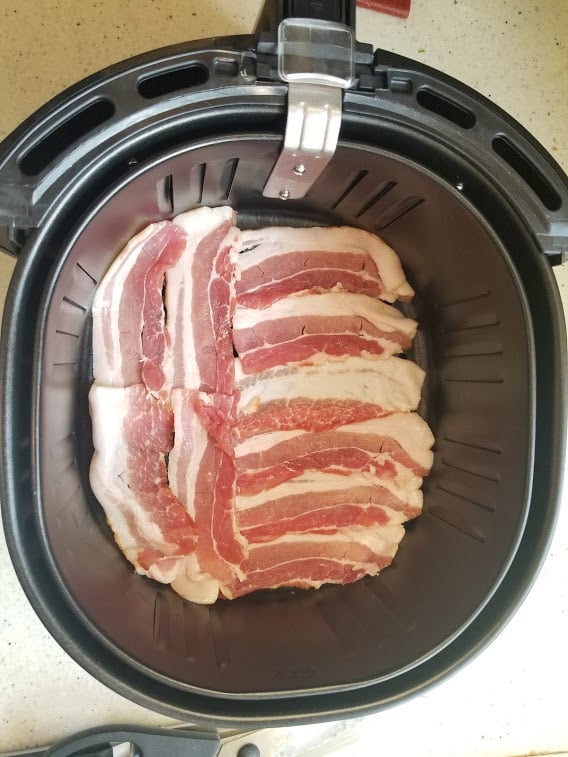
For this, I consulted the included recipe book and followed their recommendation by cutting the bacon strips in half. I felt this was a smart move which made it easier to fit them into the basket. I arranged the half strips in a single layer covering the entire bottom of the basket and arranged it into the machine. I was able to squeeze half the 12-ounce package of regular-cut bacon into the air fryer at one time which wasn't as convenient as cooking it all at once, but I was careful not to overcrowd the basket to avoid less-than-crisp results.
I touched the power button on the display panel and chose to manually select the temperature to 400 degrees. The machine defaults to 370 degrees, so I simply pressed the arrow up button on the left side of the screen, indicated by the thermometer icon. I chose 4 minutes, again adjusting the default time of 15 minutes with the downward arrow on the timer. A touch of the start icon had things underway as indicated by the sound of the fan and the four dots that began to blink across the screen.
At the four-minute mark, I removed the basket with the press of the basket release button to reveal the sizzling strips had shrunk and curled considerably. I used my plastic tongs to remove most of the bacon that was adequately crisp at this point, setting it to drain off the excess fat while the remainder benefitted from another minute to achieve proper doneness.
At this point, I pressed the fry basket release button while pulling up the handle to free the basket from the pan. I was impressed with the amount of fat that had rendered out of the bacon and accumulated in the bottom. That fat was easily poured off into a heatproof container that I would dispose of later. On to the other half of the bacon strips. I proceeded in the same way, pleased with the timing and simplicity of this first cooking attempt.
The Results
In my house, there is no need to call my family to the table when bacon is on the table. Alongside pancakes, this bacon was quickly devoured.
One might think it is hard to mess up bacon, but the truth is it can go wrong, whether it is overcooked, undercooked, or just not evenly browned and crisp. In this case, I felt it was a success. This bacon checked all of the boxes.

Typically, I cook bacon in my oven on a baking sheet fitted with a rack and lined with aluminum foil to catch the fat. I bake it at 350 degrees for about 15 minutes, depending on how think the slices are. It is a really effective method that eliminates the spattering that accompanies stove-top cooking, but it is still a bit messy when it comes to cleaning it up. The rack requires a good deal of scrubbing and while the aluminum foil catches most of the fat, it must then be disposed of which is not at all environmentally friendly.
To tell you the truth, my family did not necessarily notice a difference between the air fryer bacon and what I usually serve them, but that doesn't mean it wasn't a win. I can certainly see how other thin cuts of fatty meats like pork chops could be done nicely in this machine.
I think the true benefit in cooking bacon in the air fryer comes from the fast cook time, the amount of fat that was instantly removed, and the much easier cleanup.
Cooking Frozen Fries
It seems like everyone wants to know about how this machine cooks oily potatoes of all varieties, from sweet potato to baked potatoes to french fries. My family was on board, so I opted for curly fries for this test, a favorite in my household. This really could not have been any easier, but would it yield crisp, evenly cooked fries like the type you might expect from a deep fryer?
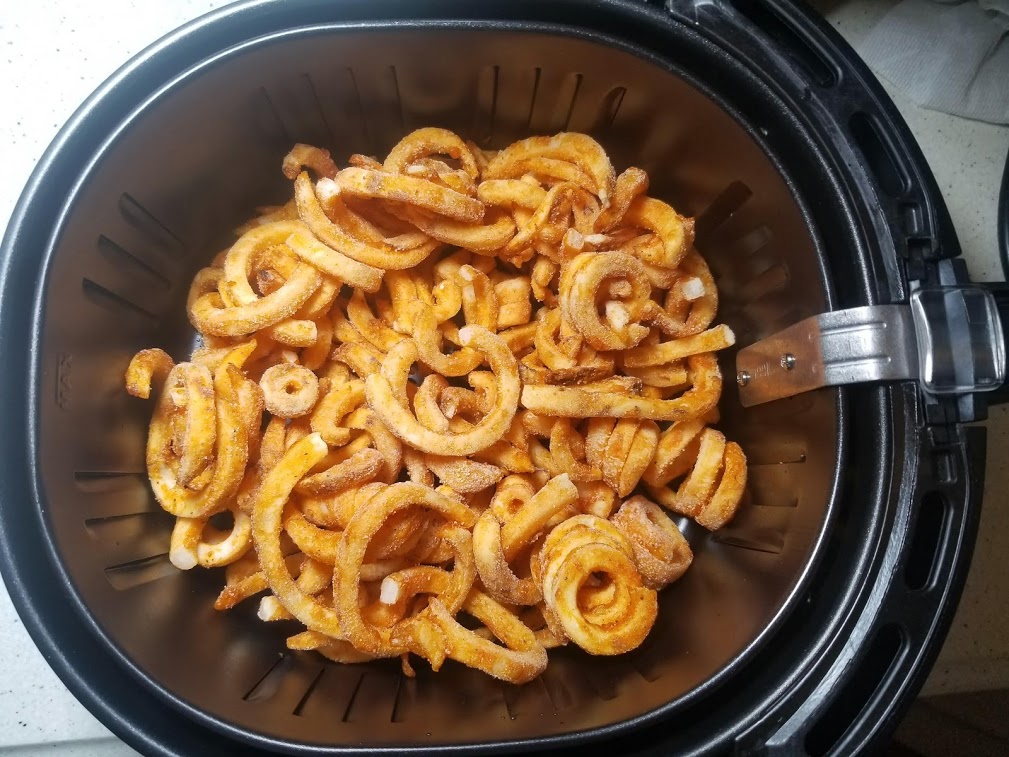
This air fryer does not have a preheat function, so the cooking began when I put the entire bag of frozen fries in the inner basket (24 ounces), clicked it into place in the machine, and selected the preset french fry mode. The fan immediately kicked into action as the temperature climbed to 400 degrees for 15 minutes. I gave the fries a quick toss at the halfway point, but other than that, it was hands-free cooking.
At the end of the cycle, I removed the pan, carefully removing them with plastic-tipped tongs, and brought them to the table. The package suggested that this would serve eight. We are a family of four. The true test would be in how well they were received.
The Results
The fries were met with great enthusiasm and they quickly disappeared. My family noted that they were evenly browned and very crisp. Having tossed them once during the cook cycle, it really could not have been any easier. The benefit of this machine is how many fries it could accommodate at one time without overcrowding. I suspect an air fryer with a smaller surface area would compromise the desired outcome. The fries were met with great enthusiasm and they quickly disappeared. My family noted that they were evenly browned and very crisp. Having tossed them once during the cook cycle, it really could not have been any easier. The benefit of this machine is how many fries it could accommodate at one time without overcrowding. I suspect an air fryer with a smaller surface area would compromise the desired outcome.

In the end, it was certainly a better way to get fries that were really on par with the deep-fried variety. Beyond that, I was thrilled that my house did not smell like a fast-food restaurant which almost always happens when you deep fry at home.
I think the Gowise Air Fryer had something to offer in terms of bringing fast food to your home kitchen with less fat and none of the lingering odors.
Cooking Brussels Sprouts
I was eager to try to cook something in this air fryer that was of the more wholesome variety. This did not surprise my family as they are accustomed to my affinity for vegetables, so when I told them we were trying air-fried brussels sprouts, they did not even act surprised.
I chose brussels sprouts because, like cauliflower, they tend to respond well to high heat, allowing the outer leaves to crisp and brown. This seemed like a perfect match for this type of cookery. I prepared the sprouts by trimming the ends, cutting them in half down the middle, and tossing them in a tablespoon of olive oil. I sprinkled them with a generous pinch of kosher salt. One pound of vegetables was a reasonable amount that would fit comfortably in the inner basket without overcrowding them. I set the temperature to 350 degrees and the timer to 20 minutes, selecting the alarm that would remind me to give my vegetables a toss every five minutes for even browning.
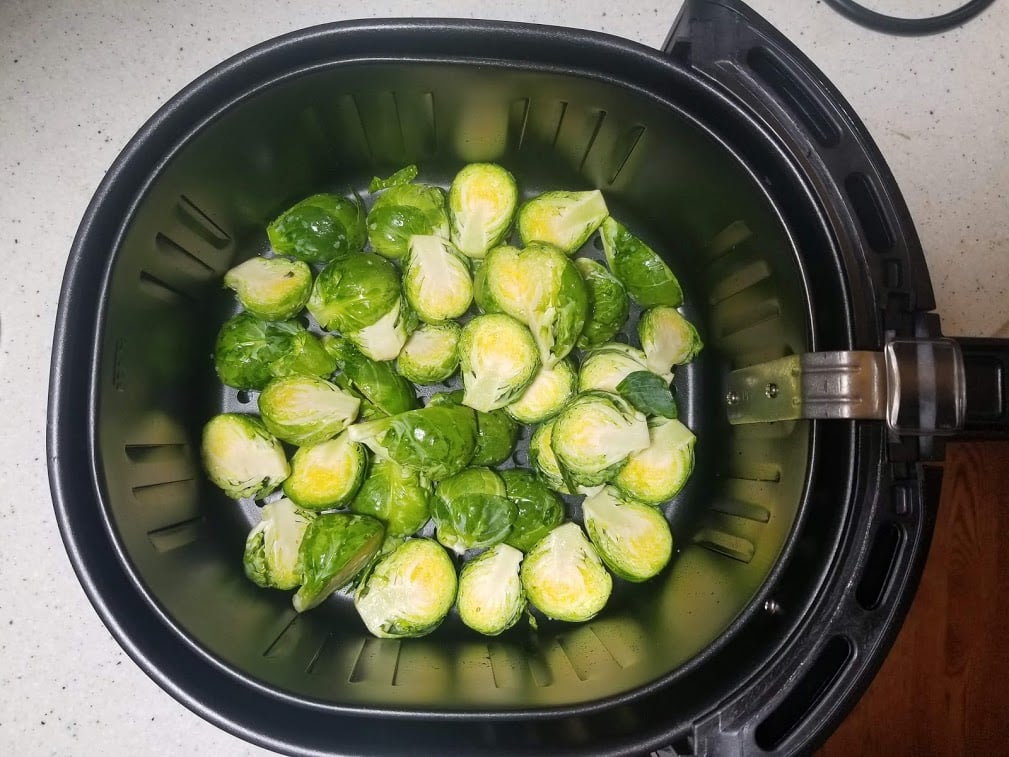
When the 20 minutes had expired I was pleased with the color. At that point, I added a couple of cloves of thinly sliced garlic and gave it two more minutes. Removing the pan from the machine revealed sprouts that smelled great and had browned nicely. They were still rather al dente (firm to the bite). At this point, I tossed them with some freshly grated parmesan cheese, a squeeze of lemon, and a bit more salt to balance it out. Time to see what my critics thought.
The Results
There was no question, these were some crispy sprouts. The outer leaves were brown while the centers retained a good amount of their color. I was the first to say they were good and my family followed suit, except for my husband who prefers his vegetables cooked a bit more thoroughly, but we proceeded to finish them. Not the best brussels sprouts we've ever had, but certainly convenient.
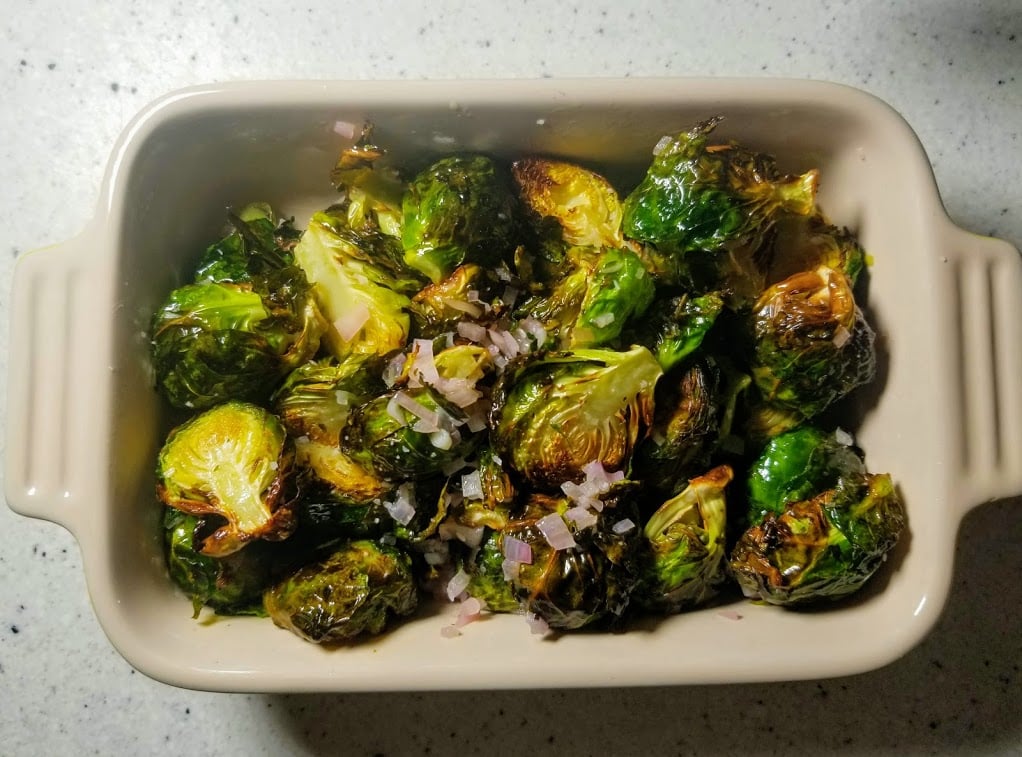
In the end, I wanted to really love these brussels sprouts, but I could not ignore the fact that they were a bit dry. I considered ways in which I could get more moisture into them and concluded the thing they were really missing was fat.
I was still determined to air fry brussels sprouts that my family enjoyed, so I gave it another try with just a small adjustment. While they were cooking I melted 2 tablespoons of butter, added a diced shallot and a good squeeze of lemon. When the sprouts were finished I quickly tossed them with the shallot butter. An improvement, for sure.
What I suspected was true in this case; fat definitely improves the texture and flavor of food and this method of air fryer cookery is certainly no exception.
I have not abandoned this method, to be clear. It is worth mentioning that the air fryer fan draws out moisture as it browns and crisps. I can tell you that with the efficiency and the ease of cleaning, I think there is something to be said for cooking vegetables in the air fryer (Paul's air fryer cauliflower is a great example), though you may find that a little extra fat will benefit your finished product.
How Easy Is It To Clean?
Full disclosure, I love to cook, but I do not necessarily love to clean up afterward especially greasy messes. I have to say that the Gowise Digital Air Fryer was an absolute breeze to clean up which had me wondering whether it is absurd to be really excited about cleaning up after cooking.
After removing the food carefully with plastic-tipped tongs or spatula, the inner basket and pan are the only things that really required cleaning. I found that the best way to restore them to cleanliness is to carefully scrape out any bits of food or fat from the pan with a rubber or silicone spatula and then fill them with hot soapy water with a few drops of dish detergent. I leave this alone for about 5 minutes, wipe it with a sponge, and rinse. Dishwashing is not recommended, though the size of the pan and basket would tend to occupy too much space anyway.
It is important to note that the non-stick coating is the star of the show here and taking care to not scratch it is the key. That said, the recommended method is hand washing, but believe me, it really is really simple and takes very little time in the end. After cleaning up the bacon fat from the pan with amazing ease, I was pretty sure this was the way I would be cooking bacon in the future.
The exterior of the unit was easily restored to its original shine with the wipe of a damp cloth and some kitchen spray.
How Would I Improve the Gowise 5.8 Qt Digital Air Fryer
After I had given this air fryer a chance to show me what it has to offer, I couldn't help but wonder if it could stand a couple of improvements.
- First of all, despite its relative simplicity, I do feel the control panel could be a bit more intuitive. Having to select the menu and toggle through all of the functions before landing on the right one for your task seems pointless. If I could redesign this, a simple touch of the chicken icon should take you directly to the temperature and timing for roast chicken. Not a big deal, but other air fryers, like the Cosori XL, have this type of functional display and it is a breeze to operate.
- Another thing that could be reworked is the way the inner basket clicks into the pan. After pulling back on a plastic button with your thumb, a button releases the inner basket, separating it from the pan. Over time, I can imagine this could become an issue as these parts experience some wear and tear. Some reviewers mentioned that the basket separated from the pan without depressing the button which created some safety issues with spilling oil.
- Lastly, I would love to see an option for a lower fan. Reflecting back on my brussels sprouts, I suspect that their dryness was due to the high fan which is good for browning and high heat cooking. It would be nice to have a low fan option for times when you wanted it.
What’s the Warranty?
As with every kitchen appliance, it is worth noting the warranty. In the case of the Gowise Electric Air Fryer, Gowise USA warrants all products against defects and workmanship for one year, provided they were purchased from an authorized retailer. This warranty can be extended by an additional 60 days by registering the product on the website. However, according to the warranty that is included with the unit, the removable basket and all components are warrantied for 30 days from the day of purchase and do not fall under the 1-year limited warranty of the unit itself.
Verdict
After spending some time with the Gowise air fryer in my home kitchen I have come to some conclusions. First of all, the size of this air fryer is quite generous. I would say that if you are cooking for a family of 3 or 4, this size is fitting.
Another thing I have taken into consideration is the cost of this model. Air fryers can range in price from around $50 to upwards of $300. This Gowise model falls towards the low to the mid-price range, making it more affordable than some others that may boast more bells and whistles. With that said, I assert that this is a good entry-level air fryer for the cook who intends to use it occasionally. Hardcore air fryer enthusiasts may opt for a more deluxe model, but again, it is best to get the one that suits your needs.
Any appliance of this sort will occupy a bit of your counter space, so small kitchens may not be able to accommodate something with a footprint as large as this. Smaller air fryers do exist, though you will likely compromise power and cooking surface.
How does it Compare?
The best way to determine if the Gowise 5.8 qt air fryer is for you is to see how it measures up to other air fryers of similar size and function. With so many air fryers on the market, I think it is important to understand how the features of the Gowise model compare to some similar models that are available.
In this next section, I have taken into consideration the size, the shape of the basket, price, and preprogrammed functions of three different machines. My goal is to help you make a better-informed choice that will suit your cooking needs. After all, the machine should be suited to the person using it.
Gowise 5.8Qt Digital Air Fryer Vs No products found.
 Gowise 5.8Qt Air Fryer $72.82 | No products found. No products found. No products found. |
|
| Watts | 1700w | 1700w |
| Capacity | 5.8qt | 5.8qt |
| Basket | Oval | Square |
| Presets | 8 | 11 |
| Temperature Range | 180-400 degrees | 170-400 degrees |
| Recipe Book | 50 recipes | 100 recipes |
| Shake Reminder | No | Yes |
| Check Price on Amazon | No products found. |
Let's start with the Cosori XL, the 5.8 qt air fryer that has stolen the hearts of many home cooks. This machine has gotten over twice as many reviews as the Gowise model which is an indication of its enthusiastic users. It is just slightly more expensive than the Gowise, while it measured up quite comparably in size and power.
The first and most noticeable difference is the shape of the Cosori Xl. It is rather square and blocky looking with a mostly matte surface. That shape lends itself to the square inner basket which is actually an asset to this machine. I feel the square basket is best for cooking things like burgers, steaks, bacon, and things with a larger surface area. Depending on what you intend to use it for, you may find that it just accommodates your cooking better.
The display screen on the Cosori boasts 11 preset functions, compared to Gowise's 8, but the main difference here is the ease of use. By simply touching the icon on the screen you can easily select your cooking mode, while on the Gowise you have to go to the menu and toggle through all of the functions to get to the one you need making the Cosori the more user-friendly machine.
Gowise 5.8Qt Digital Air Fryer Vs Philips Digital Twin TurboStar Airfryer XXL
 Gowise 5.8Qt Digital Air Fryer $72.82 |  Philips Digital Twin TurboStar Airfryer XXL $180.23 |
|
| Watts | 1700w | 1750w |
| Capacity | 2lb fries | 3lbs fries |
| Basket | Oval | Square |
| Presets | 8 | 5 |
| Temperature Range | 180-400 degrees | 175-400 degrees |
| Recipe Book | 50 recipes | 200 recipes |
| Inner Rack | No | Yes |
| Timer | 30 mins | 60 mins |
| Preheat Function | No | Not needed. Near instantly hot. |
| Check Price on Amazon | Check Price on Amazon |
For my next comparison, I chose the Philips Turbo Star XXL Air Fryer. This high-end model uses something they call Turbostar technology which allows for optimal airflow all around the food, even underneath, which is something unique to this brand. It has a few features that set it apart such as the basket that slides out and lifts which is very functional. It also has a removable non-stick mesh rack that fits into the basket to elevate food and a keep warm button which prevents your food from getting cold.
The timer on this machine allows you to cook steadily for one hour which is twice as long as the timer on the Gowise digital air fryer. Unfortunately, it does not have a pause button which is something they could improve on.
All the interior parts and accessories claim to be dishwasher safe, though some reviewers felt that the parts would take up so much room in the dishwasher and others questioned the integrity of the non-stick basket after repeated dishwasher use.
The downside of this machine is its cost. Coming in at over three times the price of the Gowise model, the Philips air fryer is an investment. I would caution a first-time buyer to choose the Philips Turbostar XXL model until they were truly ready to commit to its cost.
Gowise 5.8Qt Digital Air Fryer Vs Ninja Max XL Air Fryer
 Gowise 5.8Qt Air Fryer $72.82 |  Ninja Max XL Air Fryer $129.95 |
|
| Watts | 1700w | 1750w |
| Capacity | 5.3qt | 5.5 qt |
| Basket | Oval | Round |
| Presets | 8 | 7 |
| Temperature Range | 180-400 degrees | 105-450 degrees |
| Dehydrate Function | No | Yes |
| Inner Rack | No | Yes |
| Check Price on Amazon | Check Price on Amazon |
Another well-reviewed name in air fryers is the Ninja Max XL which is only slightly smaller in capacity than the Gowise version, but with slightly more power. The Ninja has a wide temperature range, starting as low as 105 degrees making it an effective food dehydrator, and as high as 450 degrees. When I considered the Gowise range of temperatures to be from 180-400 degrees, I could see how the Ninja has a great deal of flexibility to offer. Other functions include max crisp, air broil, air fry, air roast, bake, and reheat.
At a slightly higher price point than the Gowise air fryer, I feel that the Ninja is for the more serious home cook who plans to use this machine for more than basic air frying. It offers adaptability for those who are looking for more of a multitasker in their kitchen appliances.
UPDATE: We just completed a review of the Ninja Air Fryer AF101 which is much closer to the Gowise 5.8qt in terms of size and price. We found that Ninja model to outperform the Gowise in our tests.
My takeaway from the testing and reviewing of these air fryers is that there is no clear-cut winner. Each model has something to offer, be it size, shape, capacity, power, or function. The best way to choose is to be clear about what you expect to get out of your air fryer. Whether you are a seasoned cook, looking for a multitasker to expand your kitchen appliance arsenal, or a curious first-timer who just wants to test the waters, there is an air fryer for you that should suit your needs as well as your budget.


Leave a Reply