Air Fryers are wonderful pieces of kitchen equipment. At their heart, air fryers are nothing more than countertop convection ovens with high powered fans and top-mounted heat sources. They blow high powered, hot air over the foods, and can create crispy “fried” foods with none of the mess associated with a traditional tabletop deep fat fryer.
Air frying works best with dredged or “naked” foods, like French fries, flour dredged fried chicken, or naked wings. It doesn’t do well with things like battered fish, or tempura, but you can make incredible falafel or even doughnuts with your air fryer.
In addition to the usual suspects like wings, fried chicken, and French fries, you can cook a ton of other things in an air fryer, and in many ways replace your traditional oven, or at least expand the capacity of your kitchen when entertaining. I like to make bacon for brunch in my air fryer, it allows me more stovetop space to work on dishes like pancakes or eggs! Hot dogs or sausages come out beautifully in an air fryer, and you can even roast a whole chicken with ease.
With so many models and sizes available, it’s important to evaluate all of the options at your desired price point. As with any new cooking appliance, what is considered a top-of-the-line feature one year, might become more widely available on less expensive machines a few years down the line. While convection ovens have been around for a long time, the air fryer style is a relatively young category of cooking equipment and quality continues to improve year after year.
Recently I had the opportunity to take a look at another awesome air fryer, the 5.3qt Power Air Fryer XL. Over the past few weeks I ran it through its paces, and now that I’ve had the chance to evaluate a few different air fryers I can say with certainty that this one is worth the investment.
My goal here is to break down my results and give you all the information you'll need to decide whether or not the Power Air Fryer XL is the air fryer for you. So, let’s dive in!
What’s in the Box?
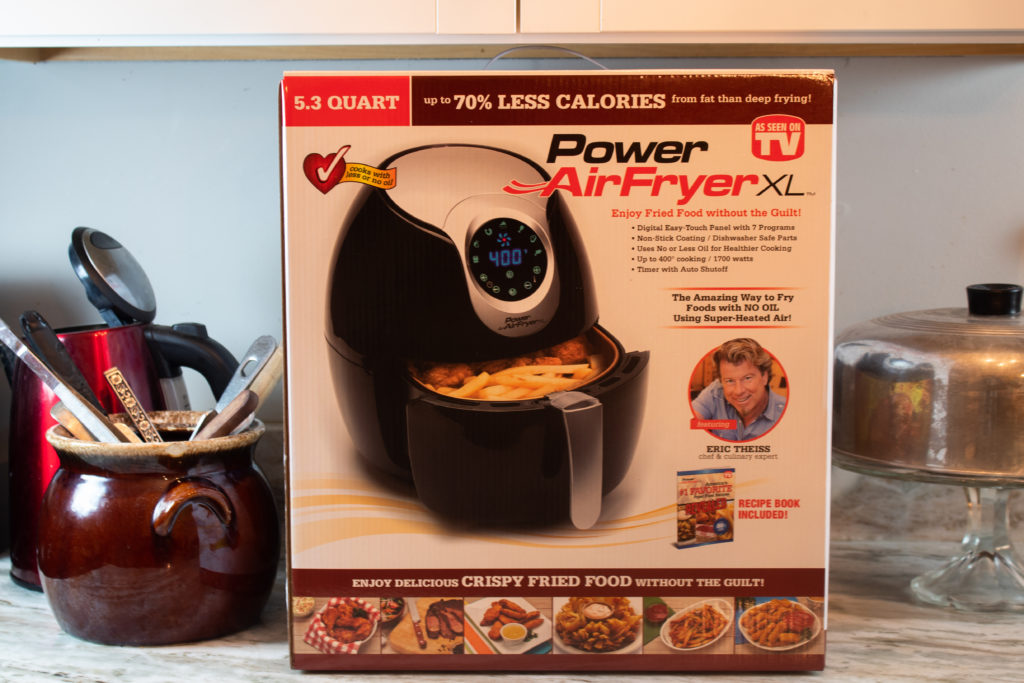
In the Power Air Fryer XL box you will find:
- The Power Air Fryer XL
- A quick start guide.
- A full owners manual
- An “America’s #1 Favorite Fried Food Recipes” booklet
- A fryer basket divider
How Does the Power Air Fryer Oven Look/Feel/Sit?
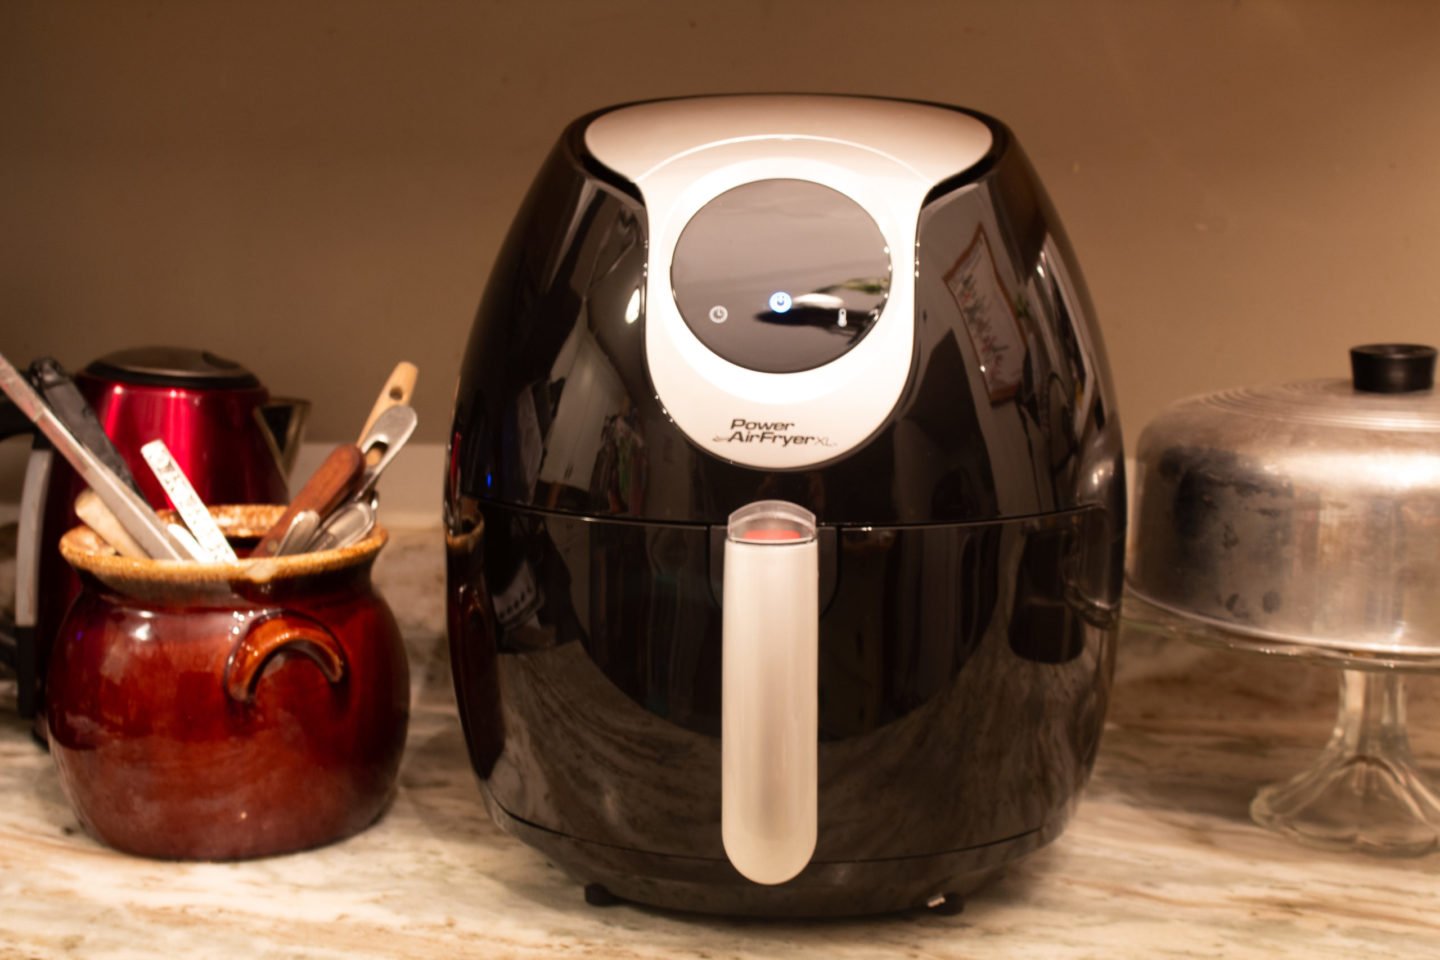
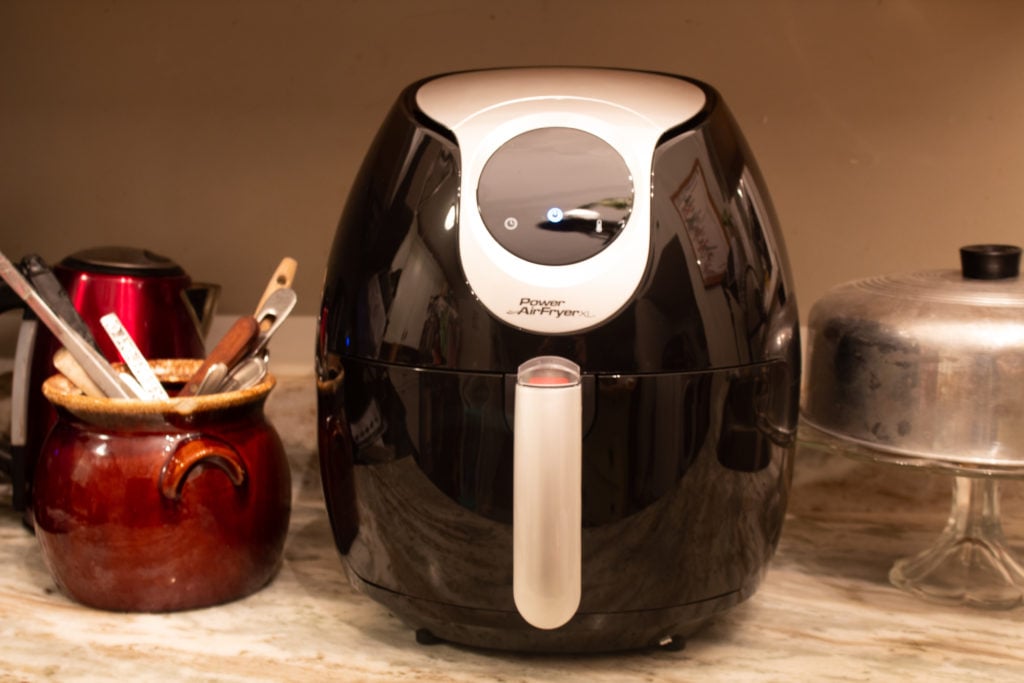
This air fryer is what I like to think of as an “egg” or a “pod” style air fryer. Different from an oven-style air fryer, it has a vaguely oval or pod-like shape and is a self-contained unit with a handle facing outward. It is about the size of a bread machine or large coffee machine and feels sturdy when picking it up to clean behind or beneath it.
The basket feels well made and doesn’t feel loose, or shaky when I pick it up to dump out food. Some models I’ve seen have less than ideal basket construction and this was a nicer more well-made design than I’ve encountered.
The display has an easy-to-read Digital interface and the UI is very intuitive, even though it comes with a full breakdown of the features in the manual. The digital numbers on the display are a cool, vibrant blue and the other display items around the dial are a contrasting bright white. It has a fun spinning fan animation to let you know when the oven is in operation that I found to be a nice design element.
The finish of the machine is a glossy black that is easy to clean. With a high gloss finish, you'll definitely see fingerprints, but a quick wipe with an all-purpose cleaner brought it back to a mirror finish. The accents on the machine are a contrasting silver/chrome that feels well made and designed. Even though this is an air fryer that's built to be easily storable in a cabinet or closet, it is aesthetically pleasing enough to warrant a permanent place on your countertop, and with how much you’ll find yourself using it, that might be for the best.
How Easy is it to Set Up?
Setting up the Power Air Fryer XL was a breeze. The packaging was minimal which is always a nice touch, keeping waste down is a good thing in my book.
Once I got it out of the box, I plopped it on my counter, plugged it in, and after giving the cooking chamber a quick rinse it was ready to use.
The Digital interface was easy to cycle through and with a simple manual mode that allows complete control over time and temperature, there is almost no need for the preset cooking modes, even though they are a really nice feature.
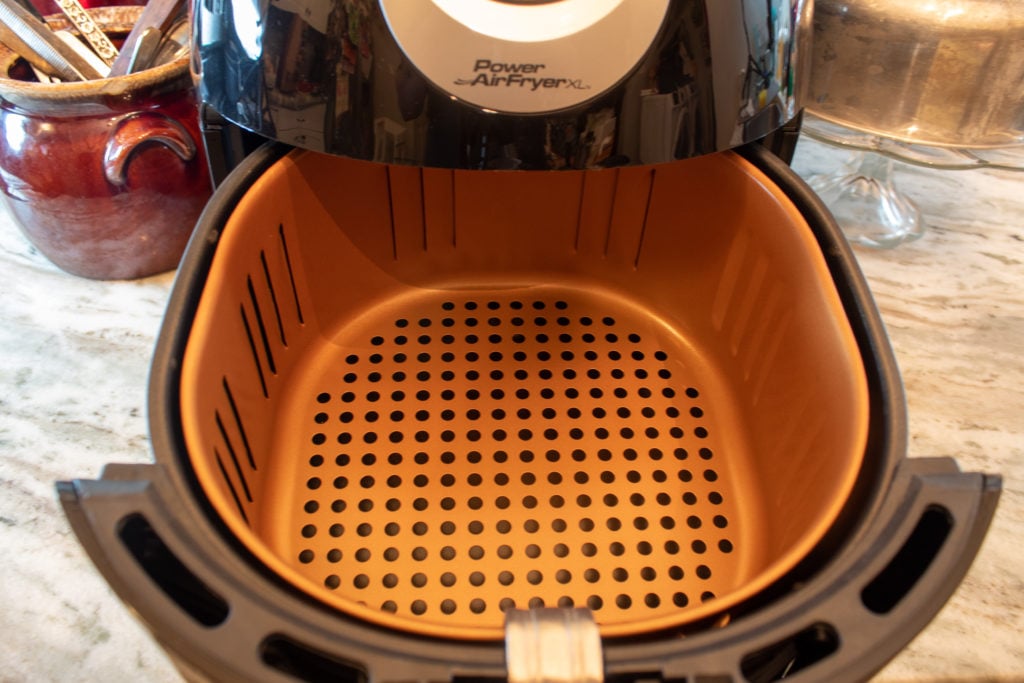
The nicest part about the setup, overall, was how well constructed I found the basket portion of the air fryer to be. Air fryers are usually well made but often the basket can feel kind of shaky. Because the basket on these front-loading machines is two pieces and only secured by a latch in the handle, it can feel wobbly and make loading a bit of a pain. The basket on this machine was tightly constructed and felt solid with or without food inside it. This made it easy to remove and load again without having to fiddle with the alignment.
Because the basket on these front-loading machines is two pieces and only secured by a latch in the handle, it can feel wobbly and make loading a bit of a pain. The basket on this machine was tightly constructed and felt solid with or without food inside it. This made it easy to remove and load again without having to fiddle with the alignment.
Because air fryers are vented through the back, you usually need to space them a few inches from any equipment or backsplash, the egg style design of this machine means I could snug it up almost to the backsplash without worrying about clearance for the vent, a very nice touch when counter space is at a premium.
Cooking Bacon
One of the ways air fryers stand above and apart from traditional deep fat fryers is in their ability to cook foods like bacon. Where putting bacon in a deep fat fryer is going to result in crispy, flavorless rectangles of former bacon goodness, an air fryer is a strong convection oven that is perfectly suited to making outstanding bacon, with far less fat than pan-frying or baking.
While the Power Air Fryer XL didn’t have a bacon setting, some quick googling provided me with enough information to decide on a time and temperature setting. Bacon cooks quickly in an air fryer which is great because the smaller capacity of the air fryer basket compared to a traditional oven means I needed to cook multiple batches if I wanted to cook an entire package of bacon.
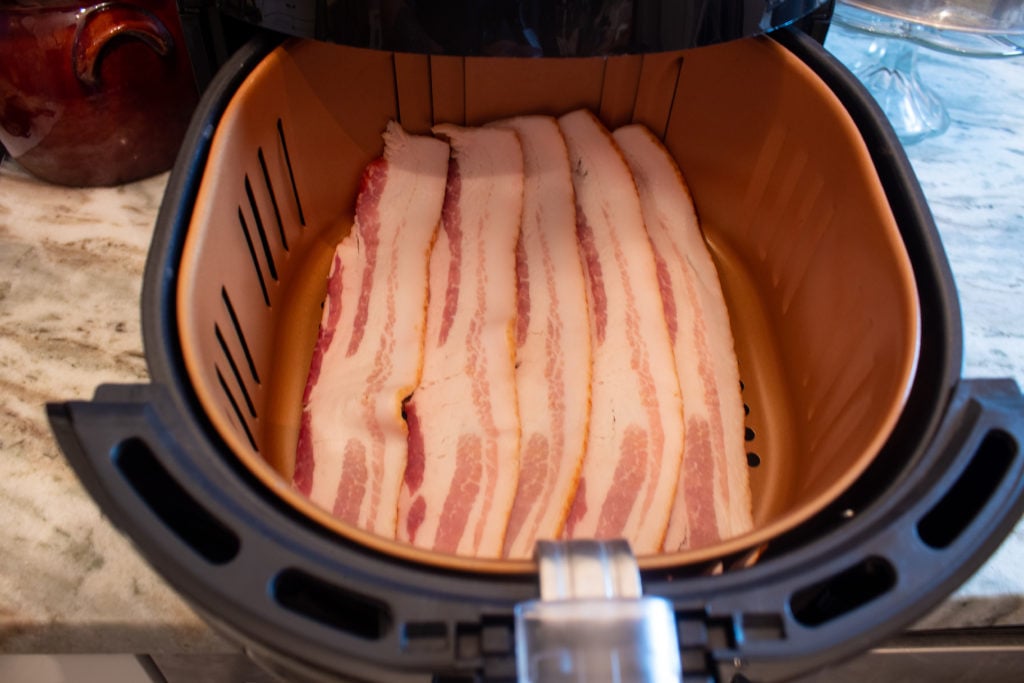
I set the temperature to 370°F and set the timer for 8 minutes. After arranging 5 pieces of thick-cut slab bacon in the cooking basket I slide the basket assembly into the air fryer and away it went. 5 was the maximum amount of pieces of bacon I could comfortably fit in the basket. There was some overlap and the ends of the bacon climbed the side of the basket, but bacon shrinks pretty significantly and I knew there wouldn’t be a problem with a little overlap at the beginning of the cooking process.
The Results
There is really no way to compare bacon cooked in an air fryer to bacon cooked in a traditional deep fat fryer because no one really cooks bacon in a deep fat fryer. If you did you’d find the results far less satisfying than pan-fried bacon because by submerging the bacon fully in oil, you lose a lot of the bacon flavor. Compared to a pan-fried or oven-roasted bacon, however, the bacon I prepared in an air fryer was better in almost every single way.
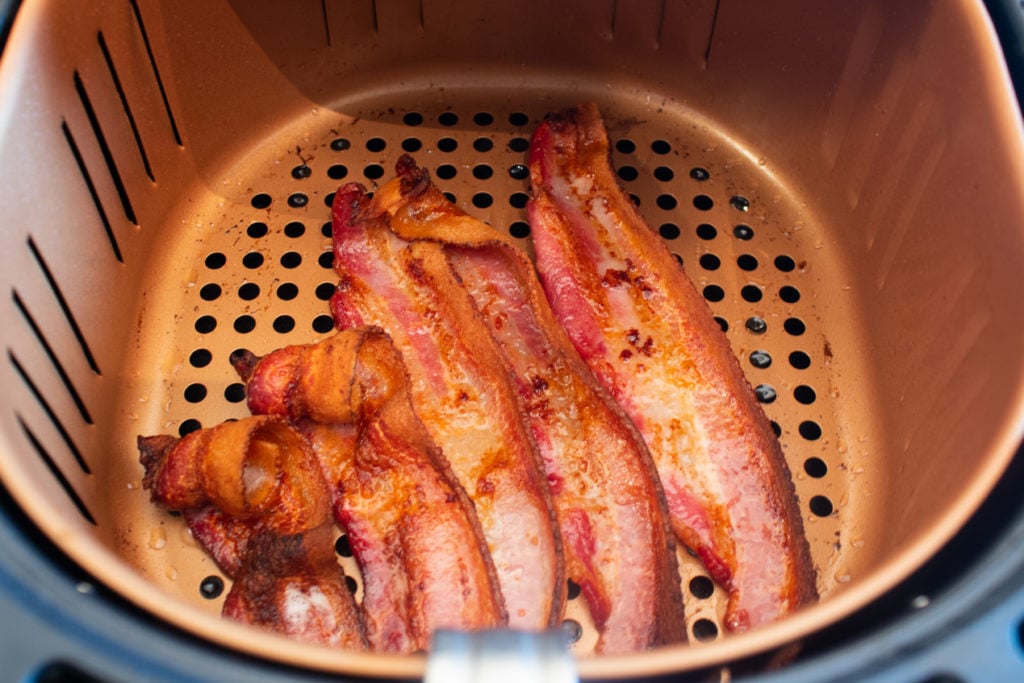
Crispy and delicious with far less fat than pan-fried bacon, the clean up was a cinch as well. At the end of every batch, I would pour the excess fat out of the fryer before loading the next 5 pieces of bacon into the basket. It is necessary to open the air fryer and flip the bacon halfway through the cooking process to ensure a fully cooked crispy piece of bacon, but overall it wasn’t too much of an imposition.
Cooking the bacon for 8 minutes at 370°F made for crispy, delicious bacon. We like crispier bacon around our home but if you like softer, chewier bacon, experiment with a lower temperature or less time.
The most surprising thing was just how much bacon grease was collected below the cooking basket in the oven assembly. I easily doubled the amount of bacon grease I would normally end up with by preparing bacon in a skillet or in the oven, which means I was able to keep from ingesting all that excess fat!
I easily doubled the amount of bacon grease I would normally end up with by preparing bacon in a skillet or in the oven, which means I was able to keep from ingesting all that excess fat!
Overall it took me 24 minutes to prepare 15 pieces or 1 entire package of bacon. The only real issue I can imagine with preparing bacon this way is going to be keeping my family from eating all the bacon before breakfast or brunch is served.
Cooking Fries
Recently our toddler has decided that french fries are one of the three major food groups and I find myself preparing more fries at home than I could have imagined pre-parenthood. We keep a bag of frozen, pre-cooked fries on hand just in case dinnertime is going particularly poorly. So I decided to test them out in the Power Air Fryer XL to see just how good it could make a frozen french fry taste.
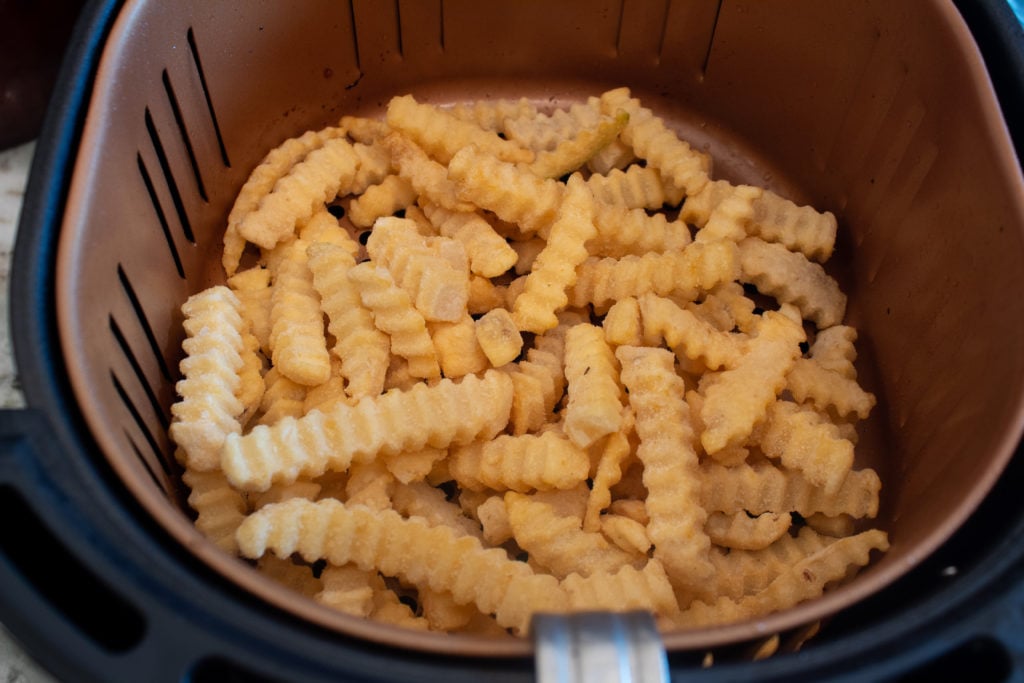
I loaded the fryer basket with a double layer of frozen, crinkle-cut French fries and chose the French fry preset mode. I went with the recommended 18 minutes and removed the basket twice to shake the product. By agitating the fries throughout the cooking process you allow all the surfaces access to the hot, super-powered air from the oven and this results in fully crisp fries.
The Results
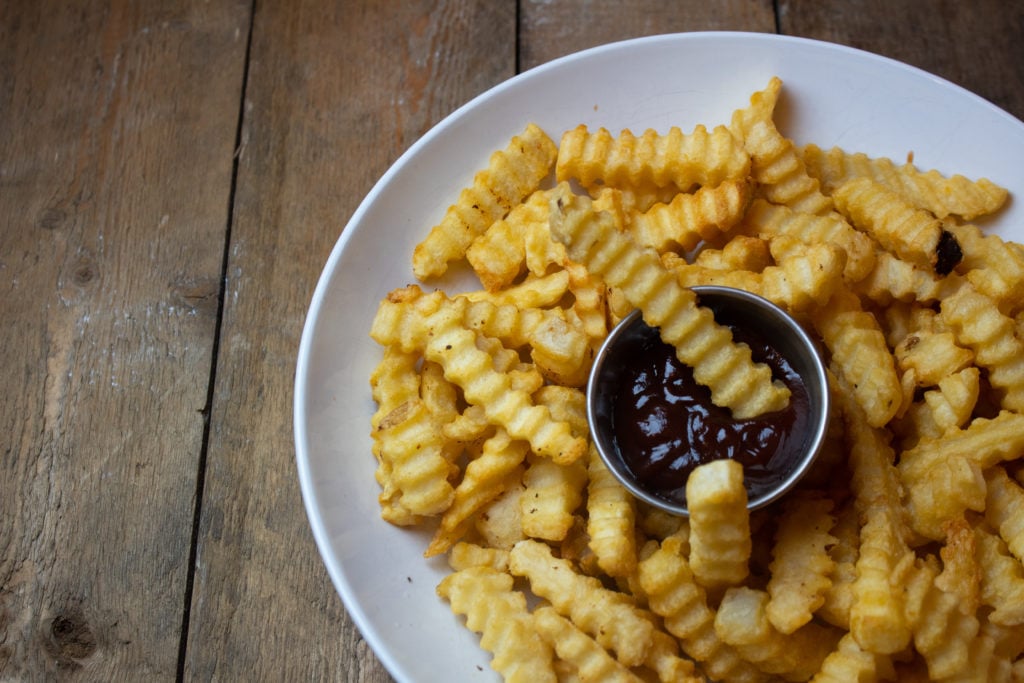
The french fries I prepared in the Power Air Fryer XL were outstanding. Crispy and crunchy with an awesome "fried taste", I could barely tell them apart from their deep fat fried cousins. I really can't wait to try out curly fries or tater tots, considering how delicious these inexpensive, frozen fries turned out to be.
The preset fry mode was perfect for both time and temperature for frozen fries, and I doubt I’ll find myself using an oven any time soon, especially when an air fryer is so much easier to clean. At 18 minutes, I can make an easy snack or dinner side dish without dirtying a ton of dishes or pans, and I can easily expand into other fries like sweet potato if I want. Using the Power Air Fryer Oven instead of the oven or stovetop allows more flexibility over the menu choice.
Cooking Chicken Tenders
Fried chicken is one of my first loves. After years in professional kitchens, I like to think that I know my way around a fried chicken recipe. I have developed my special flour/seasoning blend. I like a very specific dredging method, and I have a frying temperature that I think works particularly well. All that aside, I rarely make fried chicken at home. It’s just too much of a hassle and the last thing I want to do after making a big fried chicken dinner is clean up a deep fryer and all the associated oil/grease. Luckily, after some experimenting, I have developed a very strong method for frying chicken in an air fryer.
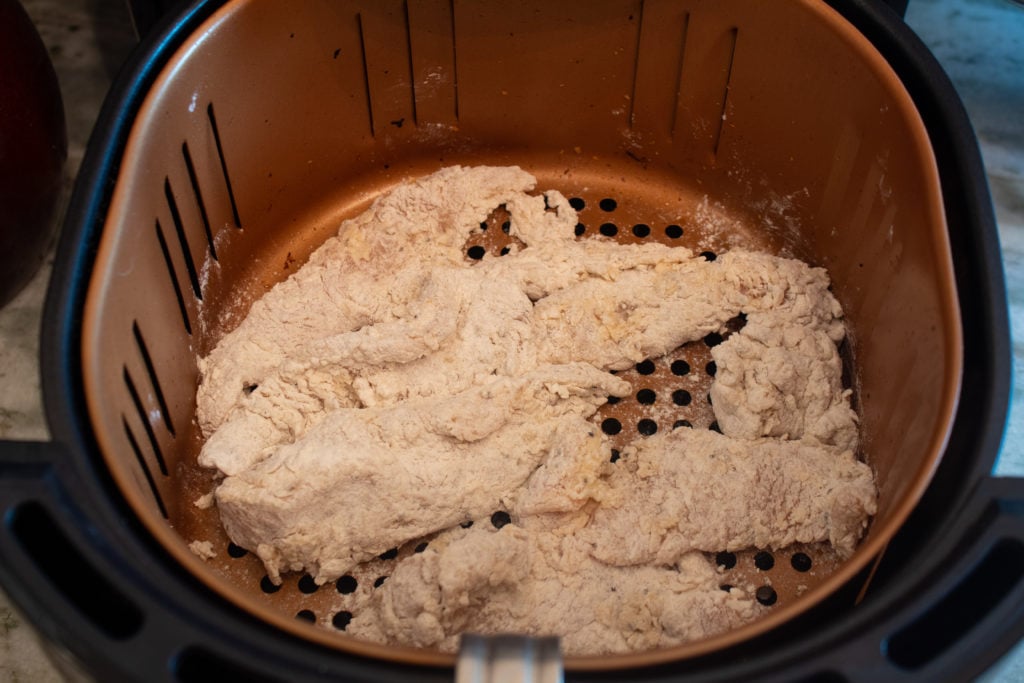
By using a simple wet-dry dredge method and an easy flour/seasoning blend, I can create world-class fried chicken, at home, with none of the mess! First I soak my chicken in buttermilk with a touch of salt and pepper. Then I mix a blend of flour, cornstarch, salt, pepper, garlic powder, and onion powder. I dip the chicken pieces into the flour blend and let them sit, fully covered for a minute or two. Finally, I load the chicken tenders into the air fryer basket and spray them with a canola oil cooking spray. I like to keep a small spray bottle with canola oil in it for different cooking processes but a store-bought spray can of canola oil cooking spray works fine.
This last step is the most important part of creating restaurant-quality fried chicken in an air fryer.
Because air frying requires no inherent oil you need to coat the outside of the tenders in a small amount of fat to achieve the golden brown, crunchiness of deep fat fried chicken. Without the oil, the coating will stay primarily tan and remain dryer with less flavor. Even though you are adding some excess fat, this is nowhere near the amount of fat associated with deep frying and contains far fewer calories.
Finally, I set the air fryer to the chicken preset and went with the recommended 20 minutes at 350°F. It is possible to extend the time but given the thinner size of my tenders, I thought 20 minutes would be more than enough time. I did flip the tenders halfway through the cooking process and sprayed them again with canola oil to make sure they cooked evenly. I checked the final temperature of the tenders with a digital thermometer and 20 minutes at 350°F was more than enough to cook them past 165°F which is the safe internal cooking temperature for chicken.
The Results
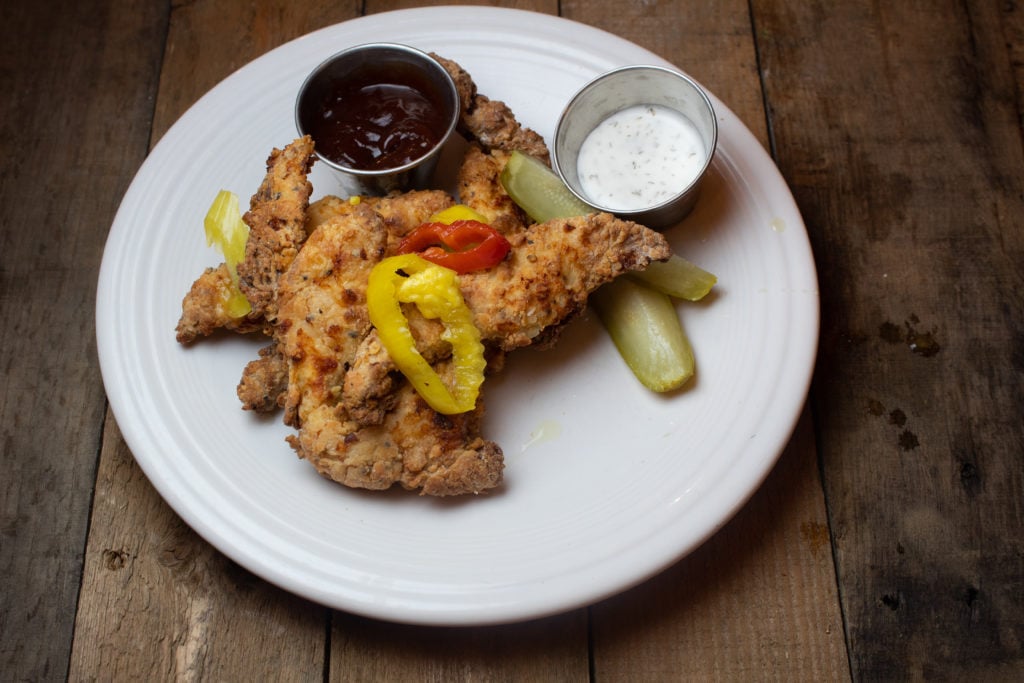
The fried chicken tenders I prepared in the Power XL Air Fryer were very good. Though they weren’t quite as good as the fried chicken I love to prepare using a deep fat fryer, they definitely exceeded my expectations. Especially considering how much easier the clean up as compared to deep fat frying, more than makes up for the lacking fried taste I’ve come to love. The ability to cook the tenders without having to preheat a pot of oil or a deep fryer was also incredibly convenient. With a little prep and one-touch on the display, I had the cooking process underway, which is a very nice feature in my hectic household.
Lastly, it’s hard to overstate how convenient preparing food - from pork chops to fried chicken - is in the air fryer. Using a deep fat fryer in your home kitchen is both a messy undertaking, but also incredibly dangerous given the temperatures you need to cook at. With a small child at home, it’s easy to envision things going wrong with a pot of hot oil on the stovetop or in a fryer on our counter. An air fryer is a much safer, more convenient alternative to a deep fat fryer and that is something I appreciate more and more every day.
How Easy Is It To Clean?
The PowerXL Air Fryer was very simple to use and even easier to clean. Unlike many comparable models, this air fryer is dishwasher safe. Even though I chose to clean it by hand, it is nice to know that in a pinch I could just load it into my dishwasher and walk away without worrying.
I chose to soak the entire basket assembly in warm water and a splash of dish soap for 10-15 minutes before scrubbing it with a non-abrasive sponge. Even after running the machine through three intense recipes, at very high temperatures, it returned to a pristine finish with little to no effort. It is important to only use non-abrasive soaps and sponges when cleaning the oven chamber/basket. The nonstick coating will get scratched and damaged from grit bases cleaners and steel-wool type sponges.
How Would I Improve the Power Air Fryer XL?
This oven is really a great example of the air fryer segment. It is well designed, user friendly, and easy to clean. Overall, I have to applaud the engineers behind this appliance, but there are one or two things I would address in future models.
- The basket/oven assembly is a really nicely designed component, but its rounded edges made it hard to load bacon easily. This is a small thing but a rounded basket makes it hard to fit larger amounts of food or things that need to lie in a single layer. Because of the pod/egg shape of the oven, the rounded basket is a necessity and the only way to address something like this would be to redesign the profile of the oven itself. It’s not a deal-breaker by any means but it would be nice to see a square or less round basket on a future model.
- During the cooking process some of the items I chose to test produced a large amount of steam and it not only vented from the rear-facing vent, but also from the face of the oven. I’m not sure if this is a flaw in the gasket around the oven chamber, but it got pretty steamy around the face of the oven, especially while cooking the bacon and French fries. This isn’t a huge problem, but it was a bit of an annoyance.
What’s the Warranty?
The Power Air Fryer XL comes with a Manufactures 60 Day Limited Warranty that covers repair or replacement from failures associated with normal wear and tear. It only covers failure under consumer use and is void if the product is used in a commercial setting.
To take advantage of the warranty you must call 1-973-287-5129 and request a return merchandise authorization number. Then you must pack the product securely and send it postage paid with the authorization number, a description of the defect, proof of purchase, and a check for $19.99 to cover the shipping of a replacement unit.
For more information on the warranty for the PowerXL Air Fryer Maxx check out the owner's manual here.
Verdict
Overall I really like the Power Air Fryer Oven. It was a snap to use and handled every recipe I threw at it with ease. It produces incredible bacon, crispy fries, and juicy fried chicken tenders, and so much more!
The Power Air Fryer Xl is a high-quality, versatile cooking appliance that won’t break the bank. It has a large capacity at 5.3 quarts and is more than large enough for a family of 3-4. With an easy to use digital interface and an even easier to clean oven assembly, the Power Air Fryer Oven will quickly become your go-to cooking tool!
How does it Compare?
Power Air Fryer XL Vs Philips Digital Air Fryer
 Power AirFryer XL $110.00 |  Philips Digital Air Fryer |
|
| Watts | 1700w | 1400w |
| Capacity | 5.3qt | 1.8 lb |
| Basket | Round | Round |
| Display | Digital | Digital |
| Presets | 7 | NA |
| Check Price on Amazon | Check Price on Amazon |
The Power Air Fryer XL and the Philips Digital Air Fryer are very similar appliances. They both have the pod-style design and both have front-facing digital displays with large prominent handles. They have rounded two-piece cooking chamber/basket assemblies and hold similar amounts of food. They have similar overall product dimensions, but the Power Air Fryer Oven's teardrop design has a slightly smaller footprint. The Power Air Fryer XL basket was slightly larger, but the Philips Air Fryer had a more square style basket so it could hold more ingredients that might need to lay flat.
Both options come with detailed recipe booklets, the Power Air Fryer XL does come with several preset options that made it easy to use, it isn’t clear whether the Philips Air Fryer comes with similar presets available to the user.
While neither model will break the bank, the Philips Air Fryer is the more expensive. Both are relatively simple to clean, and both models come with dishwasher-safe basket/oven assemblies. Overall, both models will handle all of your frying needs with ease.
I would recommend the Power Air Fryer XL to anyone who is looking to add an air fryer to their kitchen arsenal and save as much money as possible. Also if preset modes are important to you the Power Air Fryer XL has 7 while the Philips Air Fryer has none.
Vs Nuwave Brio 6qt Air Fryer
 Power AirFryer XL $110.00 |  Nuwave Brio 6qt Air Fryer $99.99 |
|
|---|---|---|
| Watts | 1700w | 1800w |
| Capacity | 5.3qt | 6qt |
| Basket | Round | square |
| Display | Digital | Digital |
| Presets | 7 | 6 |
| Check Price on Amazon | Check Price on Amazon |
Even though these air fryers are quite similar in overall specifications, they are pretty disparate in overall aesthetic and presentation. At 6 quarts and 1800 watts, the Nuwave Brio is a bigger, beefier air fryer and it certainly looks like it. Both are pod style air fryers with front-loading ovens but the Nuwave is markedly larger and definitely takes up a lot of countertop real-estate.
The Power Air Fryer XL is sleeker and definitely more compact than the Nuwave Brio. The digital display is a cleaner more intuitive design that is easier to read and operate than the multi-button Nuwave. I found the basket on the Power Air Fryer XL to be well made and tightly constructed. Reviewers of the Nuwave Brio mentioned that its basket sometimes felt a little loose and unstable.
While these fryers certainly have a similar capacity, the Nuwave Brio beating the Power Air Fryer by only .7qt, the Nuwave Brio 6qt seems to be able to hold more food. It might not matter for most recipes, but now that I know how well bacon does in an air-fryer, the Nuwave Brio looks like it can hold much more crispy bacon goodness than the Power Air Fryer Oven.
Finally, the Nuwave Brio has a slightly lower price tag than the Power Air Fryer Oven. If keeping the price as low as possible is important to you then the Nuwave Brio is the more attractive option.
I would recommend the Nuwave Brio to anyone who wants to add an air fryer oven to their kitchen without spending any more than necessary. It is a well-reviewed air fryer and will quickly become a fixture in your kitchen, even if it does take up more space than other models.
On the other hand, I would recommend the Power Air Fryer Oven to anyone who values a smaller footprint, and a sleek, easy to use digital display. If you plan on keeping your air fryer on the countertop at all times, the Power Air Fryer Oven will definitely add more to your overall kitchen aesthetic.
Vs Ninja Air Fryer XL
 Power AirFryer XL $110.00 |  Nuwave Brio 6qt Air Fryer $129.95 |
|
| Watts | 1700w | 1750w |
| Capacity | 5.3qt | 5.5qt |
| Basket | Round | Round |
| Display | Digital | Digital |
| Presets | 7 | 7 |
| Check Price on Amazon | Check Price on Amazon |
Like the Power Air Fryer XL, the Ninja Air Fryer Max XL is a pod-style, front-loading air fryer oven. It has a multi-button digital display and a round-style fryer basket assembly. At 5.5 quarts the Ninja Air Fryer XL is the larger model, and power wise they are almost identical in wattage.
While the Power Air Fryer XL is a teardrop design, the Ninja Air Fryer Max is more cylindrical with a flat top. The Ninja Air Fryer is a top vented model, while the Power Air Fryer XL has its vent located in the back of the appliance. I personally like a back-mounted steam vent, I think it gives the steam more room to dissipate before condensing against a surface, we have lower cabinets and a top venting machine sometimes creates too much condensation on the undersides of cabinets. We’ve encountered this issue with our electric pressure cooker and tea kettle, and I can see the Ninja Air Fryer XL causing similar problems.
One feature that sets the Ninja Air Fryer XL apart from the Power Air Fryer XL is its ability to dehydrate foods. I love making jerky or fruit chips and the ability to dehydrate in an appliance I already use regularly is a really attractive selling point. This is a feature that is notably absent on the Power Air Fryer XL.
I would recommend the Ninja Air Fryer XL to people who don’t mind a top vented machine or for whom the ability to dehydrate foods is important. The Power Air Fryer XL can do almost everything smaller Ninja models can, with a smaller price tag and a more attractive design, and display.


Leave a Reply