Over the past months, I have had the privilege to take a look at a number of different air fryers. From products branded by Celebrity Chefs to appliances made by some of the most well-known brands in the kitchen appliance industry, I've been incredibly impressed with how much the Air Fryer market has grown over the past few years.
What was once something I would occasionally see on a daytime television infomercial is now a must-have kitchen appliance that comes in so many different forms and functions it's hard to keep up. Beyond the variety I've continued to see in the air fryer market, the quality of these ovens has continued to grow by leaps and bounds, what was once a high-end feature is now available on budget models everywhere.
Furthermore, watching classic appliances like toaster ovens or countertop convection ovens incorporate air fryer functions has been a very interesting development, especially for someone like me who values a multi-purpose cooking tool over a single-purpose appliance.
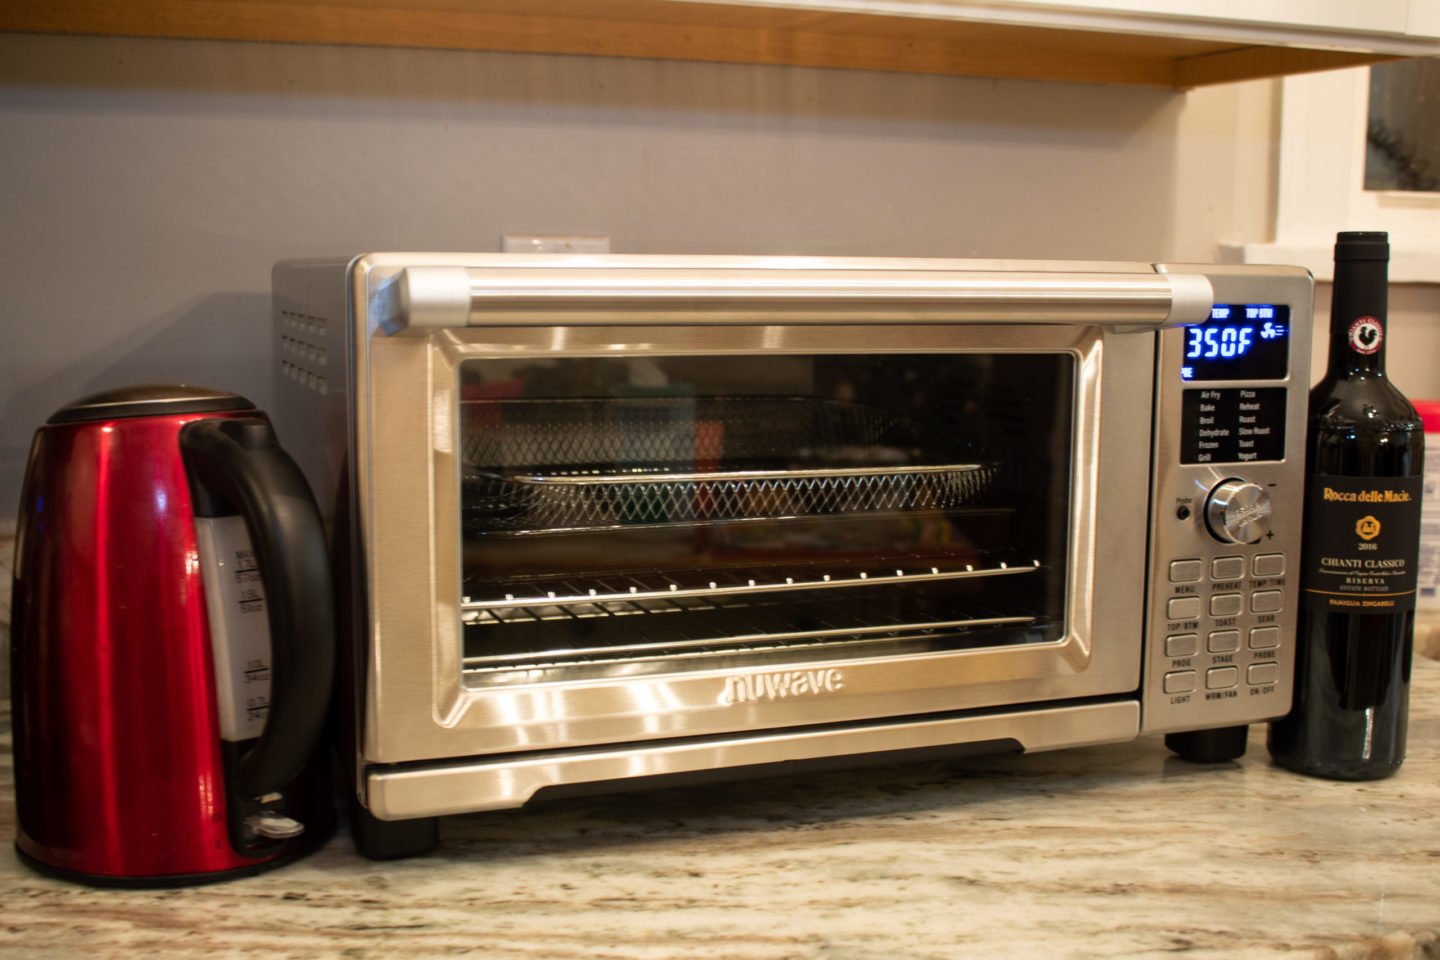
Recently I had the opportunity to dive into the NuWave Bravo XL countertop, toaster over style air fryer and I was incredibly excited. One of the first Air Fryers I had a chance to review was the Nuwave Brio and to date, it is one of the best air fryers I have used, so I was interested to see how the NuWave Bravo stood up as a sequel to that original air fryer.
Over the course of a week, I tested 3 different recipes that I thought would best assess the cooking functions and capabilities of the NuWave Bravo XL. I roasted a chicken using the digital temperature probe and multistage cooking function, air fried Brussels sprouts, and prepared chicken nuggets all in order to get a feel for how this oven works on a daily basis.
Over the course of this review, I will walk you through the highs and lows of this machine and discuss what it did well and what it could improve upon in future iterations.
If you go no further than the introduction you can be secure in the knowledge that the NuWave Bravo XL is a great air fryer/toaster oven that will more than handle any cooking task you throw its way. It can roast the perfect chicken, fry crispy Brussels sprouts, and prepare chicken nuggets in a flash on a busy weeknight evening.
Despite some frustrations with the control panel and digital display, I would definitely recommend this oven to anyone who is looking to add an air fryer to their kitchen while also possibly replacing a toaster or toaster oven as well.
Table of Contents
- What’s in the Box?
- How Does the Nuwave Bravo XL Air Fryer Look/Feel/Sit?
- How Easy is it to Set Up?
- Cooking Roast Chicken (with Temp Probe)
- Cooking Chicken Nuggets
- Crispy Brussels Sprouts
- How Easy Is It To Clean?
- How Would I Improve the Nuwave Bravo XL air fryer?
- What’s the Warranty?
- Verdict
- How Does it Compare?
What’s in the Box?
The packaging for the NuWave Bravo XL was minimal and it was easy to unpack, which is something I absolutely love in an appliance design. While a nicely branded box is aesthetically pleasing, I like to keep my recycling and trash footprint as small as possible and a minimum of packaging is always appreciated.
Inside the box I found:
- 1 Nuwave Bravo XL Air Fryer
- 2 oven racks
- 1 heavy-bottomed roasting pan with roasting rack insert
- 1 air fryer basket
- 1 drip/crumb tray
- 1 temperature probe
- user's manual
- quick start guide
- recipe book
How Does the Nuwave Bravo XL Air Fryer Look/Feel/Sit?
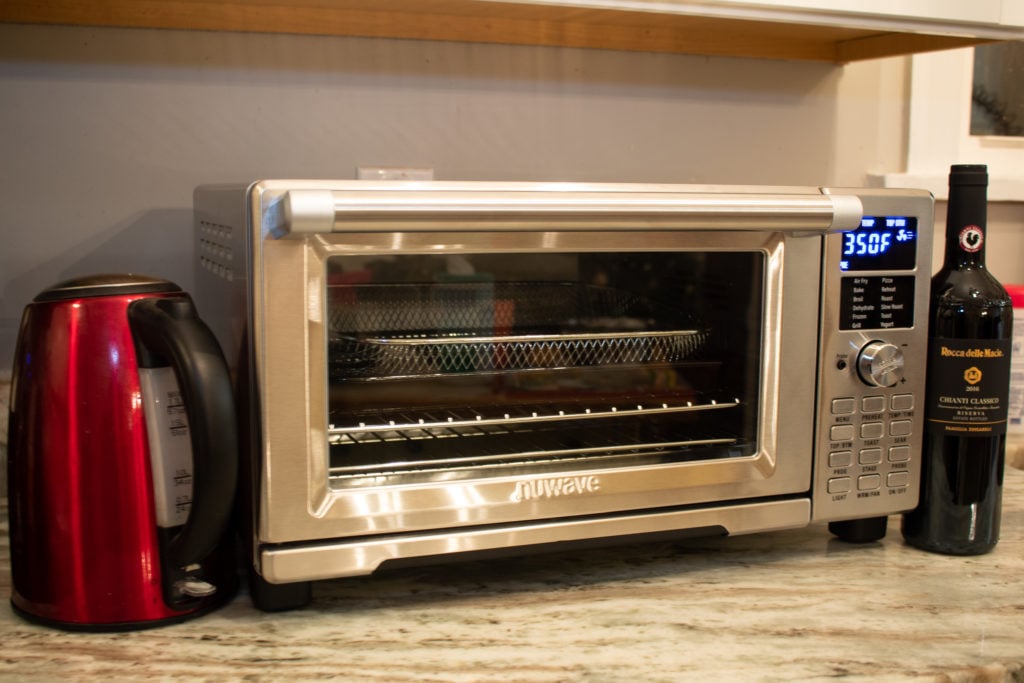
The Nuwave Bravo XL is a front-loading, glass door, countertop toaster oven. It has a stainless steel finish and while not a heavy appliance it is sturdy and feels well made. It has a large footprint at 19.5 x 15 x 11 inches which is increased by the 2 ich long spacers attached to the back of the machine.
It has a digital display to the right of the oven chamber with a large selector knob and an input for the temperature probe. The control panel consists of 12 individual button choices in addition to the control knob and is a bit busier than I normally like in my appliances.
While this oven is definitely on the larger side it will hopefully replace several cooking appliances reducing the overall clutter of our countertop. Additionally, it's possible to store things on top of the oven as long as they are relativity light but it's important to remove anything from the top of the oven before using it to prevent possible mishaps or melting accidents.
How Easy is it to Set Up?
Getting the oven out of the box and plugged in was relatively straight forward. I removed all the excess packaging materials and gave the accessories a rinse in warm soapy water before trying to begin the initial oven burnoff which is essential when using an air fryer for the first time.
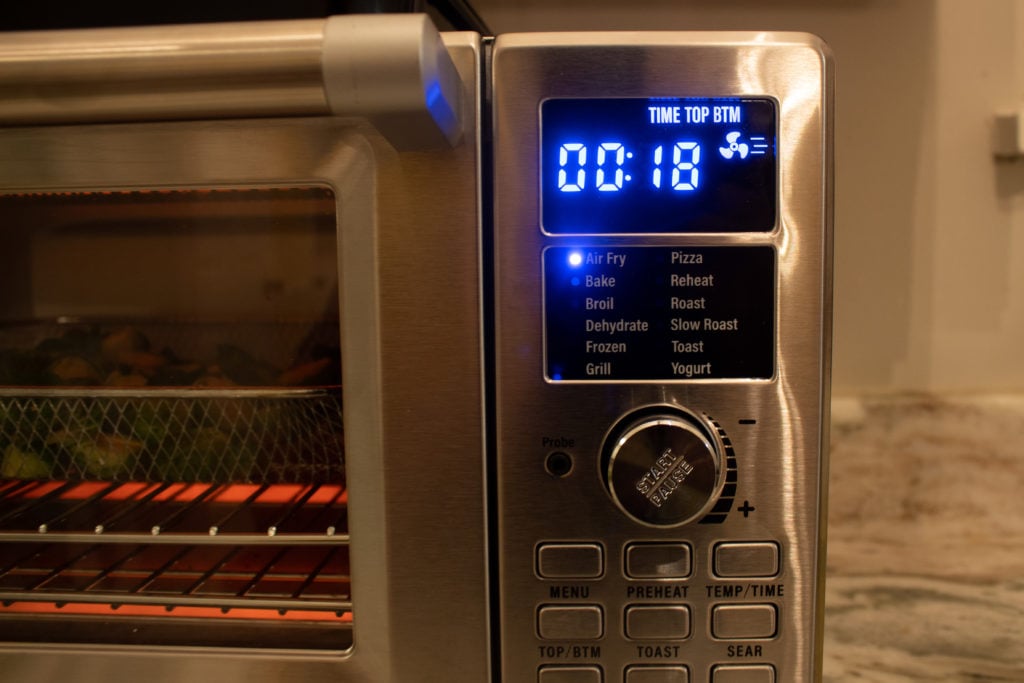
Normally when testing an air fryer I like to set the oven to 400°F and let the oven run for a 15-minute cycle to burn off any oils or residues left over from the production and packing process. Here is where I ran into my first hangup.
I'm not usually one to dive into the user's manual before getting started and I rarely need to check the quick start guide, especially if I'm doing something straightforward and not using a special feature. Now I know this isn't the best practice, but my enthusiasm usually takes hold and I find myself fiddling with buttons without stopping to look at the directions. Normally this isn't an issue but with the NuWave Bravo XL, I definitely had to run through the user's manual a few times before I could operate this machine effectively.
The control panel, though straightforward is somewhat difficult to use, and even after a few days of using the machine I still had questions that I needed the manual to answer. The 12 buttons and multiple stages/settings possible with this unit made it unnecessarily difficult to achieve simple cooking tasks at times. I'm sure after a few weeks with this oven I would be a pro, but out of the box it was frustrating at times to use.
Cooking Roast Chicken (with Temp Probe)
One of the features I was most interested in this machine was the inclusion of an internal temperature probe. I like to cook by numbers especially for things like roast chicken, pork chops or slow-cooked meats and being able to monitor the temperature of a cooking protein without opening the oven is an incredibly attractive feature.
To begin I set the oven to roast and chose the sear setting to use a multi-stage cooking approach, a feature that I haven't seen before but I was immediately a fan of.
By using the cooking stage option, I could cook the chicken at a higher temperature of 450°F for 10 minutes, allowing the oven to sear the outside of the bird and then automatically reduce the temperature to 350°F and continue cooking for an hour.
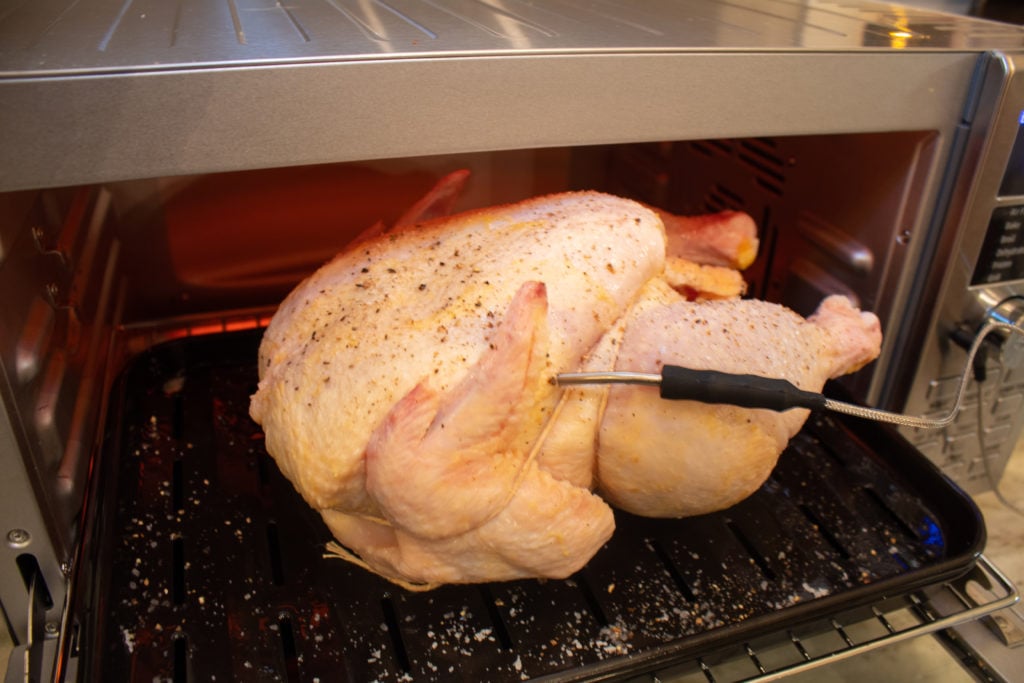
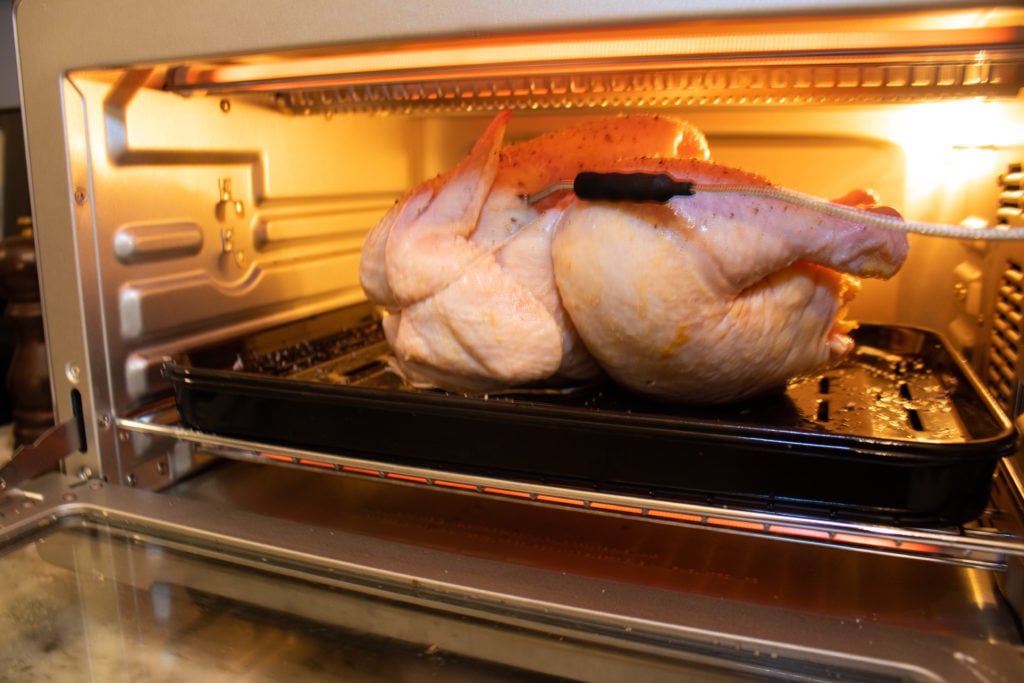
While the oven preheated I trussed my chicken with butcher's twine to ensure an evenly cooked bird. This isn't strictly necessary but I've been doing it for so long that it's become a habit. I seasoned the outside of the chicken liberally with salt and pepper and placed it onto the roasting pan with the roasting rack insert.
I placed the roasting rack in the oven on the lowest oven rack level and then inserted the temperature probe into the chicken breast. I closed the door and plugged the probe into the accessory slot on the face of the control panel and waited for the chicken to cook.
The Results
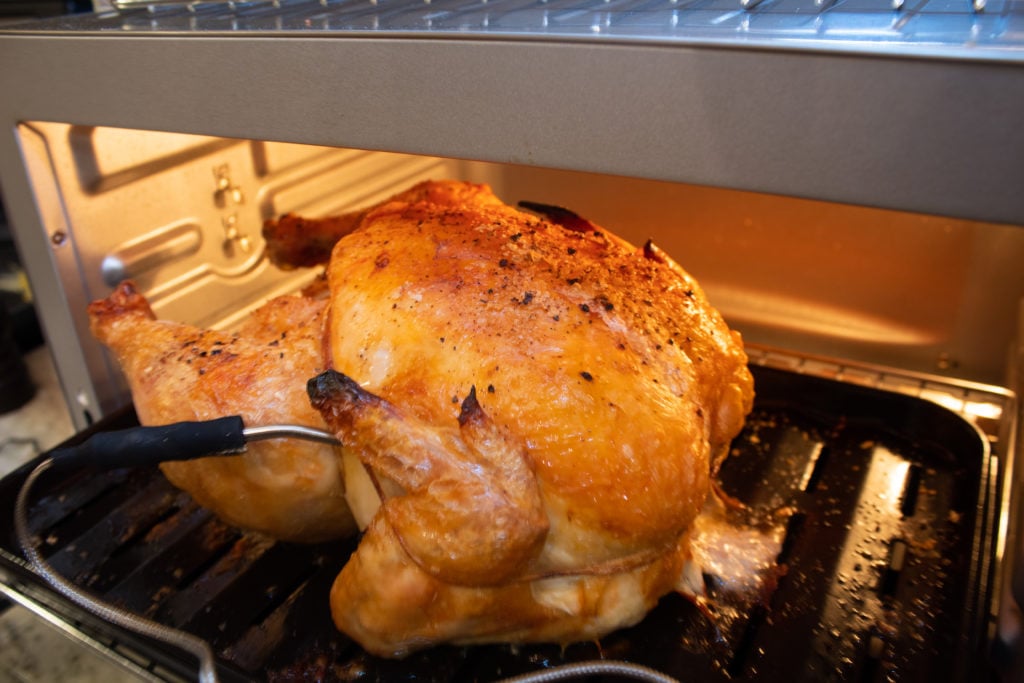
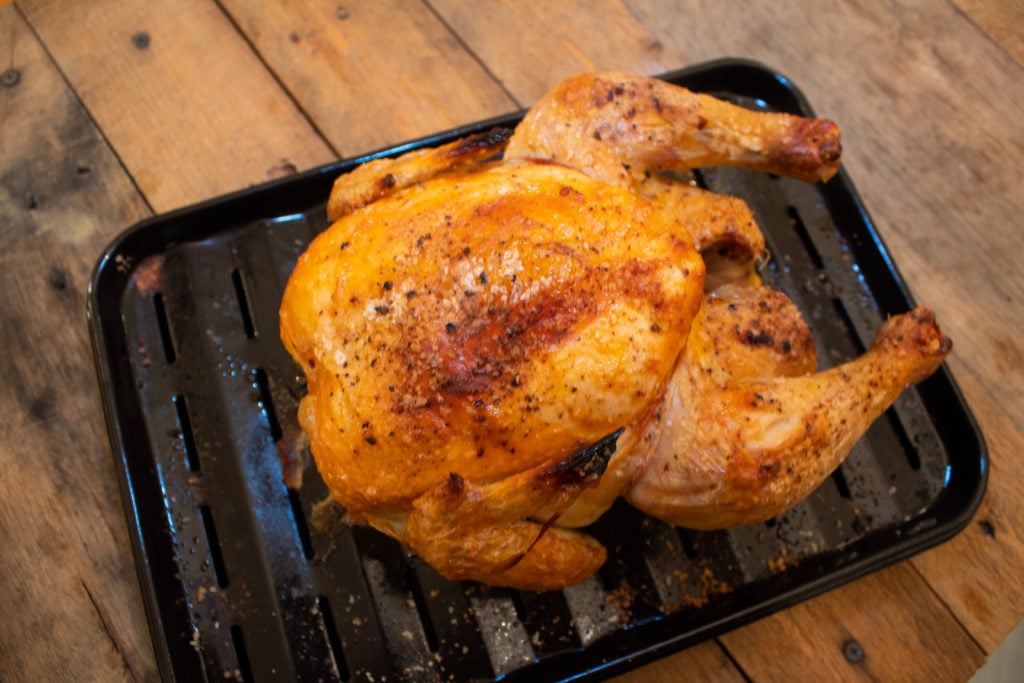
After the allotted 1 hour and 10 minutes, I checked the digital temperature probe and was pleased to see the chicken was fully cooked. I removed the roasting pan, set it on a cooling rack, and allowed the chicken to rest for 10 minutes before slicing.
Overall this was one of the 10 best chickens I have ever roasted in a home kitchen setting. It was crispy, golden brown, and absolutely delicious with juicy perfectly cooked meat.
As a professional Chef, I'm often spoiled by the capabilities of commercial kitchen equipment, and replicating some things at home can be a challenge. Thanks to the multi-stage cooking approach with a high heat sear and the high-powered circulating air as well as the digital temperature probe I was able to create all the hallmarks of a restaurant-quality roast chicken in the comfort of my home.
Despite some challenges in setting the cooking schedule, I was able to put together a simple cooking program on the control panel that made cooking absolutely delicious roast chicken a snap!
Cooking Chicken Nuggets
I eat a lot more chicken nuggets than I would like to admit these days. With a two-year-old running around there are definitely days where it's easier to give in to the dietary demands of a toddler tyrant and whip up some chicken nuggets with ketchup, apple slices, and milk than to try to force them to expand their palate. Luckily there are a ton of healthy options, made with minimal processing and whole all-natural ingredients that are both delicious and easy to prepare.
One of the benefits of having an air fryer handy is that they take far less time to preheat than a traditional oven and thanks to their high powered convection fans food takes far less time to prepare, which is a huge plus when you have a hungry child on the verge of a meltdown and only a few minutes to spare.
Over the past year, my wife and I have become true connoisseurs of the frozen chicken nugget and recently we stumbled upon a simply breaded option that is made from nothing but all-natural ingredients and tastes exactly like our favorite fast-food chicken nuggets! These tiny chunks of lightly breaded chicken breast are ready in minutes and thanks to the ease of an air fryer there's almost no mess to clean up.
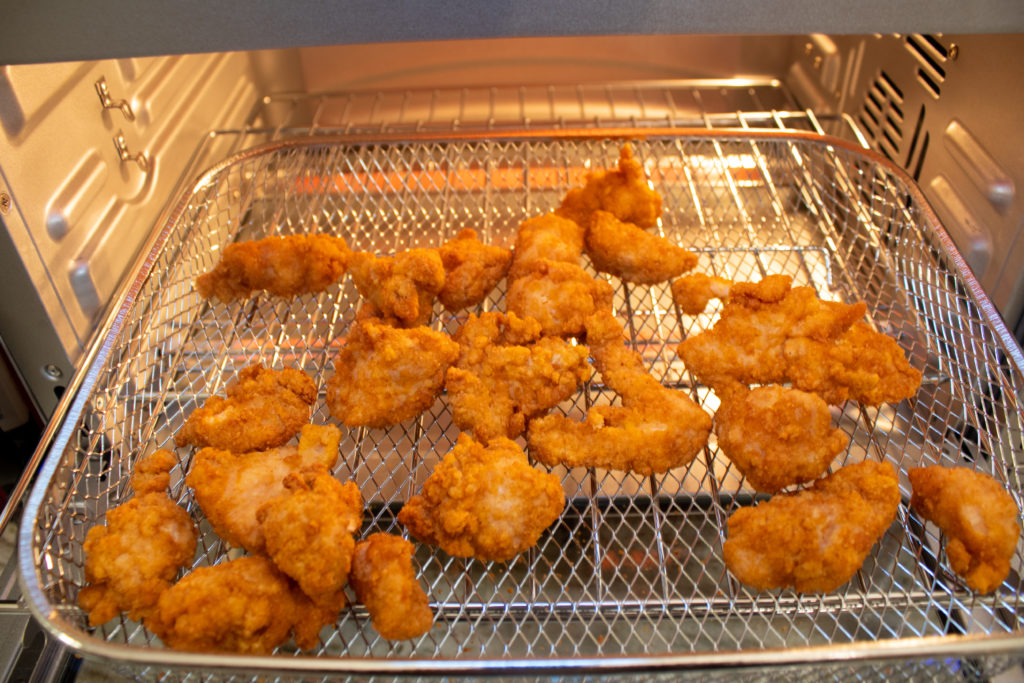
To begin I set the Nuwave Bravo XL to the air fry setting and set the temperature to 375°f with the timer at 10 minutes. The recommendations on the bag called for only 8 minutes in an air fryer but I like a crispier nugget so 10 works better for my needs. I loaded the air fryer basket with nuggets and loaded them into the oven once the preheat alarm sounded. Then I sat back to wait for my chicken nuggets to finish cooking.
The Results
As a teenager, I ate my fair share of frozen snacks like chicken nuggets or pizza bagels and though I knew that the oven always made a better product, the microwave was always the faster option. Before I began to use an air fryer at home this was always a trade-off I had to contend with, did I make a better nugget by using my oven, or did I make them quickly using my microwave. Now thanks to our air fryer I don't have to make that calculus anymore, I can always choose the option that makes the best nuggets in the least time by using my air fryer and I found the NuWave Bravo XL to be no exception.

These nuggets were crispy and delicious, with just the right amount of crunch from the high powered convection fan. With a short preheating time, they were ready in under 12 minutes, and thanks to the large capacity of the cooking chamber I could have prepared a lot more in the same amount of time, which is great when cooking for a crowd. Additionally, with the oven already preheated I could have reloaded the basket with a fresh batch and had them finished in even less time than the first round.
Crispy Brussels Sprouts
Crispy Brussels sprouts, (like crispy cauliflower) are an awesome side dish, especially during the colder months when you want something hearty and rich. They are crispy, crunchy, and addictive with any tangy sauce or dressing. Sadly, oven-roasted or pan-fried Brussels just doesn't match the sensation of a deep fat fried brussel sprout. That being said, Brussels sprouts are really dangerous to fry at home.
Because of their high moisture content, they can get pretty "bubbly" when placed in a vat of 350°f oil. While it's easy to prepare Brussels sprouts in a fryer in a professional kitchen, it's not the best idea to try at home.
I've wondered for quite a while about whether an air fryer could recreate what I love about the fried Brussels I find in so many restaurants these days with much less fat and a ton less clean up at home. Thankfully the Nuwave Bravo seemed up to the task so I grabbed a bag of fresh Brussels from my local grocer and got to work.
To begin I set the Nuwave Brio to the air fryer setting at 375°F for 15 minutes. While the oven preheated I set about preparing my Brussels sprouts.
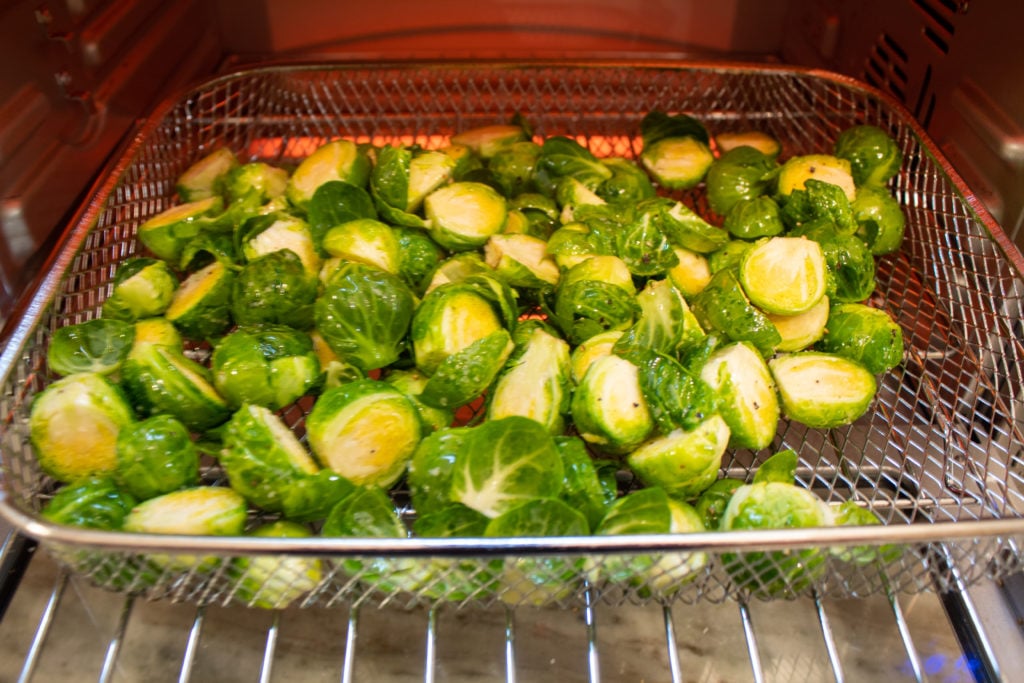
First I removed the very bottom of the sprout's core and then cut the Brussels in have lengthwise. I tossed the Brussels liberally with olive oil, salt, and pepper. Next, I poured the sprouts into the air fryer basket, and once the preheat alarm sounded I loaded the basket into the oven at the air fryer oven rack position.
The Results
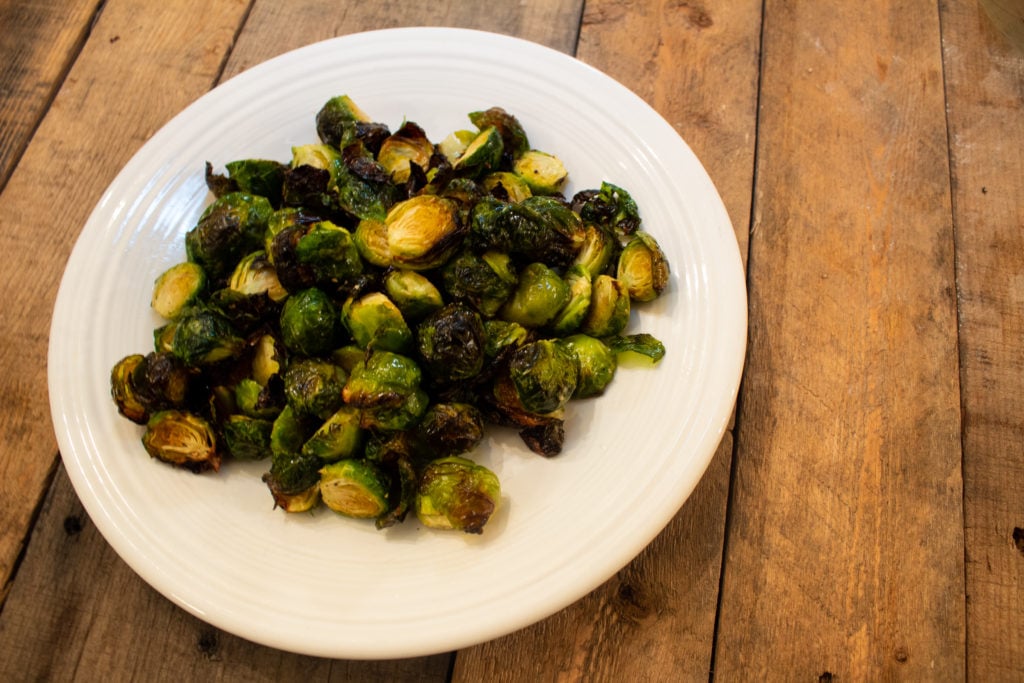
Once the timer finished I carefully removed the pan from the oven. I poured a small amount of the sprouts into a bowl to taste test alone and then poured the remaining sprouts into a larger mixing bowl. I dressed the large bowl with a sauce I had made from soy sauce and honey and gave them a try.
Both styles of sprout were absolutely delicious. The un-sauced sprouts were crispy and addictive with an awesome roasted Brussel flavor while the sauced sprouts were everything I would expect to find at a fancy restaurant.
Sweet and salty with the perfect level of crunch from the outer leaves they vanished far too quickly for my liking. With the large capacity of the oven chamber, I could have prepared much more with no crowding issues at all which is great when your cooking for a crowd.
How Easy Is It To Clean?
As with most countertop, toaster oven style air fryers, the Nuwave Bravo XL was very easy to clean. First I soaked all the removable accessories in hot soapy water to loosen any stuck-on grease and wiped the inside of the oven down with a warm, damp towel.
Grease builds up quickly in smaller countertop ovens and it's important to keep the insides clean and free of excess buildup to prevent accidents and extend the life of the appliance.
Next, I scrubbed the accessories with a non-abrasive sponge and rinsed the pieces before air drying. The user's manual notes that the removable accessories are dishwasher safe on the top rack only, but I like to hand wash parts like these whenever possible. That being said it's nice to know that I could just throw them in the top rack of the dishwasher in a pinch.
How Would I Improve the Nuwave Bravo XL air fryer?
While the NuWave Bravo XL is a well-made and versatile appliance there are definitely some improvements I would make in future models.
- The control panel and digital display are difficult to navigate and frustrating to use. Once I got the hang of it, it became a manageable frustration, but it shouldn't be as complicated as it is to operate overall. I loved the multiple functions and versatile, multi-stage cooking modes, but it could definitely stand a redesign in the user interface department.
- The fan seemed underpowered. Maybe it was just the door fitting well or a well-designed fan, but compared to other air fryer models I almost felt like something might have been wrong with my model. It was whisper quiet, which isn't necessarily a bad thing, most air fryers are distinctly audible when in use, but this seemed like a flaw or a malfunction rather than an intentional product design.
What’s the Warranty?
Compared to many air fryers I have reviewed the NuwWave Bravo XL has one of the most generous warranties I have seen yet. With a 3 year warranty that covers against the failure of the oven, or accessories from normal household use.
To take advantage of the warranty you should contact Nuwave by calling 1-877-689-2838 or emailing [email protected] and acquire an RGA or return goods authorization number. Once done you will need to pay in advance for shipping to and from the company as well as handle the costs for any associated parts that aren't covered by the warranty. While this is asking a lot from the consumer, it is nice to know that you can count on your air fryer being replaced or repaired for 3 years from the date of purchase.
For more information head to this FAQ section and click on number 18 to download the warranty description.
Verdict
Despite some flaws in the design of the control panel, overall I found the Nuwave Bravo XL to be a high quality, well-designed kitchen appliance. With its large cooking chamber size, multiple oven racks, and a plethora of cooking modes it handled every recipe I threw at it with ease.
The internal digital cooking probe made roasting chicken a snap, and the quartz heating elements provided excellent, even heat. The large capacity made Brussels sprouts or chicken nuggets easy to prepare for the entire family and the inclusion of more than one oven rack made it possible to prepare multiple items at the same time.
I would recommend this oven to anyone who wants to add a multi-purpose cooking tool to their countertop with a large capacity and a ton of cooking functions while also staying on budget!
How Does it Compare?
NuWave Bravo XL Vs Emeril Lagasse Power Air Fryer 360
 Nuwave Bravo XL air fryer $169.99 |  Emeril Lagasse Power Air Fryer 360 $152.99 |
|
| Watts | 1800w | 1500w |
| Capacity | 1 cubic foot | 930 cubic inches |
| Presets | 12 | 12 |
| Temperature Probe | Yes | No |
| Rotisserie | No | Yes |
| Check Price on Amazon | Check Price on Amazon |
From a distance, the Nuwave Bravo XL and the Emeril Lagasse Power Air Fryer 360are very similar machines. Like most offerings in the toaster oven style, the front-loading air fryer segment both have glass-fronted doors with digital displays to the right of the machine.
They both have some combination of control knobs and buttons. Both machines come with similar accessories and while the Emeril Lagasse Air Fryer comes with a rotisserie assembly, the Nuwave bravo xl comes equipped with a digital temperature probe, which I think is a fair tradeoff.
Both machines come with 12 preset cooking functions and are high powered machines with the Nuwave Bravo clocking in at 1800 watts and the Emeril Power Air 360 coming in at 1500 watts. The Nuwave Bravo XL however definitely beats the Emeril Lagasse Air Fryer in the size department at 1 cubic foot of interior cooking chamber space.
Where the Emeril Lagasse Power Air Fryer 360 truly outshines the NuWave Bravo is in the user interface department. The control panel on the Emeril Air Fryer is far easier to use and operate than the panel on the NuWave Bravo. I have spent a good amount of time using both of these air fryers at this point and though they function in very similar ways, the Nuwave was much harder to use.
I would recommend the Emeril Lagasse Power Air Fryer 360 to someone who is looking for ease of use over a larger cooking capacity. While the Emeril Air Fryer was a breeze to use with an easy to navigate digital display and control panel, the limited oven chamber capacity meant the need for multiple batches if you wanted to cook for a crowd.
On the other hand, I would recommend Nuwave Bravo XL to anyone who is looking for a larger oven capacity with multiple oven racks. While the Emeril Lagasse Power Air Fryer 360 only comes with 1 oven rack for their oven, the NuWave Bravo comes with 2 which is great considering the large capacity of the oven as it means you can cook multiple items at a time!
Nuwave Bravo XL Vs Cuisinart TOA60
 Nuwave Bravo XL air fryer $152.99 |  Cuisinart TOA60 $134.99 |
|
| Watts | 1800w | 1800w |
| Capacity | 1 cubic foot | .6 cubic foot |
| Presets | 12 | 7 |
| Temperature Probe | Yes | No |
| Preheat Function | Yes | No |
| Check Price on Amazon | Check Price on Amazon |
While these two ovens are both front loading, toaster oven style air fryers they are very different in the overall design and aesthetic. The Nuwave Bravo is a more modern design, with a digital control panel and a wealth of settings and oven features. The Cuisinart TOA60 on the other hand is a very straightforward countertop oven with analog controls and a simplistic design.
Both are glass door style front loading ovens, both can air fry, bake, roast, toast, and broil, but where the Nuwave Bravo is a complicated digital machine with a lot of presets and the ability to customize your cooking process, the Cuisinart TOA 60 is far simpler to operate. Relying on 4 analog selector knobs you can set a cooking program on the Cuisinart TOA 60 in just a few seconds and leave confident your food is in the correct setting and time.
The Cuisinart TOA60 is far smaller with a .6 cubic foot oven interior as compared to a 1 cubic foot cooking chamber on the Nuwave Bravo. It also takes up a smaller overall space on the countertop with overhead controls as opposed to a digital control panel located on the right side of the machine as with the Nuwave Bravo XL.
There is no preheat setting with the Cuisinart TOA60 which can be inconvenient but can be overcome by setting the timer for 5 extra minutes and loading your food after those 5 minutes have elapsed. While both come with very different features and presets, they have incredibly similar price tags and therefore will attract very different consumers.
Overall I would recommend the Cuisinart TOA 60 to someone who is looking to add a no-frills, straight forward countertop air fryer to their kitchen while also possibly replacing a toaster or other similar appliance. This is definitely a toaster for someone who doesn't want to fiddle with a complicated control panel to get their food cooking and is more interested in a clean analog look over a digital readout.
In turn, I would recommend the Nuwave Bravo XL to someone who values a large number of presets/cooking functions and a larger oven size. Both machines make incredible food with little to no mess and look great doing it.
Nuwave Bravo XL Vs Breville Smart Oven Air
 Nuwave Bravo XL air fryer $152.99 |  Breville Smart Oven Air $279.95 |
|
| Watts | 1800w | 1800w |
| Capacity | 1 cubic foot | 1 cubic foot |
| Presets | 12 | 13 |
| Temperature Probe | Yes | No |
| Interface/Controls | Harder to use | Easier to use |
| Check Price on Amazon | Check Price on Amazon |
The Nuwave Bravo XL and the Breville Smart Oven Air appear at first glance to be very similar ovens, with a comparable number of accessories and functions. When it comes to the price tag, however, these machines are worlds apart.
The Breville Smart Oven Air is more than double the price of the Nuwave Bravo XL and though it's an incredible piece of kitchen equipment, it is definitely not for everyone. While both machines have similar oven size, comparable functions, a wealth of accessories, and the ability to create incredible entrees, not everyone is willing to shell out almost this much for a countertop oven even if it is one of the best ovens I've ever had the opportunity to use.
The one major place where these ovens differentiate themselves is in the user interface department. The Breville Smart Oven Air has a very easy to use digital interface with selector knobs and a few function buttons, the Nuwave Bravo XL on the other hand has 1 selector knob and over 12 buttons that make it at times a bit confusing to operate.
Beyond the control panels, one of the notable differences I noticed during my time spent with both these machines was the overall construction. The Breville Smart Oven Air is a very heavy piece of equipment, it felt in my experience to be made from thicker, higher quality materials that felt like they would last for a very long time. The Nuwave Bravo XL was well made and felt sturdy, but was much lighter than the Breville Oven as it was made with lighter weight less expensive materials.
The NuWave Bravo XL has a wealth of functions from dehydrating to roasting, fermenting, and air frying. The Breville Smart Oven Air, however, has the NuWave Bravo beat in the overall function department, with 13 individual cooking modes. While many won't use anywhere near the full functionality of the Breville Smart Oven Air, if you are purchasing a machine at this price and feature set it's important to know you can do as much as possible.
The one function I found in the NuWave Bravo XL that was noticeably absent in the Smart Oven was the internal thermometer probe. It is incredibly convenient to be able to monitor the temperature of an item without having to open the oven door, and while this is possible with the NuWave Bravo, it's not something that you'll find with the Breville Smart Oven Air.
Overall I would recommend the Breville Smart Oven Air to anyone who wants to add a top of the line countertop convection oven/air fryer to their kitchen and doesn't care about the price tag. If you are looking for the best of the best and the price isn't a concern then you should definitely go with the Breville Smart Oven Air.
Now, if you want to add an incredible convection oven/air fryer, with a large capacity and a ton of preset functions to your kitchen, while staying on budget, the Nuwave Bravo XL is the machine for you.


Leave a Reply