
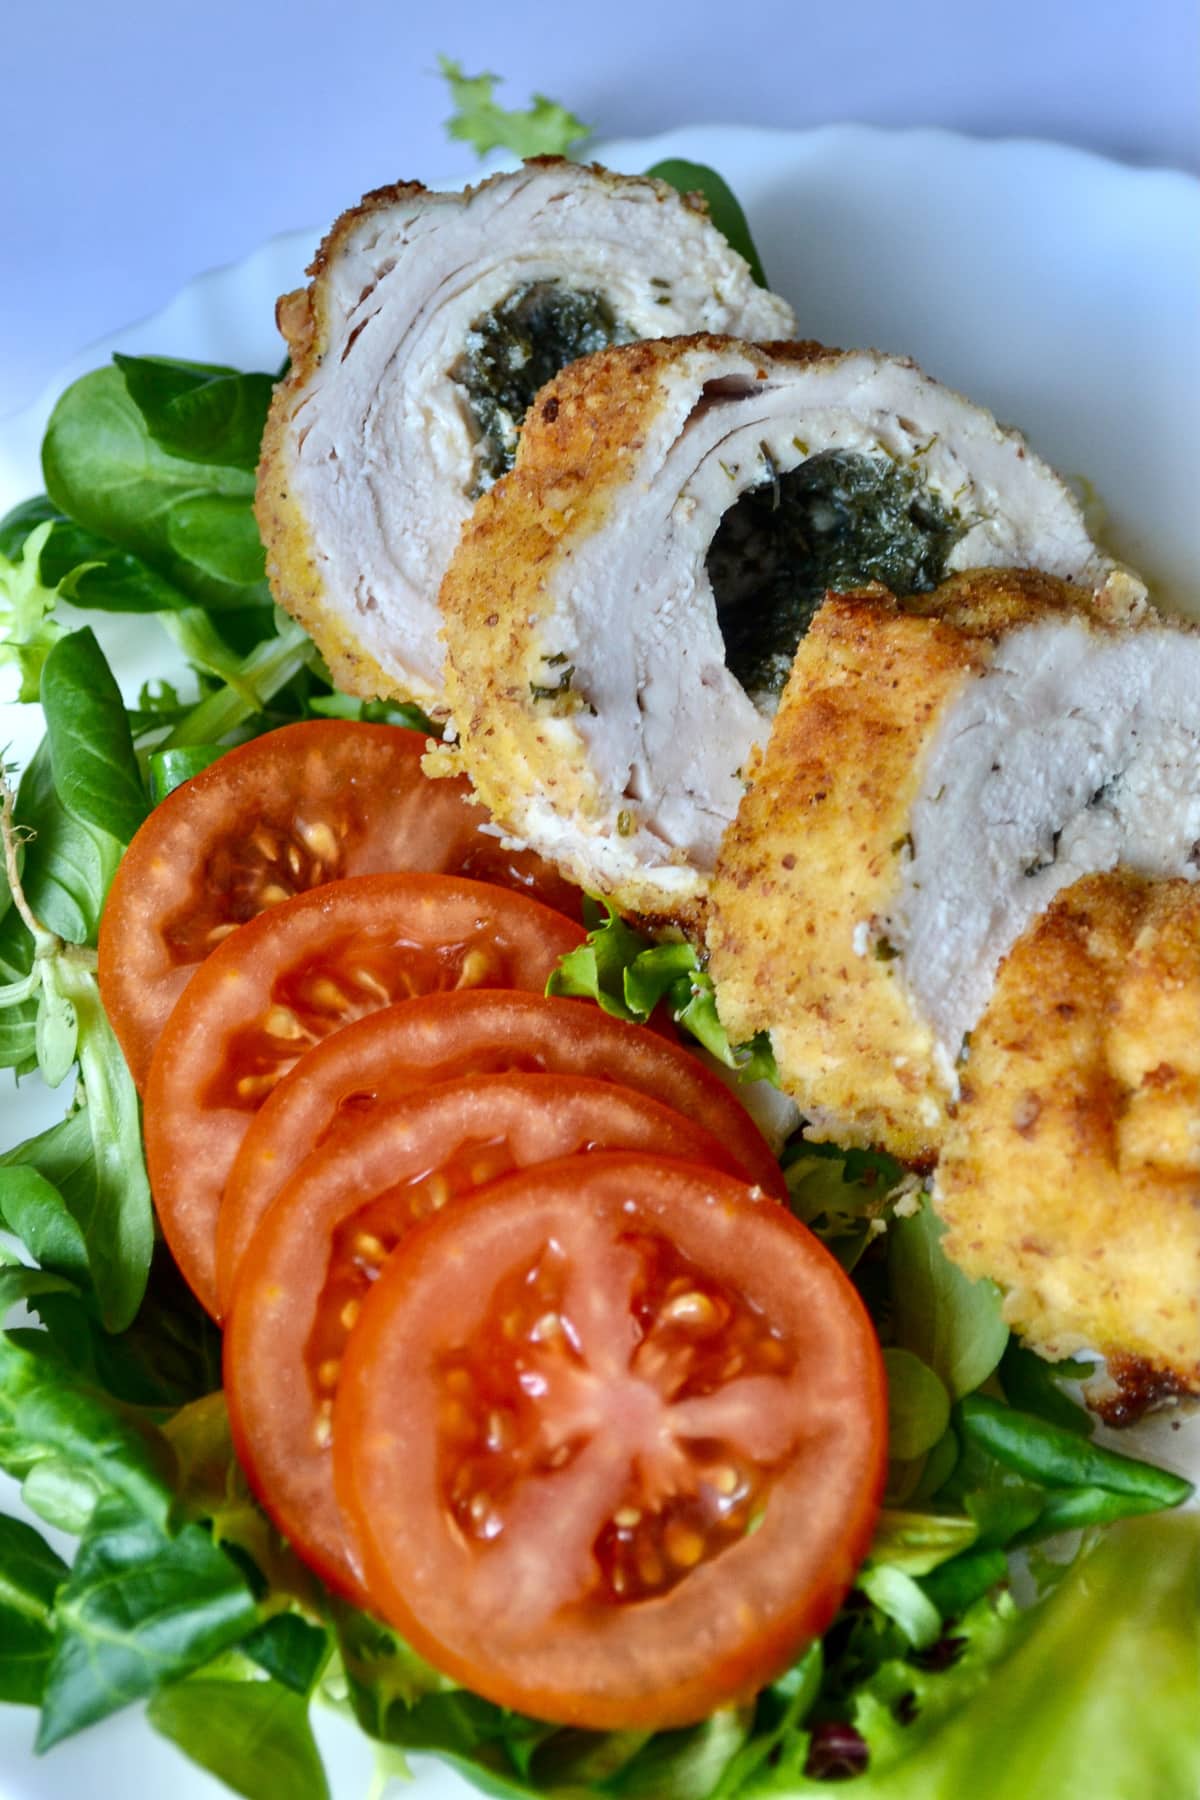
This baked chicken kiev is a healthier take on the classic recipe and is low-carb, gluten-free, and freezer-friendly. It has the perfect crispy crust on the outside and a mouthwatering buttery filling on the inside.
Even though it takes quite some time and effort to make this baked chicken kiev, the outcome is unbelievably delicious. The best part is that you can cook this dish whenever you have the time and inspiration and just freeze it. Then, when you want to serve it, all you’ll need to do is throw the chicken in the Air Fryer or in your oven for a few minutes.
My grandma has taught me everything about making chicken kiev. I remember cooking this classic Ukrainian/Russian dish with her since I was a child. However, I had to make some changes to the classic recipe to make it keto-friendly and healthier. And I must say, it tastes even better than the traditional baked chicken kiev.
Table of Contents
How to Make Low Carb Chicken Kiev
Don’t let the amount of time needed to cook this keto chicken kiev scare you. Yes, it does take more than an hour to make this dish, but your freezer or oven will be doing most of the work.
The good thing about this keto chicken kiev is that the cooking process is pretty straightforward. If you've ever made the traditional version of the chicken kiev, you'll ace this one for sure.
The process of making this dish can be divided into six main steps:
- Preparing the herb butter. You'll need to combine room temperature softened butter with dill and garlic. Then, wrap everything up in some plastic food wrap and leave it in the freezer until it completely freezes.
- Pounding the chicken. Using a meat mallet, pound the chicken until it is about ½ inch thick.
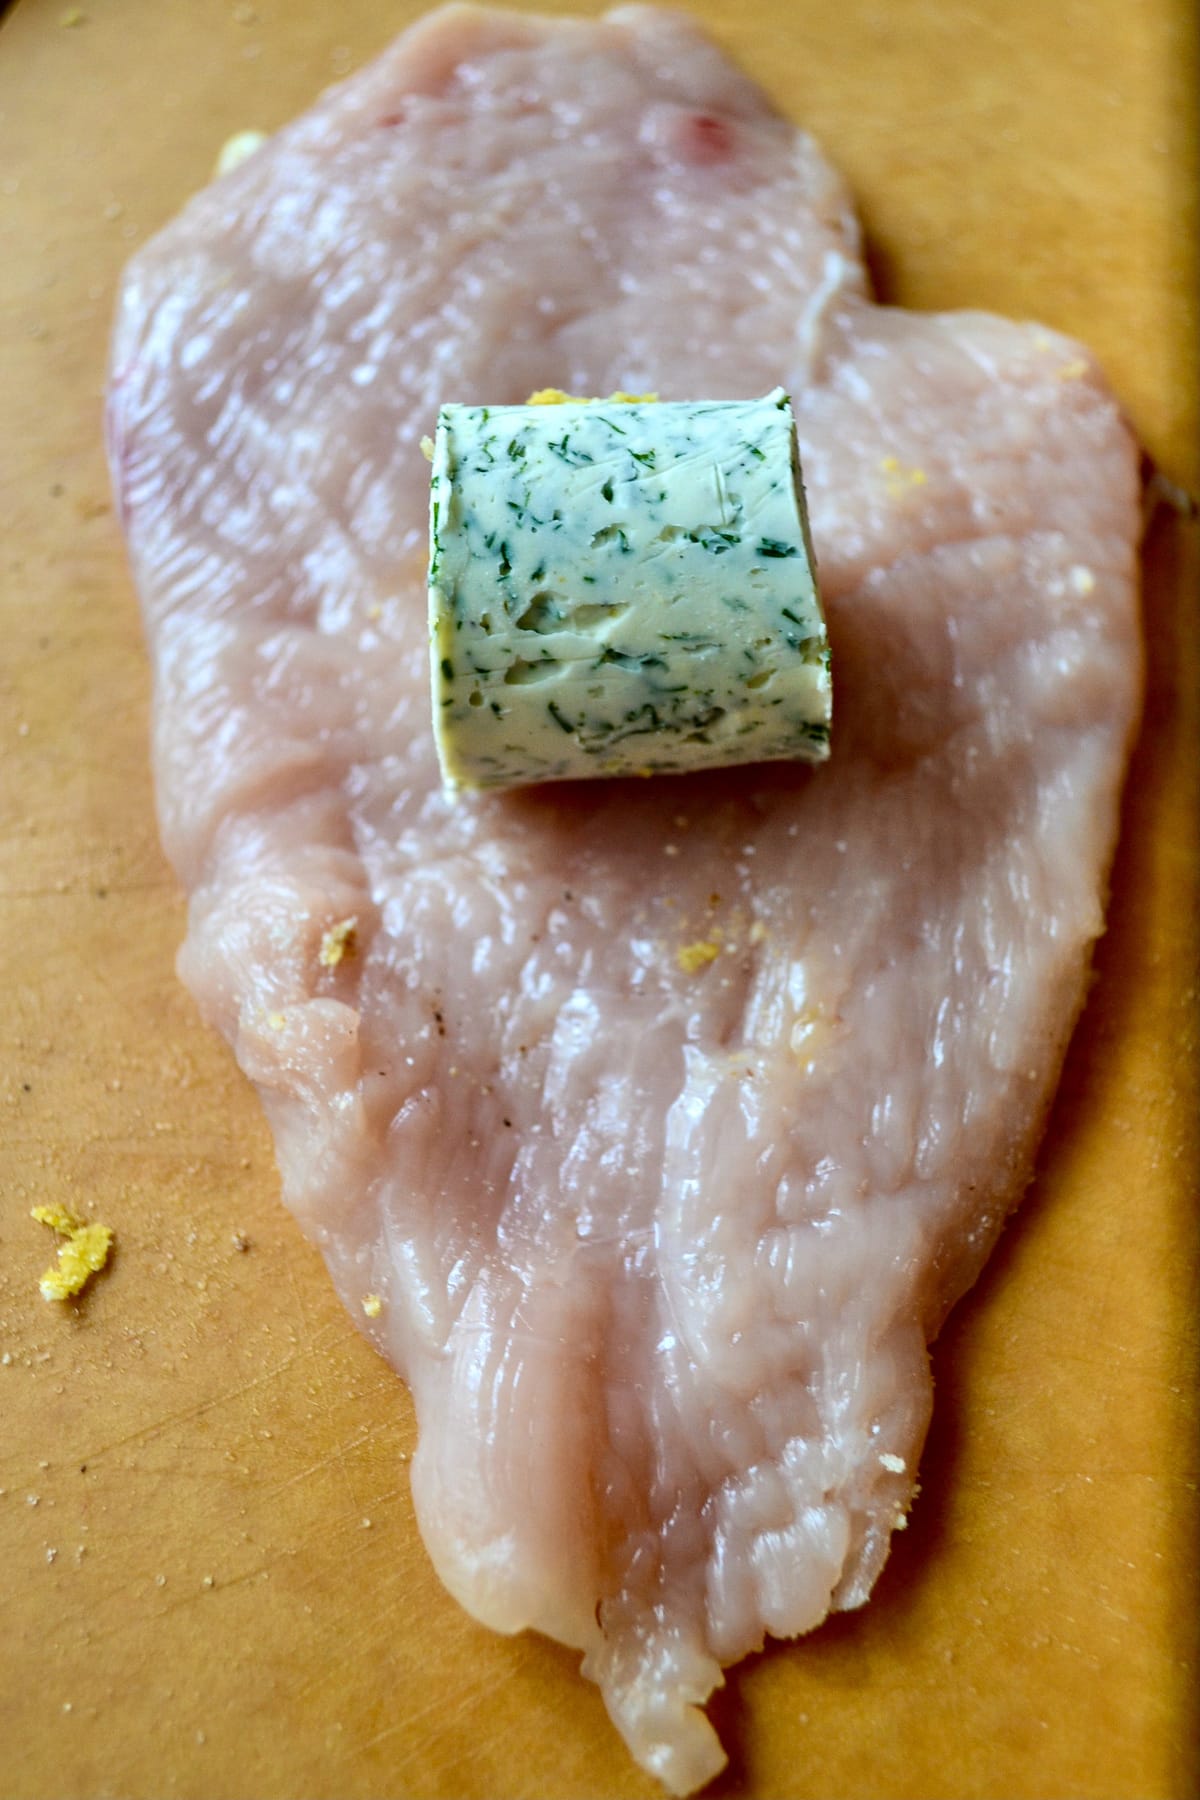
- Wrapping the butter into the chicken breasts. You'll have to divide the herb butter into four and wrap it inside the chicken breasts.
- Freezing the chicken. This step should make sure that the chicken won’t fall apart when you start coating and frying it.
- Coating the chicken. First, you'll need to dip the wrapped chicken into whisked eggs and then into an almond and coconut flour mixture.
- Frying and baking the chicken. You only need to fry the chicken in olive oil on all sides until golden. Then, sit back and let your oven do the rest.
As you can see, there's nothing complicated in this cooking process. All that you need is some time and effort to make everything work.
Cooking Tips
If this is your first time ever making baked chicken kiev, then you must check out these cooking tips. They will make sure that you get everything right, and they should help with the overall cooking process.
Here's what you should know before starting to cook the low-carb chicken kiev:
- Pound the chicken between two pieces of food wrap. It is best to use either food wrap or zipper bags to pound the chicken. Just place the chicken breast between it and pound it using a meat mallet. This way, the chicken will stay neat and flat. If you don't have a meat mallet, you can use either a rolling pin or a can to flatten the chicken.
- Make sure that the butter is completely covered in chicken. If you see that the butter is sticking out from the chicken, then it will leak during the baking process. The chicken kiev will still be tasty, but it won't turn out as it should since the whole idea behind this dish is that the butter should come out of the chicken when you cut it open.
- Place the wrapped chicken in the freezer before frying it. This will ensure that the chicken stays sealed, and there will be no butter leakage.
- It's okay to skip the frying step. If you're looking for an even healthier option, then you can skip the frying step and go right to baking it in the oven.
- Don’t cut the chicken right away after baking. Let the cooked chicken stand for a few minutes before you serve it. This way, the chicken will absorb more of the herb butter, and it will double the taste.
Storing and Freezing Instructions
If you have any baked chicken kiev leftovers, you can store them in your refrigerator for 3-4 days. Simply put it in an airtight container or place it on a plate and wrap it up with some food wrap. Whenever you wish to serve it, you can reheat the chicken kiev either in your microwave or broil in your oven for a few minutes for a crust.
If you have more free time, you can make a batch of these baked chicken kiev and freeze them. You can either freeze them fully cooked or raw. But for best results, I recommend freezing them raw and just cooking them whenever needed. Simply follow all of the instructions up until cooking, wrap the chicken, and place in the freezer. Then to cook them, simply place them on a baking tray and bake for about 50 minutes in an oven preheated to 350 F.
Serving Ideas
Almost anything can go perfectly with this keto baked chicken kiev. Here are some options to try:
- Roasted cabbage steaks
- Fried cauliflower rice
- Air Fryer garlic Brussels sprouts
- Baked Veggie Ratatouille
- Alfredo Zoodles
For something lighter, you can serve this dish with a salad on the side; simply chop up lettuce, cherry tomatoes, cucumbers, avocado, crumbled feta, red onions, and top off with some vinaigrette salad dressing.
Recipe
Keto Baked Chicken Kiev
Ingredients
- 2 large chicken breast
- 3 oz butter softened at room temperature
- 5 tbsp fresh dill chopped
- 1 clove garlic minced
- 3 tbsp almond flour
- 2 tbsp coconut flour
- 1 large egg
- 3 tbsp olive oil
- salt to taste
Instructions
- Make the butter stuffing for the chicken. In a small bowl, mix the softened butter, chopped dill, and minced garlic. Take a piece of plastic food wrap, spread the butter onto it, and roll it into a log. Twist the ends of the food wrap and place it in the freezer until it’s firm.
- Cut the chicken breasts into two pieces lengthwise. Then, place each slice between two pieces of plastic food wrap and pound them into thin, even pieces using a meat mallet. Evenly season each chicken breast slice with some salt.
- Take the butter log out of the freezer and cut it into four equal parts. Place a piece of butter in the center of each chicken slice. First, fold the sides of the chicken and then roll it tightly; make sure that the whole butter piece is inside the chicken and that it doesn’t stick out anywhere.
- Tightly wrap the chicken in food wrap and place it in the freezer for 30 minutes.
- Prepare two small bowls: whisk up the eggs in one and mix the almond and coconut flour in the other. Then, remove the chicken from the food wrap, dip it into the whisked eggs, and coat it in the flour mixture. Repeat one more time.
- Pour the olive oil into a skillet and fry the chicken over high heat on each side for 2-3 minutes. Remove the chicken from the skillet and then place it in a baking pan. Preheat your oven to 350 F and bake the chicken for 30-35 minutes.
Leave a Reply