
Lapis legit, or spekkoek, is an indulgent Indonesian layered spice cake made by baking stacks of ultra-thin layers, each one spiced and buttery. This layer cake requires patience but offers a unique, rich flavor profile.
Every slice of this Indonesian layer cake is a swirl of butter, egg yolk, and spice. It features those signature stripes that earned it the “thousand layer cake” nickname—even if nobody’s actually counting that high. In many Indonesian households, it is affectionately known as kue lapis legit.
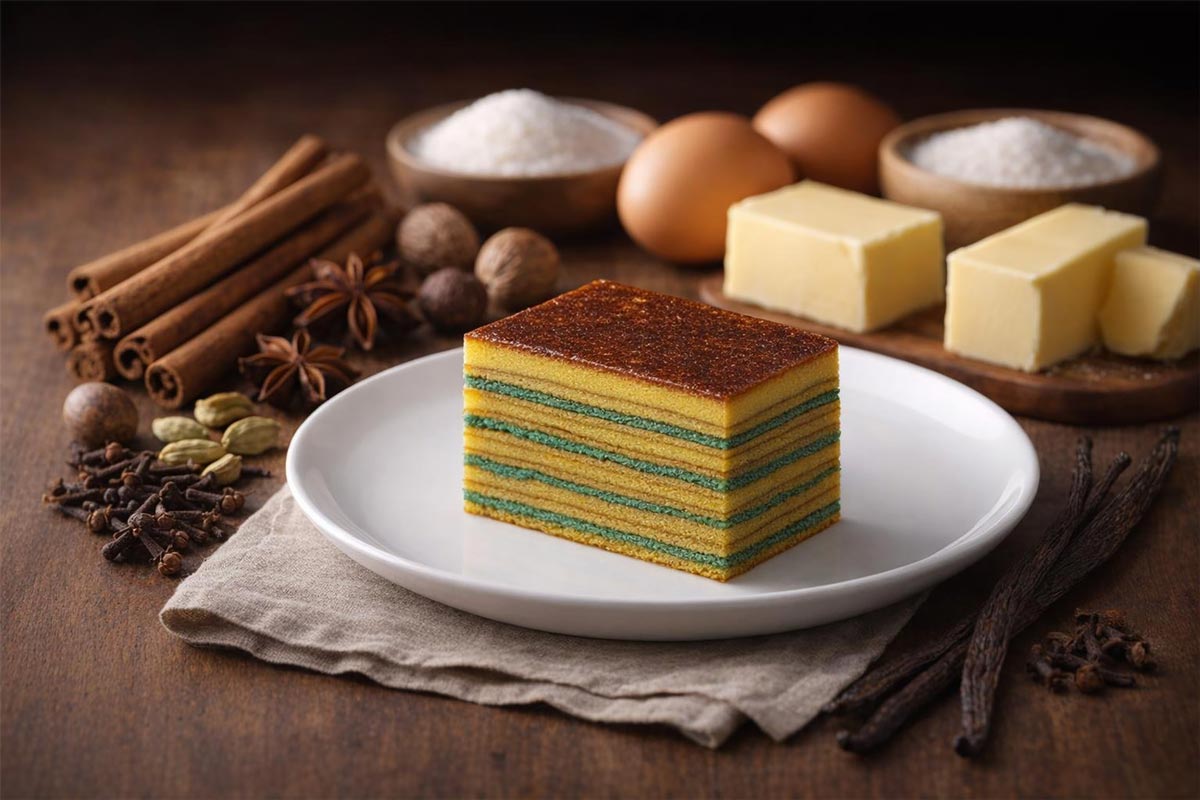
This is a dessert shaped by history, really—Dutch baking meets Indonesian spices like cinnamon, nutmeg, clove, and cardamom. Every layer adds a bit more flavor and meaning, which might be why it pops up at Lunar New Year and other big celebrations. “Legit” hints at its rich, moist bite, and “spekkoek” is all about those stripes, not the taste.
Let’s get into how this cake comes together: the spice blend, the batter, the careful broiling that makes those crisp lines. We’ll peek at how home cooks put their own spin on it, look at some twists on the classic, and talk about the best ways to slice, store, and—most importantly—enjoy lapis legit.
Table of Contents
- So, Where Did Lapis Legit Come From?
- What’s Inside: Ingredients & Spices
- RECIPE: Non-Traditional Lapis Legit (Spekkoek)
- How the Prep Actually Works
- Layering & Baking: The Real Test
- Fun Twists and Filling Ideas
- Serving and Storing: Keep It Looking Good
- Nutrition: What’s in a Slice?
- Got Questions? Here’s What People Ask
So, Where Did Lapis Legit Come From?
Lapis Legit (Spekkoek), often referred to simply as an Indonesian cake, is basically a living relic of Dutch and Indonesian history. Its roots stretch back to colonial times, and then local cooks took over, making it their own Indonesian cake. These days, it’s kind of a big deal at family gatherings and special events.
How the Dutch Got Involved
Spekkoek first showed up during the Dutch colonial era in the East Indies. Dutch bakers brought their butter cakes and oven-baked treats—stuff that wasn’t really part of the local scene. The whole stacked-layer thing? That’s a European move, not the same as traditional kueh lapis with rice flour.
The name spekkoek literally means “bacon cake” in Dutch, which is a little weird since there’s no bacon in sight. But look at those light and dark layers of this bacon cake, and you get it. Dutch families would serve it during a rijsttafel, those epic colonial spreads meant to show off.
Lapis Legit Finds Its Own Flavor
Indonesian cooks didn’t just copy spekkoek—they made it something new. Suddenly, it’s packed with egg yolks, butter, and a whole bunch of warm spices. This spiced cake has an unmistakable flavor that defines lapis legit and ties it to local tastes.
The word legit is all about richness and moisture. Over the years, it’s picked up a few other names—kue lapis, kek lapis, spekuk, spekkuk. In many regions, the name spekuk is used interchangeably with the Dutch title.
And yeah, people call it “thousand layer cake,” even if it’s more like twenty. Still, each layer is made with care.
Why It Matters at Celebrations
Lapis legit isn’t just dessert—it’s tradition. You’ll spot it at Lunar New Year, weddings, and religious holidays. Each layer is supposed to stand for good fortune, patience, and slow-but-steady effort.
The golden color hints at prosperity, and the time it takes to make one? That’s a gesture of respect for whoever you’re serving.
Homemade lapis legit always means more than something from a shop. If you’re gifting it, you’re really saying: “I put in the time because you matter.”
What’s Inside: Ingredients & Spices
Lapis Legit is all about a handful of rich ingredients and a punchy, aromatic spice mix. But honestly, the magic’s in how you treat the eggs and butter—those layers won’t make themselves.
What You’ll Need (Seriously, Don’t Skimp)
It starts with butter, eggs, sugar, and flour. Go for unsalted butter, and let it soften up so it creams easily. That’s how you get those airy, even layers.
Eggs are the star. You’ll use a ton of egg yolks—it’s what gives lapis legit that rich color and flavor. Some recipes toss in a few whipped egg whites with a pinch of cream of tartar to lighten things up.
Cake flour is the move here—skip the all-purpose if you can. Cake flour keeps everything soft and delicate. Sugar’s obvious, and a lot of folks add condensed milk for extra moisture and sweetness.
The Spice Mix That Makes It
The flavor comes from a spekkoek spice mix—basically, a blend that’s warm, a little sweet, and totally addictive. To get it right, you'll need high-quality ground cinnamon and ground nutmeg. This traditional spice blend is essential for getting the scent just right. Finding the right balance in your spice mixture is the secret to that classic fragrance.
This Indonesian cake features a combo of ground cloves and ground cardamom along with other aromatics. Usually, it’s a combo of:
- Ground cinnamon
- Ground nutmeg
- Ground cloves
- Ground cardamom
Sometimes you’ll see aniseed or ginger tossed in for a twist. Mix and store it airtight.
You want the blend to smell inviting, not harsh. Don’t overdo it though—too much, and you’ll drown out the buttery, eggy goodness.
Why Room Temperature Actually Matters
Get your ingredients to room temp before you start. Cold butter won’t cream right, and cold eggs just won’t whip up the way you need them to.
Letting eggs warm up helps them hold more air, which is pretty important for a cake this dense. If you use them straight from the fridge, expect a heavier, less impressive result.
Just let your butter, eggs, and any dairy hang out on the counter for about half an hour. It’s a tiny thing, but it makes a big difference for even baking and those neat, stuck-together layers.
RECIPE: Non-Traditional Lapis Legit (Spekkoek)
This spekkoek recipe skips the charcoal grill and uses a regular oven and broiler. You’ll still stack up lots of layers, alternating a classic spiced batter with a cocoa-spiced one for those sharp stripes.
Yield: One 8-inch cake, 18–20 layers
Time: 3–4 hours active, plus cooling
Difficulty: High (requires patience)
Ingredients
Spekkoek Spice Blend (make ahead):
- 2 tbsp cinnamon (Ceylon preferred)
- 1 tsp ground cardamom
- 1 tsp ground mace
- ½ tsp ground anise
- ½ tsp ground clove
- ¼ tsp ground nutmeg
Grind together, store airtight. This makes enough for 2–3 cakes.
For the Batter:
- 30 large egg yolks (reserve whites for meringue cookies or freeze)
- 1 cup (2 sticks) unsalted butter, softened
- 1 cup sweetened condensed milk
- 1 ½ cups cake flour, sifted
- 1 tbsp spekkoek spice blend
- ½ tsp salt
- 2 tsp vanilla extract
- 1 tbsp rum or brandy (optional, traditional)
- 2 tbsp Dutch-process cocoa powder (for half the batter)
For Assembly:
- 2 tbsp melted butter (for brushing between layers)
- 8–10 pitted prunes (optional topping)
Instructions
Preparation (30 minutes):
- Bring all ingredients to room temperature.
- Separate eggs carefully—any fat in the yolks prevents proper whipping.
- Line an 8-inch springform pan with parchment on bottom and sides (batter is sticky).
- Whip yolks in a stand mixer on high for 10–12 minutes until thick, pale, and tripled in volume. The mixture should fall in a ribbon that folds back on itself ("ribbon stage").
- In a separate bowl, cream butter until fluffy. Beat in condensed milk, then gradually add whipped yolks. Fold in flour, spices, salt, vanilla, and rum. The batter should be thick but pourable—like heavy pancake batter.
- Divide batter in half. Mix cocoa powder with 2 tbsp hot water to make a paste, fold into one half. You now have spiced and chocolate-spiced batters.
The Layering Process (2–3 hours):
- Position oven rack 6 inches below broiler element.
- Preheat broiler to high.
- Pour exactly 3–4 tablespoons of plain (yellow) batter into prepared pan. Tilt pan to spread evenly, or use offset spatula. It should be ⅛-inch thick—translucent when held to light.
- Broil 2–3 minutes until top is golden-brown with tiny bubbles and a caramelized smell. Watch constantly—burning happens in seconds.
- Remove from oven. Press gently with spatula to flatten any bubbles. Brush very lightly with melted butter.
- Pour 3–4 tablespoons chocolate batter, spread evenly. Broil 2–3 minutes until dark brown and set.
- Repeat alternating colors, pressing each layer flat before adding next, until batter is exhausted (18–25 layers depending on thickness). The cake will grow tall in the pan.
Final Steps:
- After last layer, bake at 350°F (175°C) for 10 minutes to ensure center is cooked through.
- Cool in pan 30 minutes. Run knife around edge, remove springform sides, invert onto rack, peel parchment. Cool completely—minimum 4 hours, preferably overnight. The flavors meld and texture sets.
Optional Prune Topping:
Simmer prunes in ¼ cup water and 2 tbsp sugar until glazed. Arrange in pattern on top before serving.
How the Prep Actually Works
Making Lapis Legit is all about patience and attention. You’re chasing the right texture, flavor balance, and timing, starting with a rich batter and ending with two batters that bake up in neat, even layers.
Mixing Up the Batter
Start with room temp ingredients—trust me, it matters. Cold butter or eggs can mess with the texture and layering.
Whip egg yolks and sugar until they’re pale, thick, and ribbon-y. This step traps air, giving you a soft, dense crumb. Don’t rush it—if you skimp here, the cake turns out heavy.
In another bowl, cream the butter until it’s fluffy, then blend it with the yolk mix. Fold in sifted flour gently so you don’t lose all that air. The batter should be thick but still spreadable—kind of like heavy pancake batter.
Splitting and Spicing
Divide the batter in two. One half stays plain and golden, thanks to all those yolks.
Mix up a spice blend for the other half—usually cinnamon, clove, nutmeg, cardamom, and maybe a smidge of anise. That’s what gives lapis legit its signature aroma and flavor.
Some folks add cocoa to the spiced batter for a deeper color. Just fold it in gently. Both batters should have about the same thickness so your layers bake up evenly and stick together.
Layering & Baking: The Real Test
Building lapis legit is a slow, one-layer-at-a-time process. The pan you use, your heat source, and how thick you spread each layer all play a part in getting those clean, stripey layers just right.
Picking the Right Pan and Getting It Ready
If you want those tall, delicate layers, a springform pan is definitely your friend. Most folks stick with a 9-inch springform—it’s kind of the sweet spot for home bakers. With a 9-inch pan, you’ll get thinner layers, while a 10-inch pan spreads things out more and the cake won’t be as tall.
Line the bottom and sides with parchment. This batter’s sticky and likes to cling, so parchment makes life easier when it’s time to take the cake out.
Set the pan on a flat rack. Even a small tilt can make the layers look a little wonky when you slice in.
Before you start, rub a little butter on the parchment—just a light touch. Too much and the layers might slip and slide while baking, which is not what you want.
Broiler or Bake? Here’s What Works
Traditionally, each layer gets cooked under the broiler instead of baking it the usual way. The broiler caramelizes the top quickly and sets the layer so you can keep building. That’s how you get those dramatic stripes and a nice firm bite.
Put your oven rack about 6 inches below the broiler. Let it preheat well, and if you’ve got an oven thermometer, use it—broilers can be unpredictable.
You could bake at 350°F if you’re in a pinch, but honestly, it softens the surface and the layers blur together. Baking is okay, but you’ll miss that signature browned top.
Once you’ve finished all the layers, flip the oven to bake for a few minutes. That way, the middle cooks through without torching the top.
Keeping Layers Thin and Even (It’s Worth It)
If you want that classic look, thin, even layers are key. Use 3–4 tablespoons of batter for each one, aiming for about ⅛ inch thick—spread it all the way to the edges.
An offset spatula is super handy for this. Only tilt the pan if you absolutely have to.
After broiling, if you see bubbles, just press them out gently before you pour on the next layer.
Give the pan a half turn midway through broiling—helps avoid those dreaded hot spots.
When it’s time to serve, cut the cake into thin slices so all your hard work shows off in every piece.
Fun Twists and Filling Ideas
You can play around with Lapis Legit and still keep it looking classic. While the traditional version is beloved for its simplicity, many bakers like to experiment with optional fillings to create a more personalized dessert.
These additions can range from classic fruit preserves to more modern textures. Most tweaks focus on flavor, color, or richness, but those thin, stacked layers are always the star.
Chocolate, Jam, and a Little Extra
Want to jazz things up? Try a bit of melted chocolate or jam between layers. A super thin swipe of apricot, strawberry, or pineapple jam on a baked layer before the next pour adds a subtle sweetness and just a hint of moisture—nothing overpowering.
Just go easy. Too much filling and the layers might start sliding around. Keep it paper-thin and skip extra butter on those layers.
Popular picks:
- Dark chocolate, melted and cooled
- Fruit jam, strained so it’s smooth
- Alternating jam and chocolate layers for a little drama
If you’re adding fillings, the middle of the cake is safest. Avoid the very top or bottom—they’re more delicate.
Regional Spins and Modern Takes
Some bakers like to play with color and scent. Pandan extract gives you green layers and a light, grassy aroma. Sometimes folks alternate pandan and spiced batter for a cool striped effect.
Other versions dial down the spice, toss in some cocoa, or even add a splash of rum or brandy. It keeps the cake rich but not as intense—kind of nice, honestly.
Fillings aren’t super common in the old-school versions, but home bakers these days might try:
- Thin nut pastes
- Light citrus curd
- Extra cocoa layers (no jam)
Still, if you ask me, the real secret is patience and thin layers. Variety’s fun, but structure is everything.
Serving and Storing: Keep It Looking Good
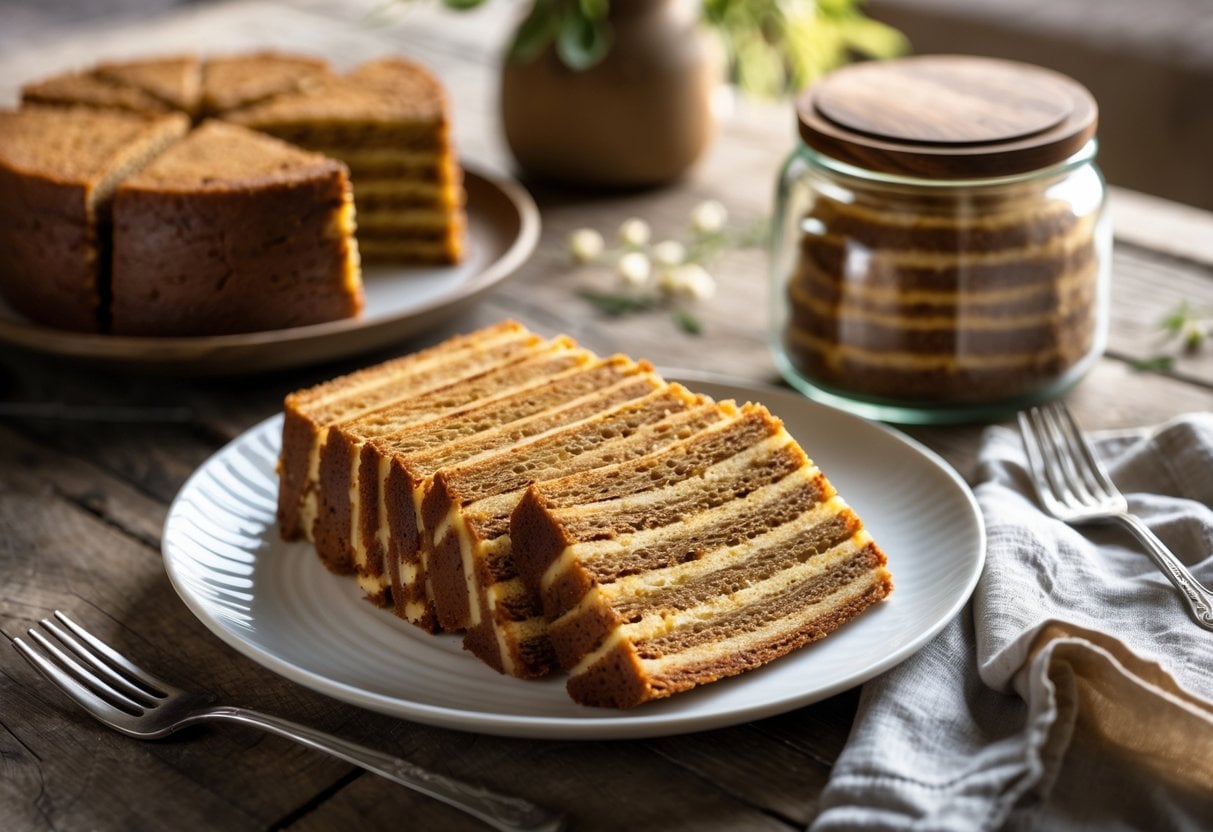
Lapis Legit is super rich and dense, so small slices are the way to go. Careful slicing and smart storage keep those stripes sharp and the flavor on point.
How to Slice and Serve Like a Pro
Cut it into thin slices—trust me, that’s plenty. Thin slices highlight the intricate layers of the Indonesian cake. Use a long serrated knife and gentle sawing. Wipe the blade between cuts; it makes a difference for those crisp layers.
Let the cake come to room temp before serving. Cold, it’s a bit too firm and the spices don’t really shine. If you had it in the fridge, give it 30–60 minutes on the counter.
It pairs best with simple drinks—strong coffee, black tea, or even just unsweetened tea. You want something that won’t fight the spices.
Serving tips:
- Go for slices around ¼ inch thick
- Lay them out in a single layer so everyone can see those stripes
- Small plates send the right message: this is a treat, not a meal
Keeping It Fresh (and Tasty)
To keep Lapis Legit moist and avoid weird fridge smells, wrap it tight in plastic wrap, then a layer of foil for good measure.
On the counter, it’s fine for up to 5 days if your kitchen isn’t too warm or humid. In the fridge, you get about 2 weeks. Always use an airtight container to keep other flavors out.
Freezing? Totally fine—texture holds up. Freeze whole or in slices for up to 3 months. Thaw overnight in the fridge, then let it come to room temp before serving.
| Storage Method | Duration | Key Notes |
|---|---|---|
| Room temperature | Up to 5 days | Keep cool and dry |
| Refrigerator | Up to 2 weeks | Wrap airtight |
| Freezer | Up to 3 months | Thaw slowly |
Nutrition: What’s in a Slice?
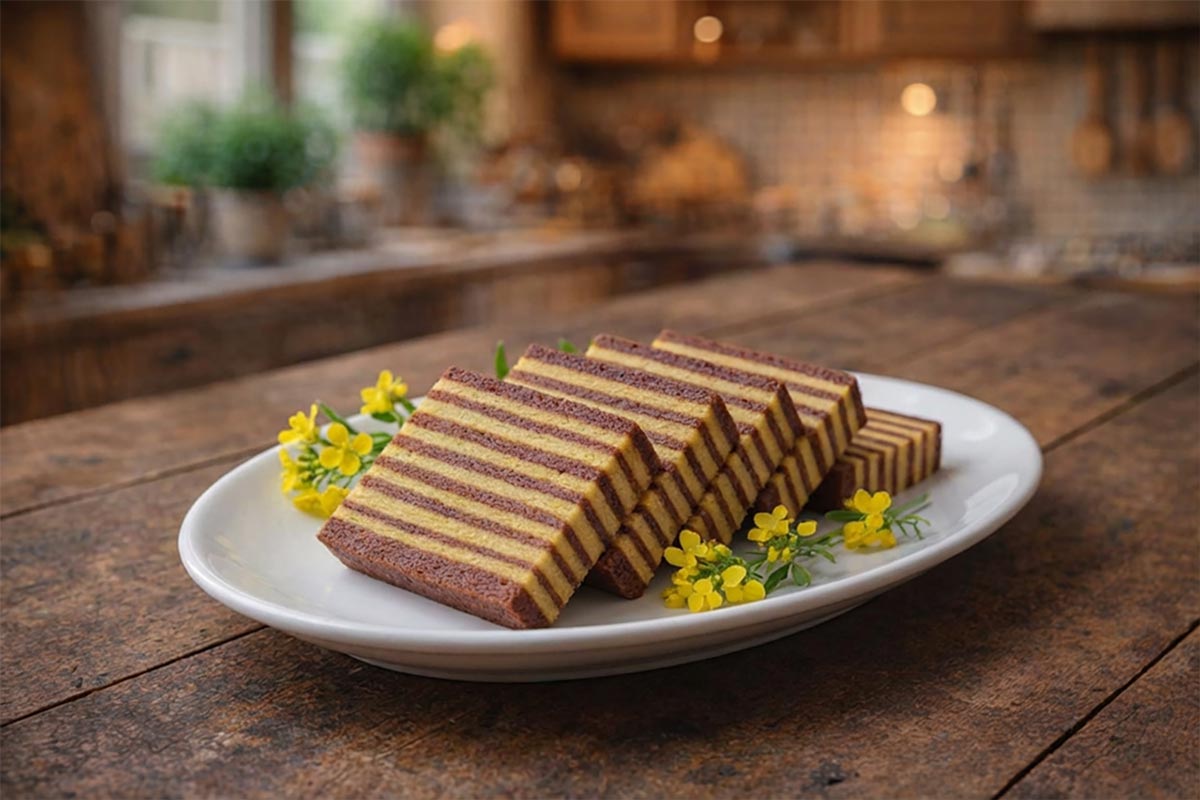
Lapis Legit is, well, decadent. Most of the calories are from fat, eggs, and sugar. Reviewing the nutrition information is useful for any Indonesian cake, as a little goes a long way in both flavor and energy.
Calories, Carbs, and All That Jazz
It’s a high-calorie treat thanks to all the butter, egg yolks, and sugar. One typical slice? Around 260–270 calories.
The total fat in a single slice is significant, usually around 16 g. A large portion of this is saturated fat which comes from the high volume of butter and egg yolks used in the batter.
When looking at the energy content, the total carbohydrate count typically reaches about 26 g per serving. Most of these sugars make up the bulk of that number, though you will find a small amount of dietary fiber, usually measuring around 1–1.5 g.
There’s a bit of protein too, around 5 g per slice, mostly from the eggs. This protein helps a little with satiety. The nutrition information reveals it's best enjoyed in moderation.
Other Nutritional Bits
The cholesterol is pretty high—often over 120 mg per slice—all those egg yolks add up.
Sodium is moderate, about 290 mg per serving, but if you go back for seconds, it adds up fast.
You’ll get a little calcium and iron from the eggs and dairy, but not enough to call this cake “nutritious.”
If you’re watching fat, sugar, or cholesterol, keep those slices thin. The traditional way of serving is pretty wise in that regard—no one’s eating a wedge the size of their hand.
Got Questions? Here’s What People Ask
This cake gets its magic from a unique spice mix, slow broiling, and a lot of patience. It’s all about rich ingredients, those impossibly thin layers, and careful handling for that dense, stripey look.
What spices go into kue lapis legit?
You’ll need a warm spice mixture for Lapis Legit (Spekkoek)—think ground cinnamon, ground nutmeg, ground cloves, ground cardamom, mace, and a bit of anise. Most bakers mix their own so they can tweak it to taste.
Those spices are what give the cake its deep, cozy aroma and gentle heat. I always recommend mixing fresh if you can swing it.
How long does it take to make?
Honestly? Set aside 3 to 4 hours of hands-on time. That’s not counting the cooling.
After baking, the cake needs at least 4 hours to rest. Some folks wait overnight so the layers really set up—worth the wait, if you ask me.
Why broil each layer instead of baking the whole thing?
Broiling sets and browns each layer before the next goes on, so you get those crisp lines and a dense texture. Pressing each layer keeps things tight and even. It’s a bit of a process, but totally worth it.
How is this different from other layered cakes?
No stacking baked sheets or slathering on frosting here. You build the cake right in the pan, one layer at a time while it bakes.
The layers are super thin and there are tons of them. The final cake is way denser and richer than your typical Western layer cake.
What’s the best way to serve it?
Always slice it thin—this cake is rich! A serrated knife and gentle motion work best.
Let it come to room temp before serving, maybe with coffee or tea. Sometimes you’ll see a simple prune design on top, but honestly, it’s great even plain.
Heads Up: Dietary Stuff to Watch Out For
So, just a heads up—the cake’s got a hefty dose of eggs, butter, and dairy. If you’re vegan or trying to dodge dairy, this one’s probably not your jam.
Plus, it’s made with wheat flour, so folks avoiding gluten will want to steer clear. Sometimes there’s a splash of alcohol in there too, but honestly, you can skip it if that’s not your thing.
Francine
DO NOT forget to press each layer with something that is square, so the layers are even. 'LEGIT' mean rich taste. Maybe you want to try when in Nurnberg? If I go to Nurnberg I would buy Knopf in Ohr stuffed animals. I used to have one to put my pajamas in--a bunny rabbit .