Molecular gastronomy adds flair to your food at home using modern molecular cooking techniques. It turns traditional cooking on its head.
Smoking guns can add an enticing aroma and flavor to chili chocolate mousse. Gelling agents and fresh raspberries combine to make raspberry caviar. Modern cookery is limited only by the imagination.ki
Before jumping in, you’ll need to learn a few basics about the science of cooking. This beginner’s guide is an excellent starting point. By the end of this page, you’ll understand the popular tools and techniques used to make modernist cuisine.
What is Molecular Gastronomy?
Molecular gastronomy is a section of food science that applies scientific principles to food preparation. Creatively using physical and chemical processes in the kitchen can produce flavors and textures that could never be achieved using traditional cooking methods.
Molecular gastronomy is about creativity, not following recipes. It is the marriage of art and science in food production.
Molecular gastronomy tools
Tools used in molecular gastronomy can range is cost from pennies to thousands of dollars. If you’re new to this cooking discipline, then we suggest choosing a low-cost technique like spherification as a good starting point. You may already have some equipment like kitchen appliances in your kitchen.
Blender

Turn ingredients into lovely, smooth purees. A blender is a vital tool in making raspberry pearls which can be used to drop into a cocktail or decorate desserts.
Digital scales

Ingredients like agar agar will require tiny amounts so you’ll need a set of scales that measure 1g units. Another set that measures larger weights will also be handy.
Measuring Spoons

You probably already have a set of these spoons. They’ll be used countless times for measuring powders and other ingredients.
PH Meter

A PH Meter is used during spherification to ensure the PH level is above 3.6. This will allow you to make stunning-looking caviar balls.
Food Molds

Molds are used to make perfect-shaped dessert domes and balls that will dazzle your guests.
Immersion Blender

These are handheld and provide great control when blending. They’re ideal for making foams and incorporating gelling agents into liquid.
Stand mixer
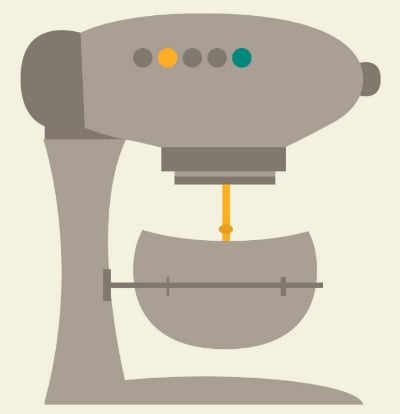
A stand mixer is great when you need your hands free to make emulsions. They’re also useful if you’ll be mixing ingredients for a long time, such as meringue making.
Measuring jug

Besides being useful for measuring, they can also be used during spherification.
iSi Whippers (aka siphon)

Make a huge selection of foams and creams using liquids, gels, or even solids. You have the option of attaching an N2O or CO2 cartridge which means your mixture can be bubbly or airy.
Smoking Gun

Smoking your food provides an added depth of flavor to a dish. Choose from a wide selection of wood to smoke, all producing different flavors and aromas.
Tip: check out our article on liquid smoke substitutes.
Food Dehydrator

A food dehydrator lets you dry foods over several hours at low temperatures. The dehydrator can dry strawberries to use as crispy garnishes or dry citrus peel which can be coated with chocolate.
Syringes

Create tiny, perfect liquid balls using a syringe.
Ice cube tray

An ice cube tray can create stunning ice cubes with flowers, herbs, and other ingredients inside. They are indispensable for cocktail making.
Dry Ice

Dry ice has many uses in modern cooking. Make ice cream in seconds, cool a salad, create a visual effect in a cocktail or add a scented smoke to a dish to put your guests’ senses into overdrive.
Spherification spoon

Helpful, but not essential, during spherification. They make easy work of collecting caviar from a bowl of liquid.
Hot infusion siphon

The hot infusion siphon is theatrical. Its original use was intended to make coffee, but it can also be used to create hot cocktails infused with other flavors.
Gastrovac
A gastrovac cooks food in a low-pressure, oxygen-free environment thanks to a vacuum. This allows a chef to maintain the texture and color of the food. It also absorbs the liquid around it creating a myriad of flavor options.
Blow Torch

You’ve probably seen a crème brûlée blow-torched, but what about crisping up salmon skin or pork crackling? Blowtorches have a surprising number of uses.
Gelling agents
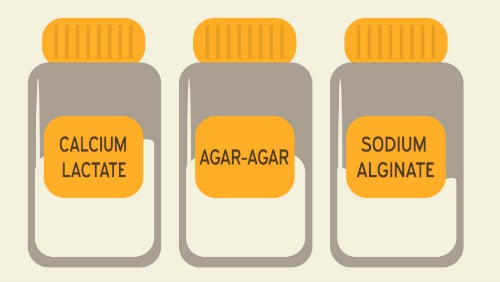
Calcium lactate, agar-agar, and sodium alginate are three excellent options to start with. They’re used in spherification and to make hot gels, foam, and more.
Other tools to consider
Water bath: Cook food on low heat for extended periods. The process can provide amazing texture.
Food Tweezers: Another non-essential tool, but they can make plating up an easier, more precise job.
Vacuum packing machine: Seal foods like salmon or beef and sous vide them for a moist, tender protein.
10 molecular gastronomy techniques to master
Learn these skills to open up a whole new world of cooking that’s full of flair and good taste.
1. Sous vide
Difficulty factor: Easy
Sous vide food for tender food which retains flavor.
When you use traditional methods of cooking, such as frying, you’ll lose some of the flavors as they leach out. The sous vide method is a solution to flavor leaching.
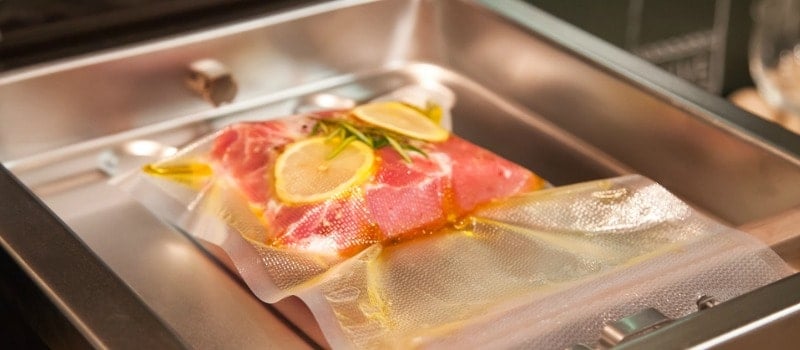
What is sous vide cooking?
If you choose to sous vide food you’ll poach it, within an airtight bag, submerged in a temperature-controlled bath of liquid. The cooking temperature is generally lower and slower than traditional cooking. Be sure to check out our review of the best sous vide cookbooks to get some amazing recipes.
Benefits of sous vide cooking
- Improved flavor and increased tenderness.
- Slow cook in advance then reheat when required.
- Set and forget cooking – no need to check the food.
- Longer storage once cooked.
- Meats remain tender and vegetables stay crisp.
- Nutrients are retained in the food.
How to sous vide
Equipment required: vacuum-sealer machine and a water bath
- Turn on a water bath and wait for the temperature to increase to the desired temperature.
- Place meat or vegetables along with oil or stock inside a vacuum bag and seal.
- Place the bag of food into the water and set the timer.
You’ll notice that meat and fish won’t have a lovely darkened exterior that results from frying. To fix this, briefly saute each side of the meat on high heat.
Quick tip: Experiment by adding different liquids to the sealed bag, such as juice, wine, or beer.
2. Spherification
Difficulty factor: Intermediate
Spheres provide an exciting burst of flavor.
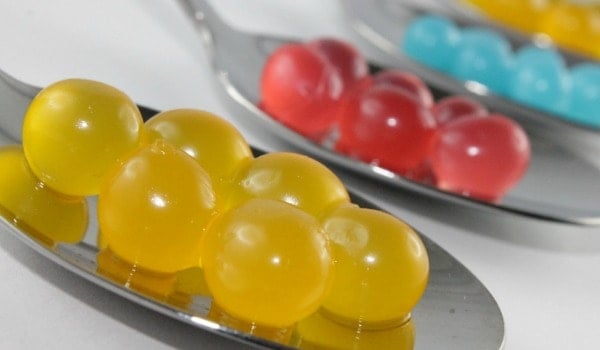
Spherification turns liquid into solid balls that look a lot like caviar. They’re visually stunning and make fantastic garnishes on a wide range of savory dishes, sweet desserts, and cocktails.
Spheres aren’t just about looking pretty. They are bursting with flavor and offer an element of surprise to a dish. Like the “everlasting gob-stopper” from Willy Wonka's factory, your guests will never know what taste is going to explode into their mouths as they bite through the external casing.
Benefits of spherification
- Capture intense flavor in each tiny ball.
- Adds visual appeal when plating up.
- It’s a lot of fun to make them.
Did you know? A mojito cocktail is delicious when spherified.
What you need to make spheres
Let’s start with basic spherification which is also known as direct spherification. This process involves dropping small droplets of liquid into a calcium bath to create spheres.
Basic spherification makes spheres with a thin membrane that pop when eaten. These balls need to be served straight after they are made or the membrane will continue to thicken until the ball becomes a solid.
Spherification tools
For basic spherification, use a liquid that you want to turn into balls. This could be almost anything, but fruit juices are a good place to start.
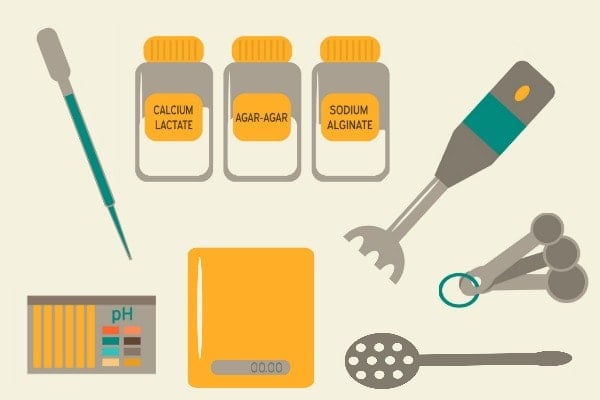
Common spherification tools.
You’ll also need:
- sodium alginate
- calcium chloride
- digital scales
- a syringe
- an immersion blender
- a spherification spoon (optional)
The basic spherification process
1. Mix the ingredients
For every 100ml of liquid, add 0.5g of sodium alginate and combine in an immersion blender. It is best to mix the sodium with a little sugar first and then slowly blend it into the liquid.
2. Test the liquid’s acidity
Use a PH meter to test the acidity of the liquid. The PH needs to be above 3.6 or the sodium alginate will transform into alginic acid.
3. Refrigerate the solution
Allow the liquid to rest in the fridge until all bubbles have disappeared. This could take up to one day but it usually takes less. To speed up the process, pass the liquid through a sieve several times.
4. Make a calcium bath
Create a calcium bath by adding calcium chloride to a bowl of water. Add 0.5g of calcium per 100g of water. The calcium will stir into the water easily and doesn’t need any special treatment.
5. Syringe droplets into the bath
Using a syringe, gently squeeze droplets of the flavored liquid into the calcium bath. Once you’ve added some spheres, slowly stir the water so that the spheres don’t sit on the bottom of the bowl and lose their shape.
6. Transfer the spheres
Wait about 5 minutes then remove the spheres from the bowl with a spherification spoon. Gently drop them into a bowl of fresh water. Test the ball’s membrane is thick enough to support the sphere before transferring the remainder.
Notes:
- Ensure the liquid is cold before adding sodium alginate.
- If the liquid contains alcohol, disperse the sodium alginate in water or some other flavored liquid before adding it to the alcohol.
- Add sugar to the calcium bath to help the spheres maintain their shape when sitting on the bottom of the bowl.
3. Foam
Difficulty factor: Easy
Foam adds fun and vibrancy to a plate.
If you’ve ever sipped a cappuccino, you’ll be familiar with foam. It is a popular element in restaurants for delivering untainted flavor and luxurious texture. Foams can be used in sweet or savory dishes and practically any ingredient has the potential to be transformed into a foam.
What is a foam?
In molecular gastronomy, foam can be any solid or liquid that has gas suspended in it. By this definition, foams include ice cream, mousse, bread, or meringue. We will focus on modern foams you may have seen in restaurants like Fat Duck and El Bulli.
What you need to make foam
- Stabilizers such as agar agar, lecithin, gelatine, or xanthan gum.
- whipping siphon, stand mixer, immersion blender, or milk frother.
How to make light foam without any tools
Light foams are easy to make without the need for any specialist equipment like a siphon. Follow these simple steps:
- Combine the liquid of your choice with a stabilizing agent such as lecithin.
- Add air into the liquid using an immersion blender, making sure to keep part of the blades out of the liquid to increase the amount of air that’s incorporated.
You’ll need to use light foam within an hour, otherwise, it will start to lose its shape.
4. Fermentation
Difficulty factor: Easy
Fermentation is super easy.
Fermentation has existed for over 10,000 years so it isn’t a new technique. However, it has gained online popularity in recent years.
What is fermentation?
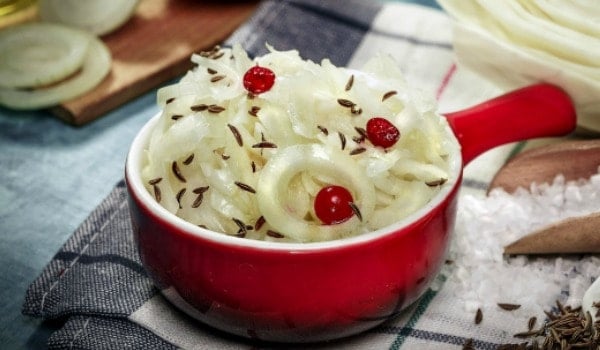
Fermentation is an anaerobic chemical process that breaks down molecules like glucose. It is used to make food like kimchi, yogurt, cheese, salami, beer, and sauerkraut. Fermenting food is useful for preserving the ingredients, developing new flavors, and improving gut health.
How to make Kimchi
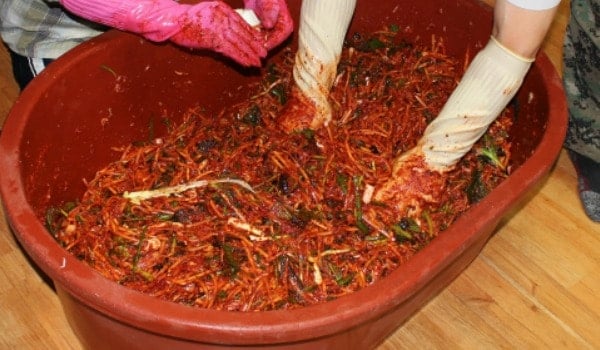
Korean locals making kimchi.
Kimchi is hugely popular in Korea and is becoming more popular in countries like the United States. It can be eaten on its own or incorporated into other dishes. Making a homemade version is simple:
Special equipment: 2 Quart jar.
Ingredients
- 1 cabbage (napa or Chinese)
- ½ cup kosher salt
- 1″ grated ginger
- 2 garlic cloves
- 1 Tbsp granulated sugar
- 4 Tbsp rice vinegar
- 2 carrots (grated)
- 4 scallions
- ¼ cup of fish sauce
- 3 Tbsp sriracha sauce
- 6 oz radish (grated)
Method
- Cut cabbage into 2″ pieces, discard the root, then add the cabbage to a large bowl with the salt. Mix with your hands then pour water into the bowl until the cabbage is covered. Cover the bowl and allow it to sit overnight at room temperature.
- Drain water from cabbage using a colander then pour cold water over the cabbage to rinse off the salt.
- Using your hands, combine cabbage with all remaining ingredients in a large bowl.
- Scoop the cabbage into a jar and pack it in hard. Place the jar in a cool spot for 3 days then open it to allow all the gas to escape.
- Place jar in the refrigerator with the lid on for 2-7 days before eating. Leaving longer will allow more flavor to develop.
You can store kimchi in the fridge for 4 weeks.
5. Dehydration
Difficulty factor: Easy
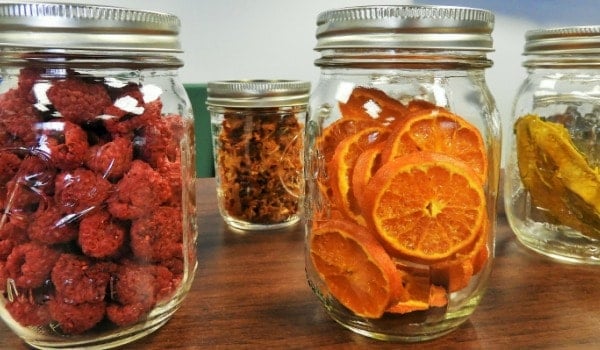
Dehydrated foods provide a lovely crispy texture.
Dehydration is another cooking technique that has been around since the beginning of time. Modern cooking is using this method to add new texture and flavor to traditional meals.
Modern dehydration methods
Dried foam: Take a liquid such as juice and combine it with xanthan gum and methylcellulose. Dehydrate the mixture until it turns into a crispy foam.
Soil: Grind dried vegetables or fruit into a coarse powder for a lovely visual effect.
Croquanter technique: Created by Chef Ferran Adria, this method dehydrates fruit, veggies, or yogurt at low temperatures for long periods to create crispy elements that retain their flavor. They are often created as geometric shapes for extra visual appeal.
How to make raspberry crisps
Ingredients
- 1 cup pureed raspberries
Method
- Spread raspberry puree onto baking paper. It should be about ¼ thick. Use a stencil to create perfect shapes.
- Add to a dehydrator at 130°F for 10 hours or until the raspberry is crisp.
6. Liquid nitrogen
Difficulty factor: Intermediate
At -346°F, liquid nitrogen is very cold and offers some unique possibilities in the kitchen. It gained notoriety thanks to Chef Heston Blumenthal who used it in a variety of dishes back in the 2000s.
Liquid nitrogen allows flash freezing of ice cream in seconds rather than half an hour or more. Freezing the mixture as fast as possible reduces the size of the ice crystals, resulting in a creamier texture.
Best uses for liquid nitrogen in the kitchen
- making ice cream and sorbet.
- freeze milk and crush it into snow.
- freeze berries then gently break up into druplets.
What you’ll need
- liquid nitrogen
- dewar or similar container for transportation
- gloves and safety glasses
Safety message: Always keep a window or door open to allow air into the room. Liquid nitrogen can kill in an enclosed space as it displaces oxygen. Never allow liquid nitrogen to touch the skin.
7. Smoking
Difficulty factor: Easy
Culinary smoking guns add amazing smoky flavor to food. As with most molecular cooking techniques, smoking also creates a visual element that traditional cooking has a hard time competing with.
To make flavor-infused smoke you’re going to need a smoking gun. With this piece of equipment, you can burn wood chips such as maple, hickory, or apple. They impart the smoky flavor into any food of your choice.
Tips to improve smoked food
- When plating up, cover each dish with a lid or glass then direct some smoke under each cover. When the lid is removed a smoky veil lifts and reveals the meal.
- Leave smoking until as close to serving time as possible as it loses intensity over time.
- Limit the use of liquid smoke as it has an intense flavor.
- Try smoking chocolate, ice cream, cocktails, or butter for an exciting twist.
- Use teas or spices in your smoking gun for more flavor variety.
- For more intense flavor, place the food in a zip-lock bag and add smoke, then seal until you’re ready to serve.
8. Rapid infusion
Difficulty factor: Easy
Rapid infusion takes a process from chemistry and turns it into a food-focused triumph. The rapid infusion method takes ingredients like spices or coffee and infuses them into a liquid. As the name suggests, it is a fast process that takes minutes.
Rapid infusion: Method 1 (using iSi whipper)
You’ll need an iSi whipper and a fine sieve.
- Pour liquid such as water or oil into the iSi whipper. The liquid should be at room temperature for this method to work.
- Add an ingredient to infuse like mint or coffee.
- Seal the whipper, charge the gas, and lightly swirl for one minute before allowing to rest for one minute.
- Gently release the gas from the iSi then open the canister. Pour the liquid through a sieve into a bowl.
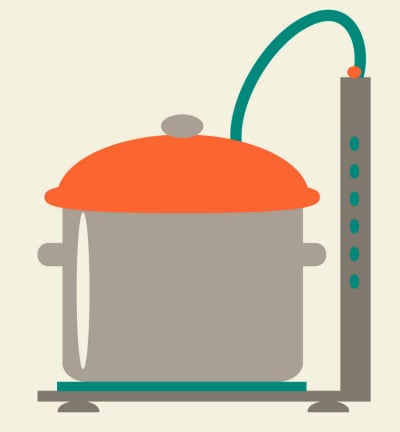
Rapid infusion: Method 2 (using a hot infusion siphon)
An infusion siphon is a piece of equipment you’d expect to see in a lab, not the kitchen.
Liquid is heated in a lower vessel which creates pressure. The vapor starts to force liquid into the upper chamber which becomes infused with the flavors from the ingredients in the upper chamber.
After a couple of minutes, switch the device off and the liquid will drain back into the lower vessel. There will be one final gush of liquid that signals the process is complete.
A hot infusion siphon can be used to make coffee and tea, flavorful broth like dashi, and cocktails.
9. Plating Up
Difficulty factor: Ranges from easy to hard.
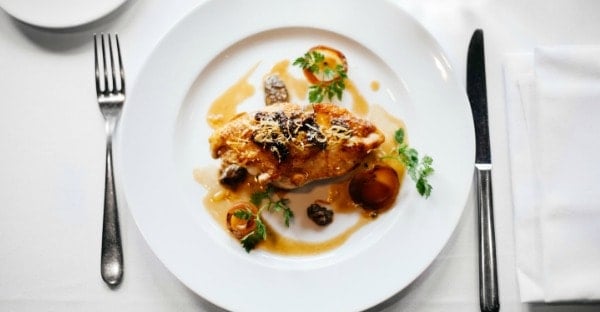
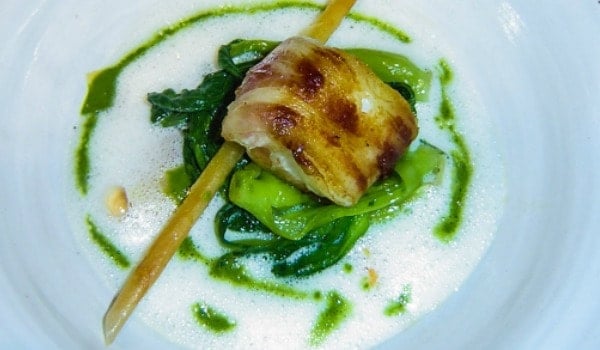
Add your own signature when plating up.
No discussion of molecular cookery can leave out plating up. For most of us, sight is our strongest sense, and we will often judge food based purely on appearance.
There is more than one way to present a dish. What are you trying to achieve? Rustic, minimalist, geeky, retro? Be creative and express your personality on the table.
Choice of plate is important. Choose suitable sizes and shapes to match your food.
Balance the proportions of each element on the plate. You don’t want huge amounts of pea puree just because you made too much. Consider the hero of the dish and make it stand out.
Vibrant colors always please. When you choose ingredients, they should pair well in flavor and also appearance. Choose colors that complement or contrast each other effectively.
The texture is vital to a successful meal. Try to combine different textures – mushy, crispy, creamy, fine, crumbly, gritty. A meal could be boring if it is all mushy food.
Other techniques worth trying
Edible paper: Use ingredients like soybeans or potato starch to create an edible paper that adds some flair to the plate. You can use additional ingredients like fruit juice, vanilla, or cinnamon to infuse more flavor into your paper.
Meat gluing: Meat glue, or transglutaminase, binds together food like bits of chicken, meat, or fish. This glue allows a cook to produce creative food patterns using different foods.
Frequently asked questions
Who invented molecular gastronomy?
The term molecular gastronomy was coined by Nicholas Kurti, a Hungarian physicist, and Herve This, a French chemist. Their focus was on food processing at scale and they proposed studying cooking as a discipline of food science.
Is molecular gastronomy safe?
Most ingredients used in molecular gastronomy are considered safe. Some methods use additives like calcium salts and xanthan gums which can cause side effects like bloating and other digestive issues. Allergy sufferers should always check what ingredients are being used if they are at a restaurant.
What is a Molecular Gastronomy Kit?
A molecular gastronomy kit is a convenient way to get started experimenting with new cooking techniques. A kit usually comes with recipes, some basic tools, and commonly used ingredients in molecular gastronomy like agar agar and calcium lactate.
Final words
Molecular gastronomy is extremely rewarding. What’s not to love about creating meals using unique methods, geeky tools, and unheard-of ingredients. Modern cooking techniques will open up your world to new flavors, textures, colors, and aromas. Food that fulfills all our senses in one hit.
Molecular cooking isn’t just for food snobs. Although the movement began in fancy restaurants, this field of cooking has evolved. It’s now become a fun pass-time for home cooks who love exploring new boundaries. Sous vide was hardly heard of a decade ago, but these appliances are commonly available now.
Some of the required equipment can be expensive so “dip your toe in the water” when starting. Choose one technique and master it, like spherification or fermentation. They’re great options because there isn’t much cost involved in getting started.
Leave a Reply