In my recent experiences with the world of air fryers, I have learned a couple of things: First of all, an air fryer is not really a replacement for deep-frying your food, though it can help you achieve healthy, crisp, golden, brown food.
And second, no two air fryers are created equal.
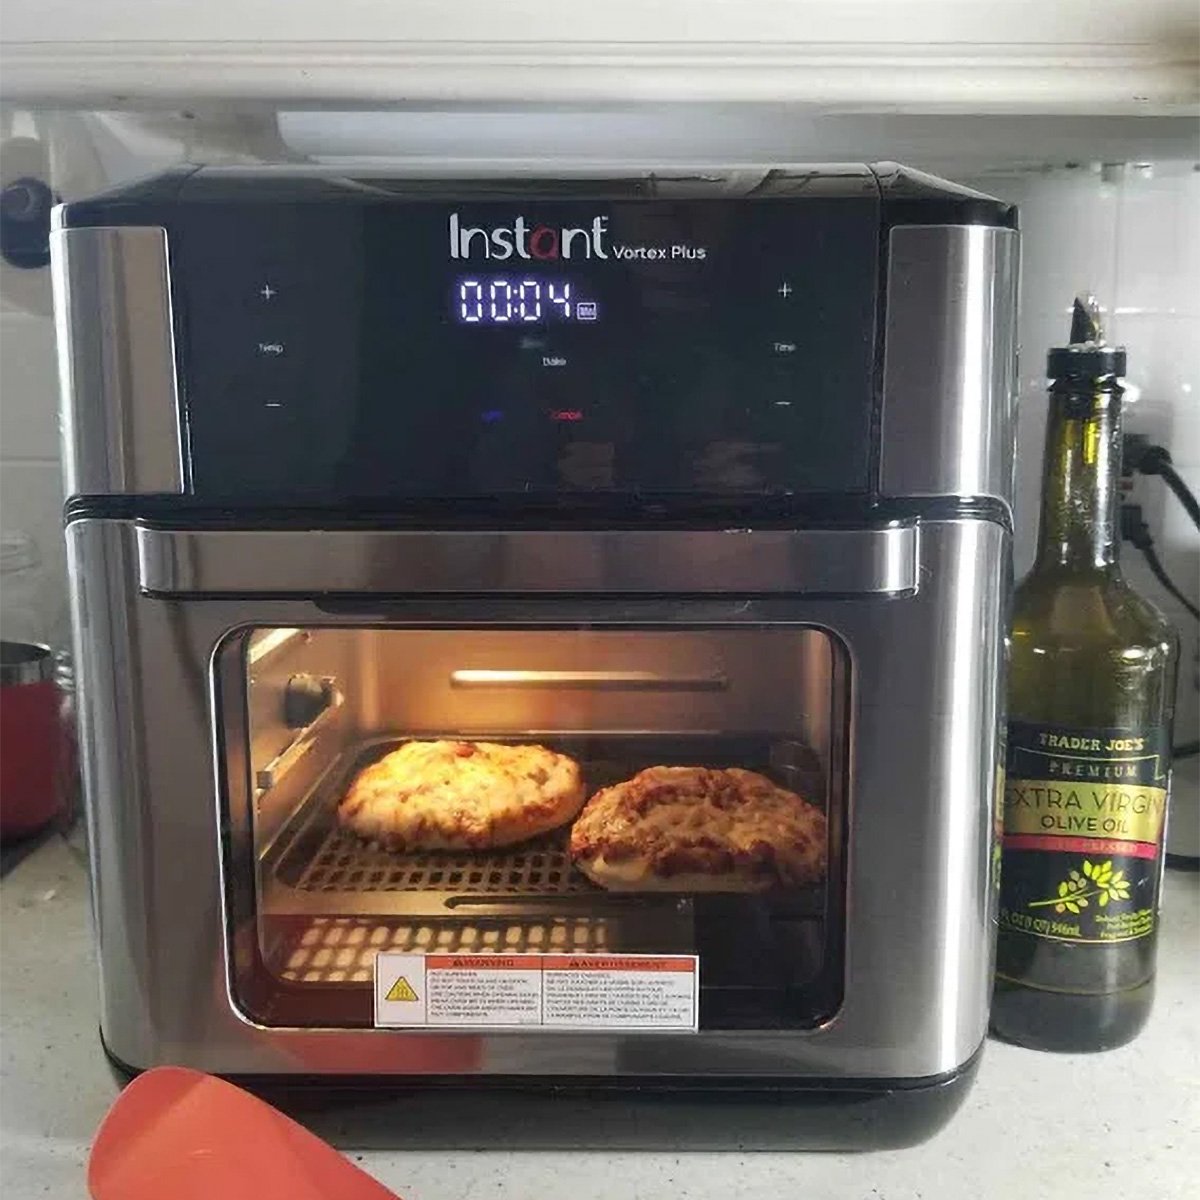
With these things in mind, I was prepared to be open to the capabilities of the Instant Vortex Plus when I opened the box to find an air fryer unlike any I have tested previously. I began to wonder if this would be a very unique experience for me or if this was a similar air fryer with a different look. I was eager to dig in and give it a go.
In this article, I will show you some of the ways you can use the Instant Vortex Plus in your own kitchen, highlighting areas where it really excelled as well as its shortcomings. Finally, I will offer a few comparisons with air fryers of similar price, size, and design.
My goal is to help you decide which air fryer is a fit for you based on your needs. After all, the price range for these appliances is quite vast, and the features are varied. I believe that there is an air fryer out there with your name on it. First, let's see what the Instant Vortex Plus has to offer.
Table of Contents
- What’s in the Box?
- How Does the Instant Vortex Air Fryer Look/Feel/Sit?
- How Easy Is It to Set Up?
- Cooking Burgers in the Instant Vortex Plus
- Cooking Roast Chicken (with Rotisserie) in the Instant Vortex Plus
- Cooking Frozen Pizza in the Instant Vortex Plus
- How Easy Is It To Clean?
- How Would I Improve the Instant Vortex Air Fryer?
- What’s the Warranty?
- Verdict
- How Does It Compare?
What’s in the Box?
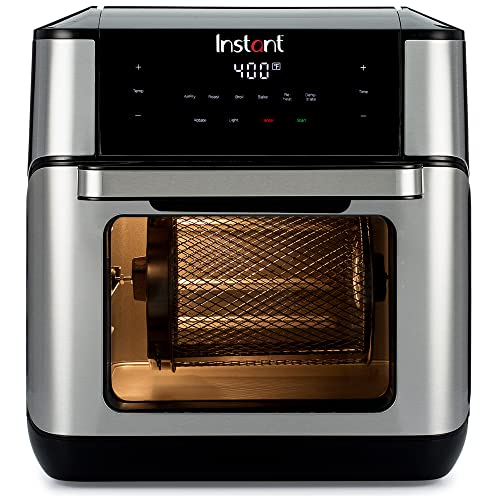
Upon opening the box, I was initially a bit intimidated by the first things I saw tucked into the packaging, specifically a long metal rod and two fork-like brackets. I set those aside, determined to figure out how they would be used a bit later, and revealed the unit itself, which was quite boxy in shape. This machine looked more like an oven than any others I had tested previously.
I got this thing to my counter and opened the door to reveal a cylindrical rotisserie basket, a drip tray, and two perforated pans. Already, it seemed that figuring this machine out would be a bit of an undertaking with its wide array of attachments and parts. I knew immediately that I would have to peruse the Getting Started Guide if I were to be well-prepared to start cooking.
Here's a list of what was in the box:
- air fryer unit
- drip pan
- perforated cooking trays (2)
- rotisserie basket
- rotisserie fork
- rotisserie spit
- rotisserie lift
- Getting Started Guide
- safety, maintenance, and warranty cards
How Does the Instant Vortex Air Fryer Look/Feel/Sit?
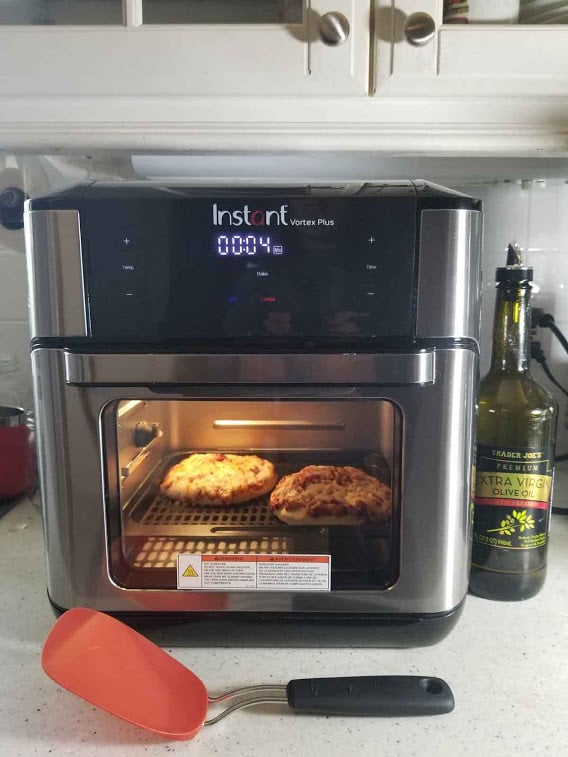
The Instant Vortex Plus is a really boxy machine, measuring 16.7 x 15.1 x 15 inches in size and weighing just under 20 pounds. It will certainly require a substantial piece of real estate on your kitchen counter, but when I considered that it is a 10-quart air fryer, I figured it might justify its size with its capabilities.
It was pretty solid yet easy to move—something that would come in handy as this air fryer required 5-inches of clearance above and behind it while in use.
The exterior is a mix of stainless steel and a shiny black plastic housing. It offers a clear glass window that is built into the door, allowing a view of the inside, a feature that I had not seen in pod-type air fryers like the Cosori XL or the Gowise 5.8-qt air fryers. I had a feeling I was in for something different with this model, which resembled a mini oven.
How Easy Is It to Set Up?
The set-up of this machine would certainly require a bit of reading to get into all of the gadgetry that accompanied it. As eager as I was to get into the kitchen to get started, I took the high road and consulted the Getting Started Guide. After getting acquainted with the parts and accessories, I followed the 10-step test run, which helped me familiarize myself with the LED display and the built-in smart programs. It walked me through the process of preheating, turning the food indicator, and the cooldown fan that commences when your cooking is finished. Overall, it was informative and helpful. No regrets, whatsoever.
A bit more complicated to understand were the instructions for the rotisserie, but in the end, I was properly briefed on the parts that would come into play and how I would assemble them. It wasn't necessarily hard to understand, but it was certainly a prerequisite to using this model.
Cooking Burgers in the Instant Vortex Plus
Once I had washed the cooking trays and drip pan, I wanted to see if this air fryer could handle cooking burgers. With a variety of functions, including broiling, I was unclear where I should begin, so I consulted the Instant Pot website for their recommendation. I came across the Diner Burger recipe which suggested the Air Fry function with a temperature of 475 degrees and a time of 9 minutes.
First things first, I thought it would be wise to cover the drip tray with foil. I was going on a hunch here, along with a bit of my own cooking experience. It seemed a worthwhile precaution to take, which would optimally make clean up a bit easier.
To be clear, I am a cook who believes in following the rules, at least the first time around, so I did exactly as instructed by preheating the oven while I prepared my burger patties.
First, I chose a pound of 80/20 ground beef that I shaped into burgers, about 5–6 ounces each. I prepared them rather thick, and roughly 4 inches in diameter, each with a divot in the center that I created with my thumb (as recommended by the recipe).
Then, I generously seasoned the burgers with salt and pepper, and, within a few minutes, the oven indicated they were ready.
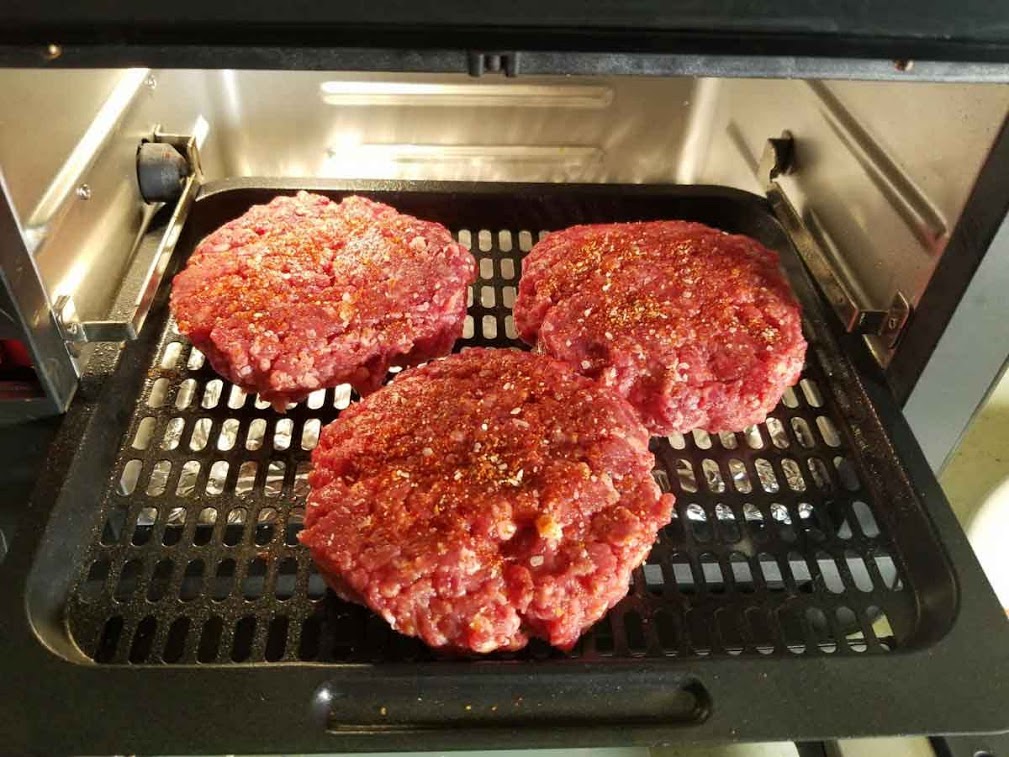
With the somewhat limited space on the cooking tray, I found that I was able to fit three burgers with ample space around them to allow the air to circulate. Any more, and they would certainly be crowded. As the recipe suggested, the oven could accommodate two trays of burgers (in the lower and middle positions in the air fryer). Good to know if I were planning to cook more than three in the future.
I placed the burgers on one of the perforated baking pans that I had lightly prepared with a canola oil spray and slid them into the oven in the middle position. Upon closing the door, the oven began counting down. Curious to see how my burgers were cooking, I was able to have a view through the window, further highlighted by the internal light.
At the halfway-through cooking point, the oven beeped and indicated it was time to turn my burgers. I carefully removed the tray and flipped them with a plastic flipper, slid them back into the machine, and waited for the time to expire.
To check for doneness, I inserted an instant-read thermometer into one. It read 120 degrees, which is just under what I was going for here, but my next move ensured they would reach 125 degrees for a medium-rare burger. I topped two of the burgers with a slice of cheese, leaving one plain for my husband.
I wanted to finish the cooking and melt the cheese, so this time I chose to cook them closer to the heat source in the upper position. I selected the broil function for just two additional minutes. As expected, they were cooked just right with the cheese melted to perfection.
The Results
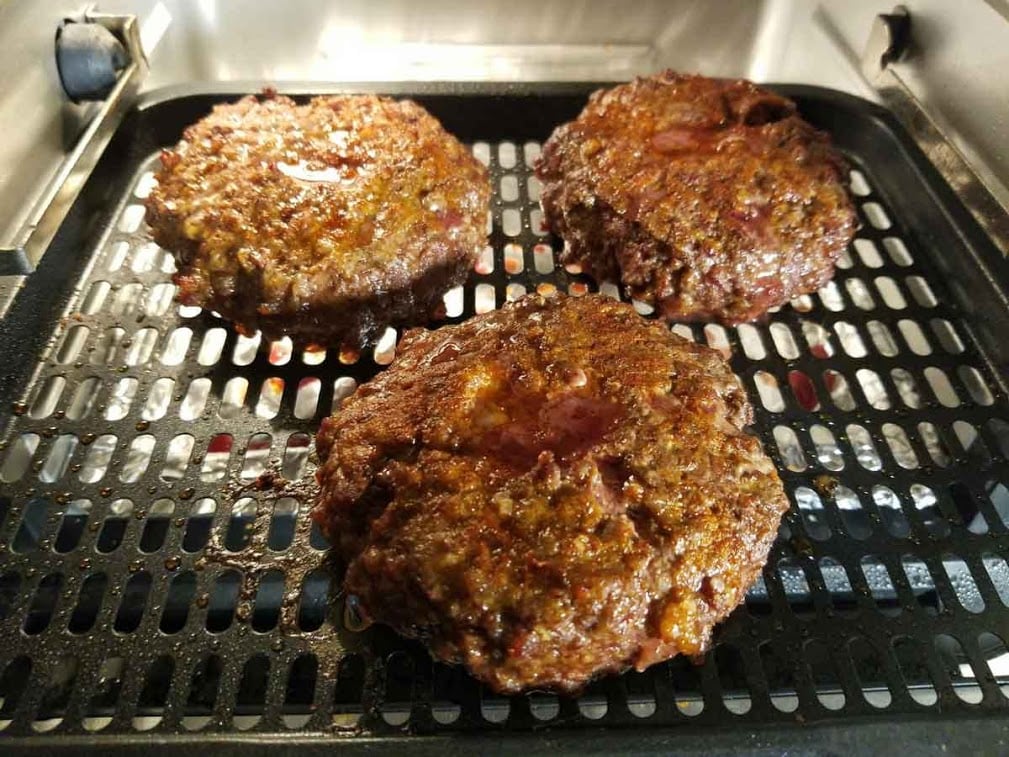
My family was really pleased with these burgers! They were properly cooked to medium-rare, juicy, and really tasty. Because they were cooked on a perforated pan, a good amount of the extra fat was able to drip away from them and onto the foil-lined drip pan. The result is a better-tasting, leaner burger.
Of course, choosing the right protein and fat content is a big part of the equation here, as leaner beef will result in drier burgers. This is why pork chops work so well in an air fryer.
I chose an 80/20 protein to fat ratio, which is really ideal for burgers; certainly something to keep in mind when selecting ground meat.
Another pro-tip is to make a divot in the burgers before cooking. This is helpful when we cook burgers because as heat hits the edges of the burger, it cooks and therefore contracts the meat on the outside more quickly than the middle which results in a burger that is thicker in the middle. The indent counteracts this effect from those cooking methods. By the time our burgers came out of the oven, they were flat and evenly cooked which is desirable.
The one downside to this method of air-frying burgers is that they did not pick up a lot of color on the exterior as the heat was not enough to sear them as much as cooking over a grill. I would not abandon this technique, however, because the ease of cooking and cleanup made it a success in other ways. I could certainly see myself using this method at times when I wasn't in the mood for grilling outside.
Cooking Roast Chicken (with Rotisserie) in the Instant Vortex Plus
Next up, I had to see what the rotisserie had to offer this machine and if it was, in fact, worth the extra effort to roast a chicken this way.
I am no stranger to roasting a chicken. In fact, it is honestly one of my favorite things to cook, as well as a family favorite for dinner in my house. A chicken just tastes better when it is cooked whole. The added benefit of roasting something with bones and the undeniable perk of crisp, browned chicken skin make it so worthwhile. I had high hopes for this method, which, if it was a success, would be a true asset to this machine.
It is important to mention that this is not the time to prepare the biggest chicken you can get your hands on. I did my homework before shopping, and I am so happy I did because while the recommended size for this unit is up to 4 pounds, I did read some reviews that indicated a smaller bird would be better given the size of this air fryer. I settled on a 3-pound chicken which turned out to be quite fitting for the capacity of this oven.
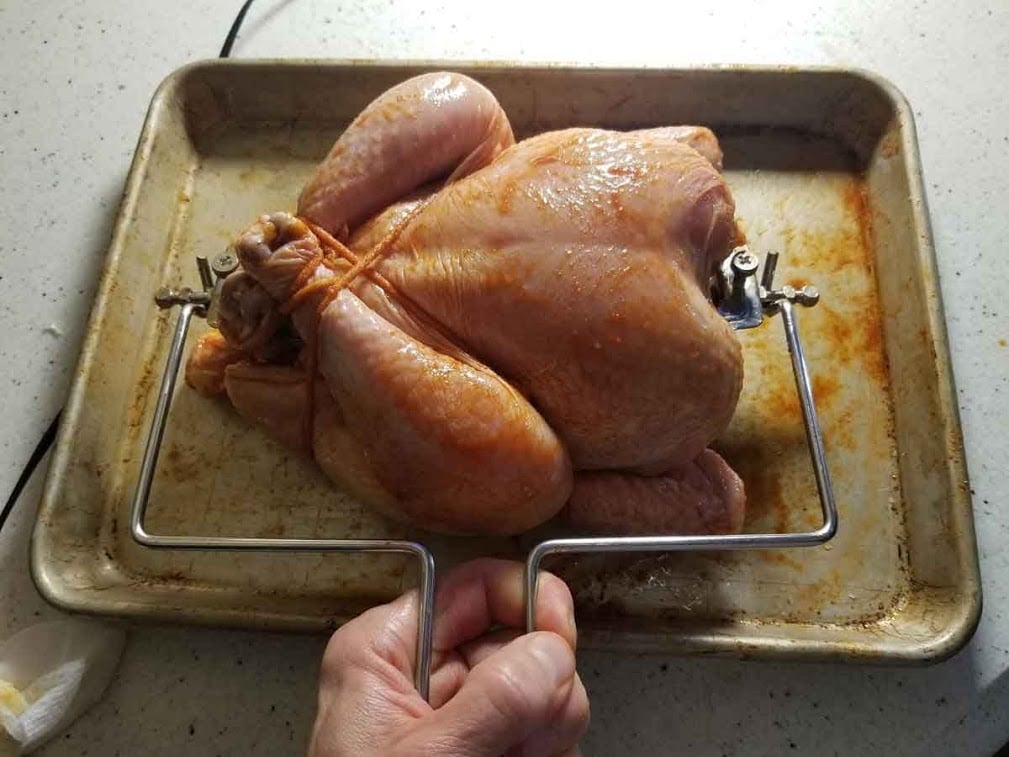
Before I got down to cooking, I had to do a bit of preparation. First of all, I wanted to make sure my chicken was well seasoned. I used a spice rub I keep handy that consists of equal parts kosher salt, brown sugar, and smoked paprika, sprinkling over the exterior of the skin as well as a bit on the inside of the cavity to ensure this would be tasty throughout.
Next up, I had to truss my chicken, which is necessary when roasting a chicken on a spit, so it doesn't move around as it turns. The important thing here is to tuck the wings and legs in securely with butcher's twine. This ensures that your chicken will cook more evenly, as well, so it is generally a good practice.
To get this chicken onto the spit, I had to attach the rotisserie forks to the rod while inserting it through the cavity of the bird. It required some adjustment to get it fitted properly and the tightening of a screw on each of the forks to keep it in place. As this was my first go, it did take some time to get it properly situated. I used the rotisserie lift to make sure it was secure before preheating the air fryer.
As recommended in the Getting Started Guide, I selected the roast function with the temperature set to 380 degrees. The time suggestion was 50–70 minutes, which seemed a bit long for a chicken of this size. I started with 30 minutes, prepared to add more time as necessary.
Once the "add food" indicator had signaled, I lifted the chicken with the rotisserie lift, sliding the spit along the guides inside the cooking chamber until the right end was seated in the notch. I then pushed the red rotisserie catch lever to the right and held it in position, which allowed the catch to receive the spit.
Once in place, I released the red rotisserie catch lever, shut the oven door, and pressed "Rotate" to get things moving. Once the spit began to rotate, I watched through the window in the oven door to ensure that the chicken cleared the sides of the oven. Everything was moving along perfectly.
After thirty minutes, I used my probe thermometer to check the temperature in the thigh. The reading was just below 160 degrees, so I gave it 8 more minutes before I checked it once again. Pleased with the temperature and color, I reached for the rotisserie lift, pressed the red lever again to release the spit, and removed the chicken to a platter to cool.
My rule here is that a resting time of 15 minutes will give the juices a chance to redistribute so they don't run out of your chicken when you carve it. So I waited patiently before carving and bringing it to the table for the ultimate critique.
The Results
This chicken came out with a gorgeous, evenly browned, mahogany-colored skin. It was crisp, and it smelled amazing. I was so eager to carve it but was rewarded with juicy, well-rested meat that was evenly cooked throughout.
![Chicken Cooked] Chicken Cooked]](https://tastylicious.com/wp-content/uploads/2020/12/Chicken-Cooked-1024x712.jpg)
My family really loved it. Even the white meat, which can tend to get a bit dry as it takes longer for the legs and thighs to cook, was devoured. I was really excited about this process and really confident that I would revisit this technique again and again.
As I mentioned, I roast chicken frequently, and it is a challenge to get evenly browned skin that is really crisp. Typically, the top gets brown and the underside stays a bit pale. This was absolutely not the case with this rotisserie-roasted chicken, because every bit of it had the opportunity to get blasted with the heat and high fan that originate in the top of this oven. My thoughts are already drifting toward cooking other cuts of meat using this method. A small pork roast or Cornish game hens would surely be phenomenal!
Cooking Frozen Pizza in the Instant Vortex Plus
My third attempt was a test to find out how frozen pizza turns out in the Instant Vortex Plus. By now, I had a sense of the space limitations of this oven with an interior width of only about 9 inches.
I was determined to find a pizza that would fit into the oven. It was a struggle, quite honestly, as most frozen pizzas were larger in diameter than the size of the baking tray so I was forced to opt for smaller, single-serving pies that are 4 inches in diameter.
I managed to fit two of these small, single-serving pizzas on a tray, set diagonally to allow for some space between them. I preheated the air fryer, hoping to get it as close to the recommended 425 degrees as I could. The maximum temperature for this machine is 400 degrees, but with a fan much like a convection oven, I was pretty confident that I would be okay with this high temperature.
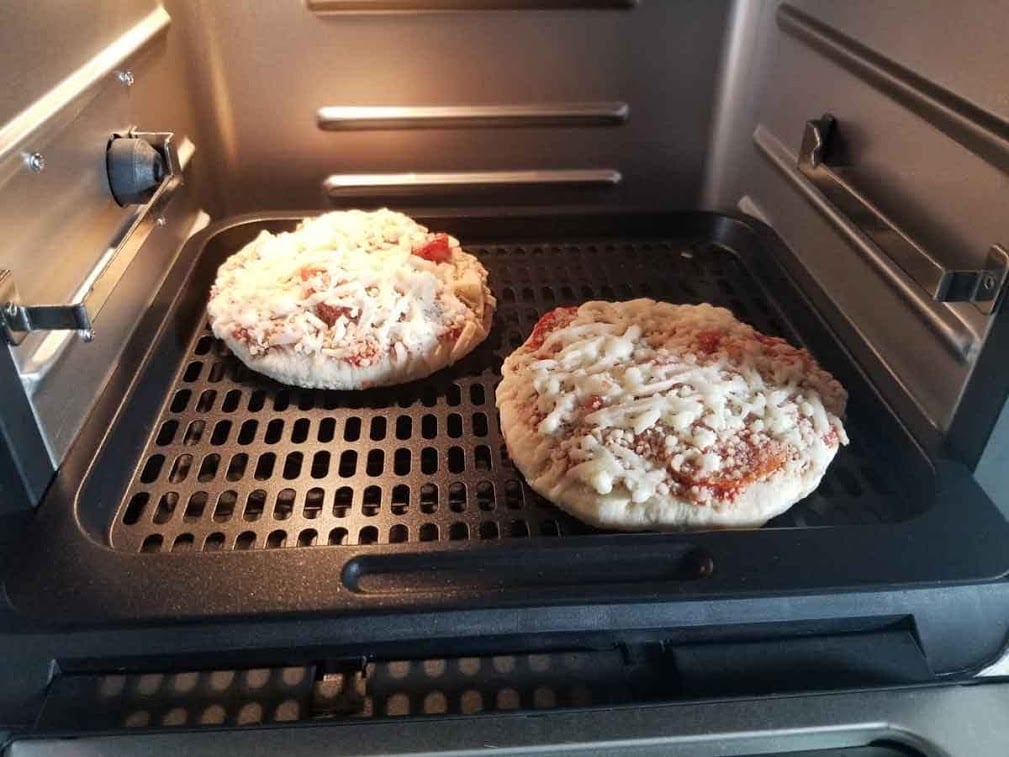
After just a few minutes, I was ready to go, setting the timer to 8 minutes which is a few minutes shy of the package instructions, as I suspected this would cook a bit more quickly than a conventional oven. I chose to place the perforated tray in the lowest position, away from the heat source, to cook this pie without burning the cheese. Closing the door, I recognized once again the benefit of the window, which would allow me to keep an eye on things as they cooked.
At around the 6-minute mark, I noticed the top of the pizzas starting to pick up a bit of color, despite having them as far from the heat source as I could manage. Meanwhile, the undersides were really pale and not nearly cooked. I needed to slow down the browning so that I could get the crust thoroughly cooked, so I decided to use the second perforated pan to deflect some of the heat from the top by sliding it into the middle rack position. This allowed for adequate heating and airflow while slowing the browning of the cheese. It worked and within a few more minutes, I removed the pies, which seemed ready to eat.
The Results
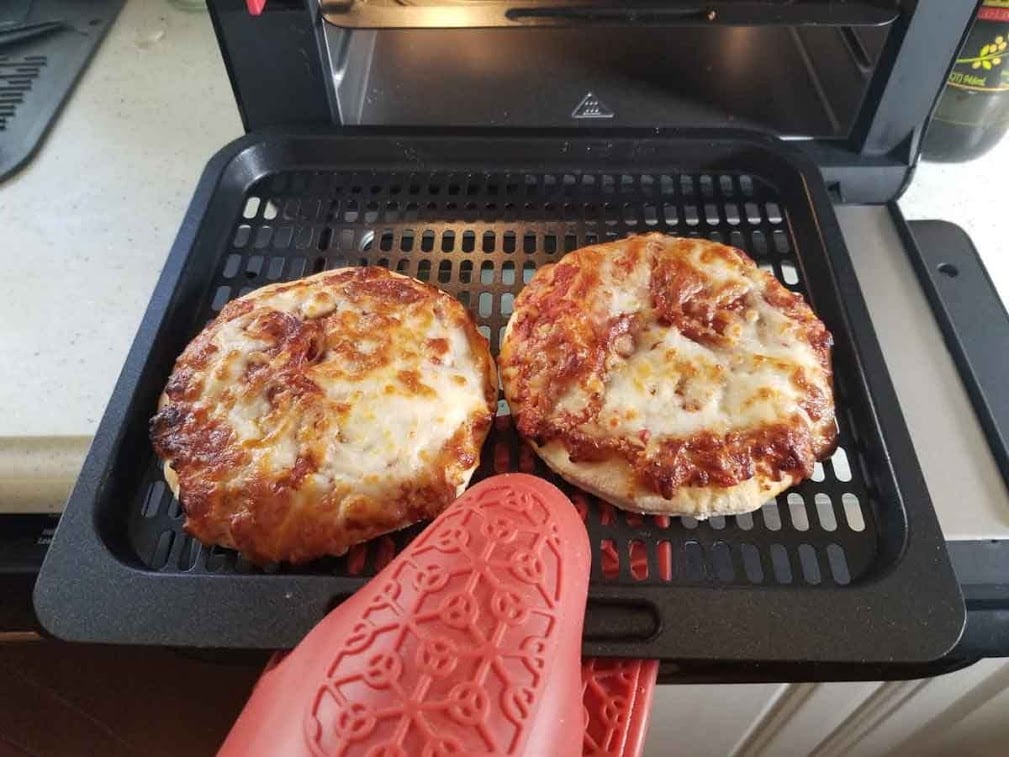
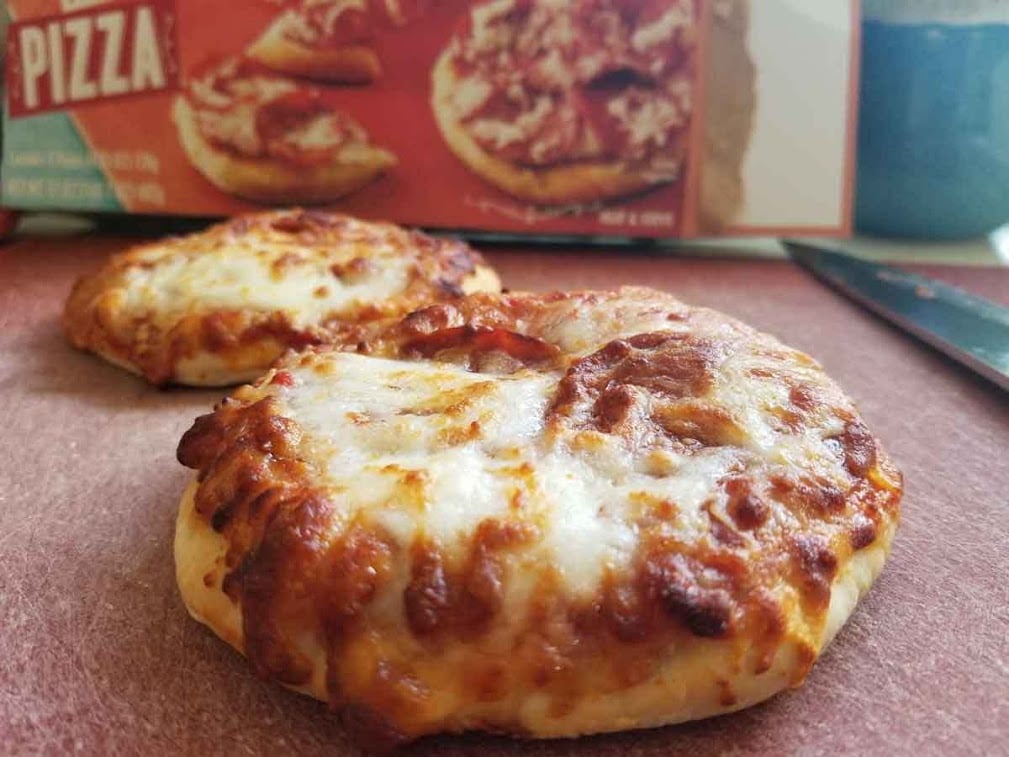
The results of this test were not stellar. The cheese was melted, and the dough seemed thoroughly cooked, but the crust was just not crisp. Of course, it was edible, but I was looking for something better than that. The truth is, I wouldn't recommend this air fryer for items of this nature that would benefit from a lower heat source. Your best bet would be your regular, conventional oven or even a toaster oven (like this Cuisinart model) which provides heat from the bottom and enables your pizza to pick up some color.
With that said, I did take the time to reheat pizza in the air fryer the next day. The results were certainly more favorable than cooking it straight from the freezer. It certainly took the chill off and brought the cheese back to life. Again, I achieved no noticeable crisping of the crust, but in a pinch, I could see how this could be an option. Perhaps quicker than preheating your oven, but possibly not quite as good.
How Easy Is It To Clean?
I have tested several air fryers, but this is the first one of an oven style that features a rotisserie, rotisserie basket, and three separate trays. With that said, there are some parts of this model that are easier than others to clean. The cooking trays and drip pan all boast non-stick surfaces and are technically dishwasher-safe. These pans actually cleaned up quite easily. I would recommend lining the drip pan with aluminum foil as recommended in the manual to make clean-up even easier, but overall, a bit of hot soapy water and a non-abrasive cloth had them clean in no time, at all.
The rotisserie spit and forks, as well as the rotisserie basket, are all a bit trickier to clean, but even after roasting a chicken on the spit, I managed to restore them to their original shine. A 10-minute soak in hot water with dish soap really loosened up most of the browned bits that had stuck to the spit and forks. I felt comfortable scrubbing them as they do not have a non-stick coating. In the end, they looked as good as new.
The oven door of this air fryer is actually removable, which is a nice feature. By opening the door at a 45-degree angle, you can rather easily disengage the hinge. This enables you to clean out any drips or crumbs that may have accumulated. I would not recommend submerging this door in water, however, as water can collect inside the window, making it steamy and cloudy.
The inside walls and the heating coil were a bit spattered but were easily cleaned with a damp cloth. And, as far as the outside goes, with a combination of brushed stainless steel and black plastic housing, a general kitchen spray really did the job well.
How Would I Improve the Instant Vortex Air Fryer?
To be honest, no air fryer is perfect, and there are definitely a few things that I found myself struggling with as I tested it.
- First of all, I would love this machine more if it had a lower heating element. As I discovered in my pizza cooking test, no browning takes place on the underside of your food, making this a poor option for things like toast. Of course, it doesn't claim to be a toaster oven, but a cook could dream, right?
- My second complaint is that the timer only goes up to one hour, which is fine for many things, but I would love to put this to use as a dehydrator, and in many cases, an hour would simply not cut it.
- Finally, I found the manual and Getting Started Guide to be really limited. I have tested other machines that include recipe booklets with color photos that give you a better sense of their capabilities and options. Perhaps not a big deal, but I found myself running to my computer for help when I really wanted to be in my kitchen.
What’s the Warranty?
As with any kitchen appliance, it is good to know if the manufacturer stands by their product. In the case of this model, the limited warranty is effective for one year from the date of the original consumer purchase. The manual suggests registering your Instant Brand appliance to validate your warranty within thirty days of purchase by visiting this page.
They do offer the following number to obtain service under this warranty: 800-828-7280, which you can call any time between 10:00 Am and 4:00 PM ET from Monday to Friday.
Verdict
Just like every other air fryer that I have tested, this one has its strengths and weaknesses.
One thing that I felt was a real asset was its cooking capacity, as well as the ability to accommodate two trays at a time, which is really great if you are cooking for a family. So many air fryers (like the Cosori, Gowise, Nuwave and PowerXL) are limited to the amount of food you can fit into the single-layer fryer basket, but with the Instant Vortex Plus, you can prepare an entire meal with a main dish and a side, in the same oven at the same time.
Another determining factor is the size of this model. Standing nearly 17 inches tall and 15 inches wide, it undoubtedly takes up a pretty big area in my kitchen. Beyond that, it is recommended that you allow 5 inches above and behind it for proper airflow. With that said, this machine is better suited for a kitchen with ample counter space.
The other big advantage of the Instant Vortex Plus compared to similarly priced models is the wide temperature range, giving you the ability to slow cook and dehydrate. Being able to run the machine at 100F for a long time allows it to handle even more cooking tasks, further justifying it's lease on your countertop real estate.
To sum up:
- If you're cooking for a family of 4 or more,
- If you'll use the low-temperature modes (dehydrate and slow-cook),
- If you have ample counterspace (or cupboard storage space to tuck this one away when you're not using it),
The Instant Vortex Plus is an outstanding air fryer option for you, especially at it's current low price.
How Does It Compare?
Before getting on board with any new appliance, it is wise to consider other options so that you can make an informed decision. In this next section, I will compare the Instant Vortex Plus with three other air fryers of similar price, function, and capacity. I aim to break things down so that you can see how they measure up. After all, what works for one cook, is not necessarily what is best for you.
Instant Vortex Air Fryer Vs Cosori XL
The first contender is the Cosori XL which is a really popular, well-rated machine. In a side-by-side comparison, the first and most notable difference between these two is the design of these air fryers. More specifically, the Cosori is equipped with a non-stick, dishwasher-safe fryer basket that opens like a drawer which allows you to remove it entirely from the unit, while the Instant Vortex Plus looks like a small oven with the advantage of an oven door that allows you to keep an eye on your food as it cooks.
Beyond the difference in design, the Cosori Boasts 11 preset cooking functions which are really based on what food you are cooking. In other words, if you want to cook steak, it is as easy as selecting the steak icon. The machine is equipped to really do the work for you in terms of determining time and temperature if you so choose. However, you can just as easily select the time and temperature manually. The Instant Vortex Plus asks you to bring a little more knowledge to the cooking experience, requiring you to know if you want to broil, bake, or roast your food. The Instant Vortex, with its variety of attachments and rotisserie, may just be too complicated for many home cooks who have no interest in this type of cookery.
The bottom line is that these two air fryers are fairly matched in price, so the question is this: how do you plan to use your new air fryer? If you are looking for something more streamlined, simple, and easy to clean, the Cosori XL may be for you. On the other hand, if you are looking for something with more cooking features, the Instant Vortex may suit your needs with its rotisserie and three position oven rack flexibility.
 Instant Vortex Plus Air Fryer $131.67 |  Cosori XL |
|
| Watts | 1500w | 1700w |
| Capacity | 10 qt | 5.8qt |
| Basket | Rectangular cooking pan | Square |
| Presets | 7 | 11 |
| Temperature range | 185-400 degrees | 180-400 degrees |
| Check Price on Amazon | Check Price on Amazon |
Instant Vortex Plus Vs Instant Omni Plus
My next contender is the Instant Omni Plus. It is a digital convection oven model that offers combination air fryer and toaster oven capabilities. I selected this particular model based on design. It is somewhat similar to the Vortex with its front-opening oven door, but the Omni also offers toaster oven capabilities. I found this intriguing and it seemed to satisfy my desire for a lower heat source that the Vortex lacks. The Omni can do things like make toast and cook a frozen pizza complete with a crisp bottom crust which was something the Vortex failed at.
Another difference between these machines is the temperature range. The Omni offers a much wider range, from 70-450 degrees, making it a strong contender for the cook who also wishes to get into some dehydrating. Add to this the timer that allows you to use it continually for 72 hours which is really amazing for things like beef jerky which require a low temperature over a long period of time; something the Vortex could not handle with its limited 60-minute timer.
The Omni has an option for a low or high fan when cooking, something I felt that Vortex would have benefitted from. This would be really convenient if you planned to use this oven for any kind of baking which would be best with a lower fan. The option really gives the cook a bit more control which is certainly something that some cooks would appreciate, while others may not really find this to be a deal-breaker. Again, it comes down to knowing how you intend to use your air fryer.
Both models include a rotisserie which is only an asset if you plan to cook a whole chicken or larger cuts of meat. I did note that the rotisserie forks on the Omni are a bit improved with a thumb screw that makes it easier to tighten. Otherwise, these machines are quite similarly matched as far as the rotisserie goes.
The Omni Plus, with its toaster oven features, is substantially bigger than the Vortex, but with that comes a bigger price tag. At about twice the price of the Omni, it is important to ask yourself if it is worth it.
 Instant Vortex Plus Air Fryer $131.67 |  Instant Omni |
|
| Watts | 1500w | 1800w |
| Capacity | 10 qt | 26 L |
| Basket | Rectangular cooking pan | Rectangular cooking pan |
| Presets | 7 | 11 |
| Temperature range | 185-400 degrees | 85-450 degrees |
| Check Price on Amazon | Check Price on Amazon |
Instant Vortex Plus Vs GoWISE 12.7-Quart Air Fryer Oven
My last comparison has the Vortex Plus stacked up against the Gowise 12.7-quart air fryer oven. These two machines seem quite similar in outward appearance, as well as having rotisserie capabilities. The Gowise model, however, takes the rotisserie spit to new heights with a shish kabob attachment and a rotisserie steak cage, making this level of cooking function a fit for someone who plans to use their air fryer oven for meat cookery. While the Gowise claims to be able to support a 5-pound chicken, several reviewers suggested keeping it in the 3-pound range, much like the Vortex. Better safe than sorry, I would say, as I am reluctant to commit that either of the machines is strong enough to support and turn a heavier bird.
Another notable difference is the stainless steel interior and cooking trays that accompany the Gowise model. Other than the drip tray, all of the parts are free of non-stick coating which may appeal to some cooks. On one hand, the non-stick coating may be easier to clean, yet other cooks may prefer the durability of stainless steel.
If you are a cook that is impressed with gadgetry, the Gowise model may suit you with its assortment of attachments that seem to offer a wide array of applications. Of course, these extra parts will require you to store them somewhere, so if you have limited space in your kitchen you may want to steer clear of the extra accessories.
The Gowise version is accompanied by a colorful book featuring 50 recipes to get you started in the kitchen which is a nice addition to the Gowise products and it serves as a great point of reference for making a wide variety of dishes from snacks to desserts.
Again, the bottom line may be a deciding factor, and with the Vortex Plus a bit less expensive, this may be your machine. In either case, you are getting an air fryer oven with flexibility and a rotisserie attachment which makes both of these machines solid contenders.
 Instant Vortex Plus Air Fryer $131.67 |  GoWISE 12.7-Quart Air Fryer Oven $103.74 |
|
|---|---|---|
| Watts | 1500w | 1600w |
| Capacity | 10 qt | 12.7-qt |
| Basket | Rectangular cooking pan | Rectangular cooking tray/basket |
| Presets | 7 | 15 |
| Temperature range | 185-400 degrees | 90-400 degrees |
| Check Price on Amazon | Check Price on Amazon |
There is undoubtedly a place in the modern home kitchen for the air fryer. With its ease of cleaning and quick preheat time, these appliances are a great fit for people who are looking for an efficient way to prepare healthy meals that aim to satisfy our desire for deep-fried food.

Leave a Reply