Multicookers have become extremely popular recently, due to the wide variety of ways you can utilize them in the home kitchen. I am going to have a look at the Duo Crisp Air Fryer from Instant Pot, which is the newest addition to their line of pressure cookers. With the addition of a unique air fryer lid, this machine offers a whole new range of cooking possibilities that allow you to broaden your scope in the kitchen with one single appliance.
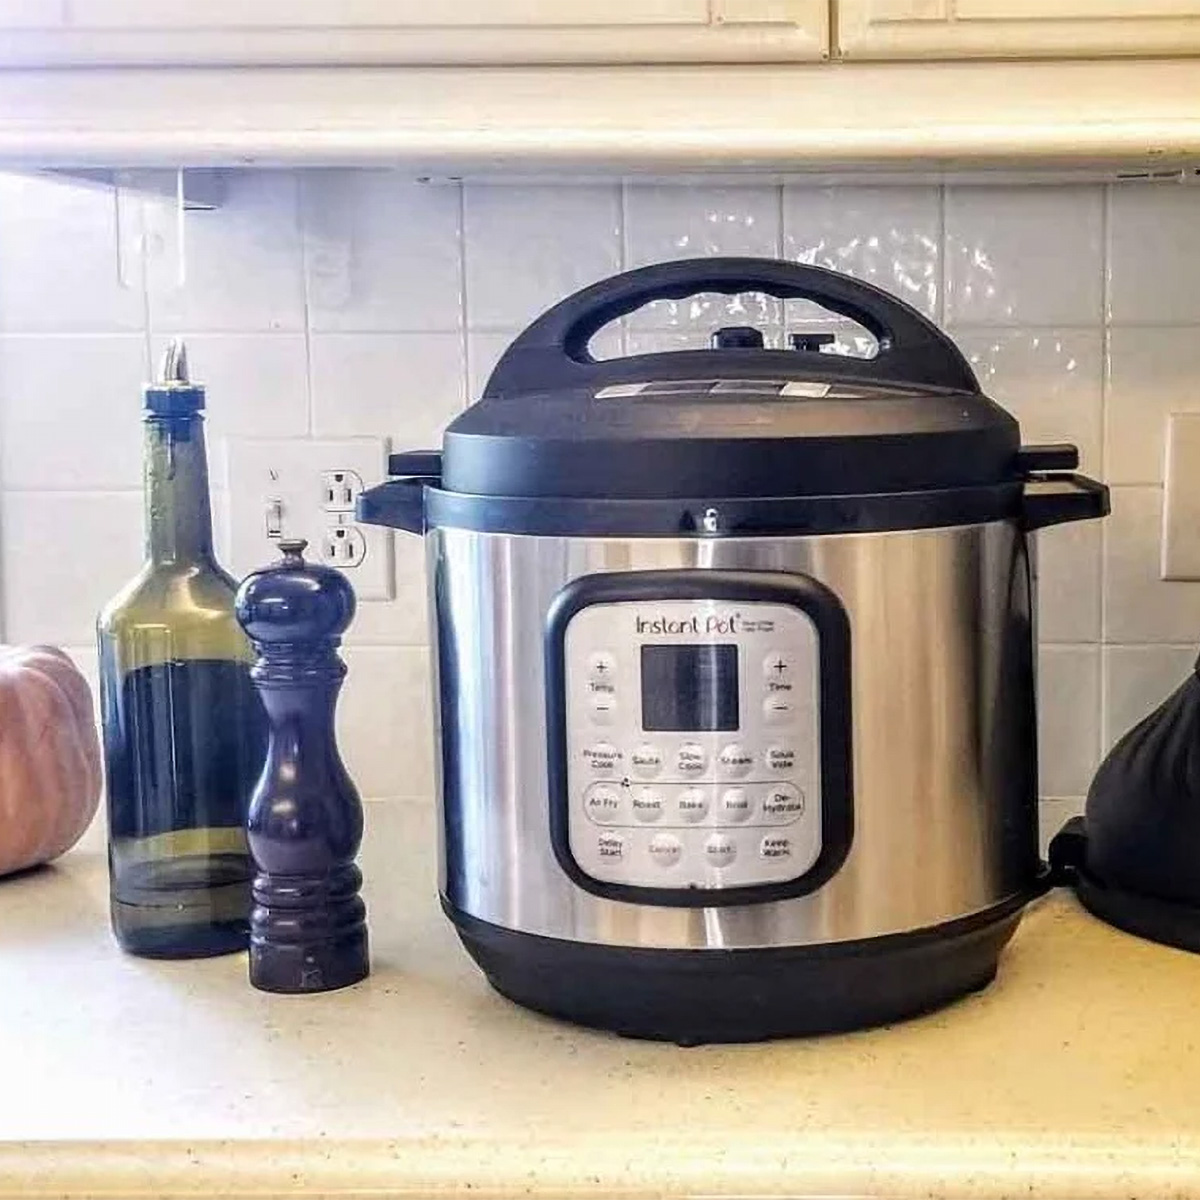
Of course, not all multicookers are created equally. My goal is to demystify the process of pressure cookery with the added air fry function. More specifically, I will help you determine if this type of machine has a place in your own kitchen. Beyond that, I will have a look at three other multicooker options and compare them to the Duo Crisp so you can be sure which is right for you.
In the end, my hope is that you better understand how these appliances can make your time in your kitchen enjoyable and successful as you reach new heights in your culinary endeavors.
Table of Contents
- What’s in the Box?
- How Does the Instant Pot Duo Crisp Air Fryer Look/Feel/Sit?
- How Easy Is It to Set Up?
- Cooking Wings with the Air Fryer Function
- Cooking with the Pressure Cooker: White Bean, Sausage & Kale Soup
- Cooking a Whole Roast Chicken Using the Pressure Cooker & Air Fryer Functions
- How Easy Is It to Clean?
- How Would I Improve the Instant Pot Duo Crisp Air Fryer?
- What’s the Warranty?
- Verdict
- How Does It Compare?
What’s in the Box?
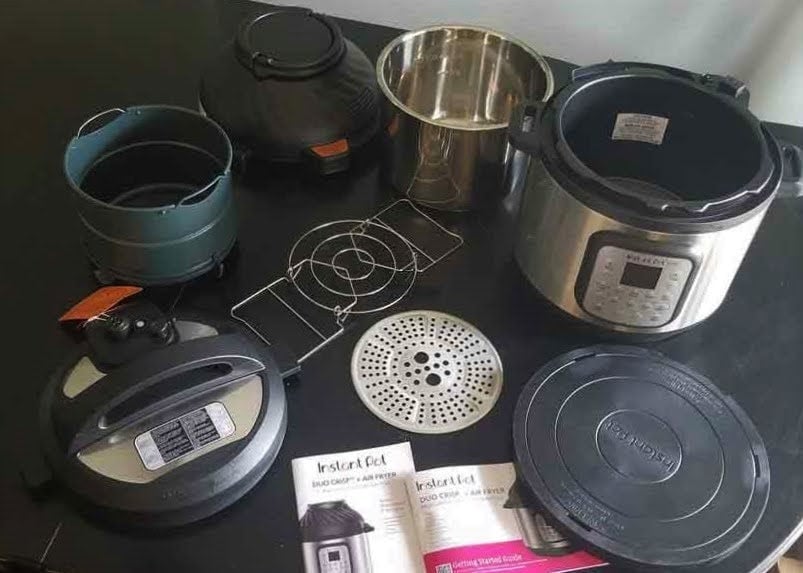
When the Instant Pot Duo Crisp arrived, I was a bit surprised by the size and weight of the package. I muscled it into my house and managed to unpack it, but I was rightfully overwhelmed by the size of the box.
I also began to question if my kitchen counter could handle an appliance of this size. Once I got into the box and sorted through all of the parts, it began to make sense. Much of the added weight and size was due to the fact that this machine contains two separate lids that are used for different functions, as well as a few added accessories.
The box included the following:
- Pressure cooking lid
- Air fryer lid
- Broil/dehydrating lid
- Multi-level air fryer basket
- Air fryer basket base
- Protective pad and storage cover for air fryer lid
- Multi-functional rack
- Cooker base
How Does the Instant Pot Duo Crisp Air Fryer Look/Feel/Sit?
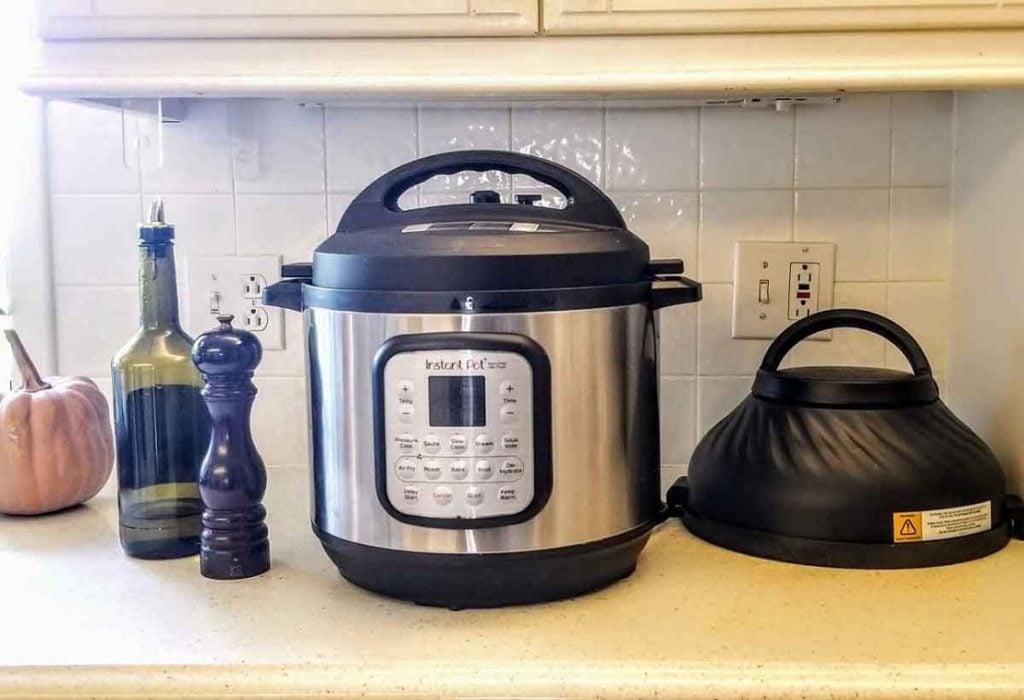
At first glance, the base of this machine looks like a typical pressure cooker with brushed stainless steel sides and black trim. One-touch controls and preset cooking programs are located on the front of the pot. The bright, easy-to-read dual display with large font makes programming relatively simple, with 11 functions, temperature, and time controls that give the user a wide range of cooking options.
What makes this unit unique are the two separate lids that correspond with specific functions. The pressure cooking lid is much like many of the other lids of its kind. It has a generous black handle that makes it easy to remove.
The air fryer lid, however, is unique. It has a taller, curved shape with a swirled texture that sort of resembles a Chinese steamed bun. It has a hinged handle that makes it somewhat easy to move, despite its size and weight. And it even has it's own storage cover or protective pad to keep it from burning your countertop.
The unit itself is 15 inches wide and nearly 16 inches tall with the air fryer lid in place. While it certainly fits in my counter space, I would probably not want to sacrifice that much room if I did not plan to use it daily.
Because there are two different lids for this model, I feel that a small kitchen with little storage space may make this tricky to tuck away when not in use. Add to that the fact that it is quite heavy, and I wonder where I would keep an appliance of this sort. My goal was to decide if this machine could justify the space it takes up.
With 11 functions, I felt optimistic that this multi-cooker was up to a number of methods that would make my time in the kitchen a bit more streamlined.
How Easy Is It to Set Up?
After unpacking and finding space for the Instant Pot air fryer, I knew right away that this would require some research before I was ready to start cooking. I found this Product Manuals and Resources page to be very helpful as I proceeded to familiarize myself with the proper setup.
I definitely recommend the "Initial Test Run" that is detailed in the manual, as it will take a first-time user like myself some time to get used to the mechanisms for pressure cooking. This pretty much took me through the process of setting up the cooker with water. I learned how to set the timer and release the steam properly, which was very worth the time I spent doing it.
It took me a while to acquaint myself with all of the parts. After about 30 minutes, I felt I was ready to move ahead, though I certainly continued to reference the manual through the process. Once I felt prepared, I moved on to some simple air-frying. I wanted to see if this function was enough to set this multicooker apart.
Cooking Wings with the Air Fryer Function
The first thing I wanted to test with the Instant Pot Duo Crisp was its air fryer capabilities. I was already familiar with the name Instant Pot, but the air fryer seemed like new technology for this established brand of pressure cookers, and I wondered if this function was reason enough to have purchased this machine.
The true test for my family would be its ability to cook and properly crisp chicken wings. I really did not want to try anything too complicated for my inaugural run, so I prepared them the same way I had in the past when I recently tested the Cosori Air Fryer.
First of all, I made sure to dry the wings well with paper towels. I know that dry food simply fries better because having added moisture on the skin just causes it to steam. So, I took this to the next level with a dusting of baking powder, which contributes to browning through the Maillard reaction. I seasoned them well with kosher salt and garlic powder to make these wings extra tasty.
The fryer basket of this machine is round and quite deep. Unfortunately, this does not provide a very large cooking surface, which is optimal for air-frying.
I aimed to set the wings into the basket without having them touch, for optimal crisping, which was challenging. It required some creative standing of the wings around the perimeter of the basket, with a few of them along the bottom. With this method, I could comfortably fit only 12 wings at a time in this model, which is fewer than I was able to cook in the square basket of the Cosori Air Fryer that I recently tested. I attribute this to the design and shape of the Instant Pot fryer basket, which is round and offers less cooking area.
I moved ahead, placed the hefty air fryer lid into position, and selected the air fryer function on the display.
[For Wings] I set the temperature to 400 degrees, the timer to 20 minutes, and waited, checking them once halfway through. At the 20 minute mark, they were definitely testing done with a probe thermometer.
When I tested the Cosori air fryer with the same technique, the wings were crisp and done at this point, but the wings in the Instant Pot needed a few more minutes to achieve the same desired results.
I carefully removed them from the basket with plastic-tipped tongs, gave them a quick toss in a traditional Buffalo wing sauce, and brought them to the table to present them to my panel of judges. My family was eager to give them a try.
The Results
The wings were tasty, without a doubt. They were thoroughly cooked, but they weren't as crisp as we had hoped. Taking into consideration the absence of added oil, we acknowledged that we were eating something that was more healthy than traditional deep-fried wings. The truth is, we weren't necessarily impressed enough to go about this in the same way again in the future.
My curiosity provoked me to seek out an alternate method that could deliver the type of wings we were wishing for. I turned to the Internet and discovered a few recommendations. One suggested a two-step cooking method that employs the pressure cooker for 7 minutes for the initial cooking of the wings. This is followed by a final 20-minute crisp with the air fryer function to finish them off.
According to my research, this technique aims to produce the type of crispy skin we long for.
To be honest, I couldn't find a good reason to use this machine to cook and crisp 12 buffalo wings. I can confidently say that the use of a regular convection oven would achieve much crispier results, with the added benefit of cooking more than 12 at a time.
To be clear, this is no reason to write off the machine as a whole. From here, I moved on to testing something a little more substantial, and the outcome was very different.
Cooking with the Pressure Cooker: White Bean, Sausage & Kale Soup
Next up, I decided to give this machine an opportunity to show me how it could handle a recipe that utilized a variety of functions in one dish. I decided to make a white bean, sausage, and kale soup.
I began the cooking using the sauté function, browning the sausage in the inner pot of the pressure cooker. Right off the bat, I was impressed by how quickly this heated up.
I used a tablespoon of oil and added the sliced sausage, stirring occasionally for about 5 minutes, until I had achieved sufficient color. Then, I added mirepoix (carrot, celery, and onion) until they softened a bit, followed by garlic and aromatics.
I deglazed the pan with chicken stock, continuing to add about 6 cups, then brought things up to a simmer. Next went the dry beans that were only rinsed and sorted.
This step caused me to pause and question the recipe. I wondered if I would regret the decision not to soak the beans, which is what I would have done for a soup of this nature that I would have made on the stovetop, but I forged ahead, trusting in the process.
The pressure cooker top was then put into place, aligning it properly and turning it clockwise until it signaled a little jingle indicating proper positioning. I selected the pressure cook function and adjusted the time to 45 minutes. It took about 10 minutes for the pressure to build inside the cooker (the float valve lifted at this point) before the actual time started ticking down.
At the signal, the cooker automatically switched to the keep-warm function. I was directed by the recipe to allow for a 15-minute natural release of the steam, which means that over a period of time (10–40 minutes or longer), the pressure will release on its own. I had to monitor the timing of the natural release by keeping an eye on the timer, which had begun counting upwards after the initial cook time had finished, indicated with an 'L' for lapsed time. The steam had not entirely been released by this time, so I proceeded to release the remaining steam with a press of the quick-release valve. A considerable amount of steam remained in the pot, so this release took about a minute until the float valve dropped.
I have to say, the aroma that filled my kitchen at this point was really awesome. I was eager to open the lid. With a counter-clockwise turn that signaled another jingle, the lid was unlocked. I checked the doneness of the beans and, feeling satisfied, added the kale, switched the function to saute to continue simmering, and finished the soup with a bit more salt and pepper.
After just five minutes, I was on my way, ready to serve my family a satisfying meal, the results of which may have been written on my face, but I was ready to let them decide if it was a true success.
The Results
To say I was pleased is an understatement. I was rewarded with a glorious soup with great texture and aroma. The true test would be in the doneness of the beans, and these were soft and creamy, yet not broken. They retained their shape well while providing thickness to the broth. The vegetables were well cooked yet intact. Everything seemed spot on. I dare say that this is a soup that tastes better than I had imagined. In fact, I assert that it was likely better than a soup that would have simmered on the stove for hours.
[For white bean, sausage & kale soup] To have the cook time cut to less than half was a real benefit to this process, but it does not end there. When I looked around at my kitchen, I was pleased with the surprisingly few dirty dishes and cookware.
The flexibility that this machine had to offer was all that I needed to become a believer in Instant Pot cookery. I felt ready to move on to other recipes that could utilize a whole new set of cooking techniques.
Cooking a Whole Roast Chicken Using the Pressure Cooker & Air Fryer Functions
I could not ignore the fact that this machine had something else to offer. I really wanted to know how I could employ two different functions in one recipe to achieve desirable results in order to prove that this machine was worthy of the counter space it occupied.
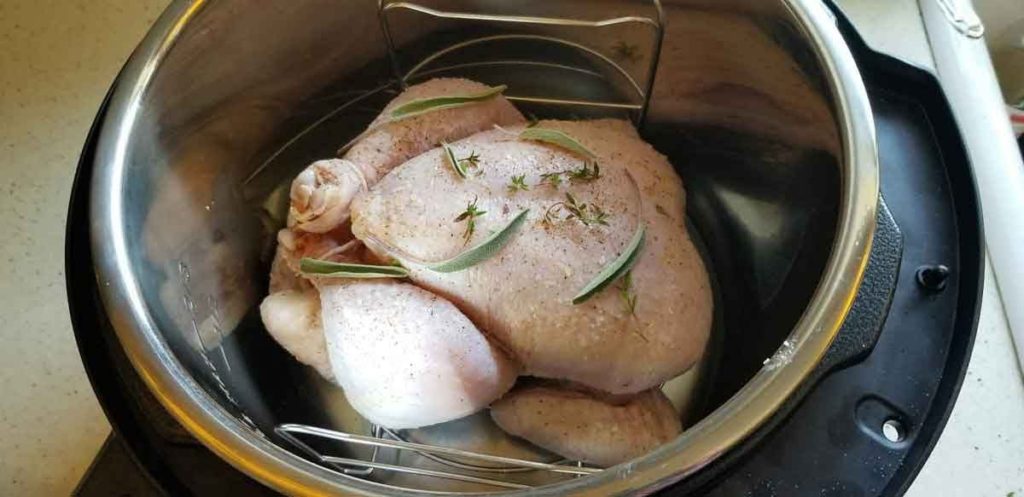
So, I decided to put this to the test with one of my all-time favorite meals: roast chicken. I set out to make this dish in one pot with two functions. I was after a bird with juicy white meat and crisp skin—something I feel I have perfected in my conventional oven. After consulting the Instant Pot Time Table that accompanied this cooker, I knew that I could cook a 4-pound chicken in about 30 minutes (8 minutes per pound, as recommended by the chart). I adjusted this time slightly because I intended to use the air fry function to finish this chicken off with golden brown skin.
Then, I seasoned the chicken generously with salt and pepper, stuffed the cavity with garlic and lemon, trussed it with butcher's twine, and nestled it into the wire rack that I lowered into the inner pot, along with a cup of water. I set the timer for 25 minutes.
When it was done, I released the pressure and opened the lid to find a nearly-cooked chicken without any color whatsoever. I easily lifted the chicken from the pot, emptied the liquid that had accumulated in the bottom, and placed the air fryer lid in place. Fifteen minutes with the air fry function proved to be the sweet spot for color and texture. Satisfied, I removed the chicken and waited the essential 20 minutes before carving so that the juices would redistribute and not end up on my cutting board.
I could not ignore the delicious, golden, aromatic liquid that had been left behind from the pressure cooking stage, so I quickly put that right back into the pot (I didn't even have to wash it at this point, which was a bonus!) with an equal amount of jasmine rice that I had rinsed under water.
With the pressure cook setting, I adjusted the timer to 5 minutes. When it was done, I let it naturally release for 10 minutes, giving the rice a chance to further cook before I released the rest of the steam and removed the pressure cooker lid to reveal perfectly cooked rice grains. I stirred it gently with a fork, carved the chicken, and dinner was served!
The Results
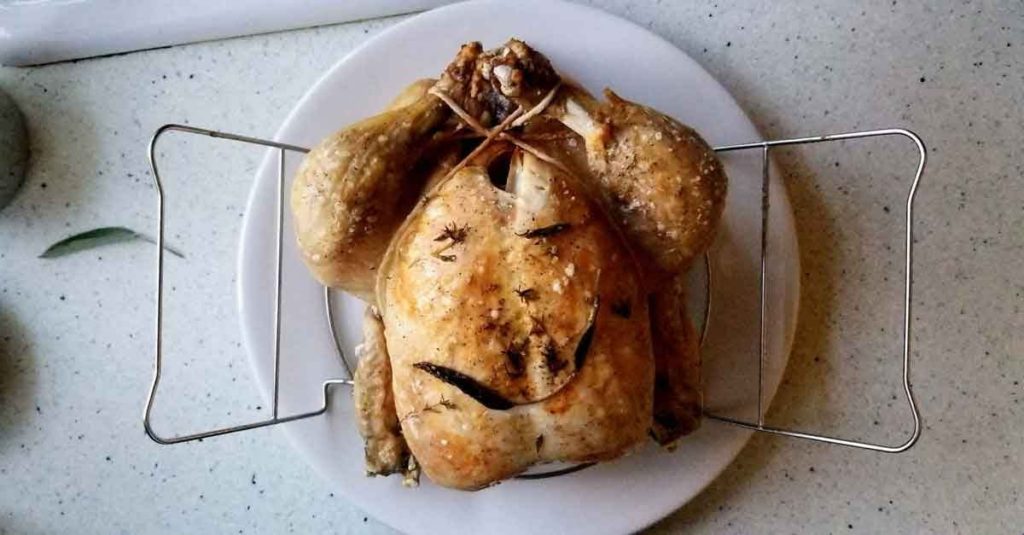
I am pleased to report that this was an Instant Pot success. The chicken was really juicy—even the white meat—and the skin was delicious, both pleasingly crisp and golden.
Having fully cooked this chicken in under 45 minutes was truly a time saver - a job that would have taken over an hour in my conventional oven.
The real star of the meal was the rice. Having used the pan drippings and rendered fat, this was a delicious and well-seasoned side dish. My family really enjoyed it, and when it came time to clean up the kitchen, I was reminded that this really was achieved in just one pot—a real treat, to be honest.
One thing I will likely try in the future is brining the chicken prior to cooking. I suspect this will give me a more well-seasoned bird. The point is, the options here are plenty. I feel that I have just scratched the surface in some ways with the capabilities of this machine.
How Easy Is It to Clean?
The Instant Pot Duo Crisp, with all of its bells and whistles, has a number of parts that require cleaning. This machine boasts a stainless steel inner pot, making it a candidate for washing by hand or using the dishwasher. Because I didn't have to worry about a nonstick surface, I was free to use an abrasive sponge if necessary. After just one use, the pot did not have quite the same luster and shine, but I felt it was quite easy to clean, much like the rest of my stainless steel cookware.
The air fryer basket, however, required a bit more care because of its nonstick coating. It did clean up with some effort, but using an abrasive would be a mistake here. There were bits of food stuck to the basket, so letting it soak with some hot water and dish soap certainly loosened them. Alternatively, you can try cleaning it in the dishwasher. I will say that this fryer basket was not as easy to clean as the Cosori fryer basket that I recently tested, but it was manageable.
The air fryer lid should never be submerged in water, so cleanup requires a bit more care. The heating coil is coated with a non-stick surface, which makes most of the cleanup quite simple with a damp kitchen towel or sponge. The outside of the lid cleans up well with a kitchen spray.
Cleaning the pressure cooking lid was a little complicated due to the steam release valve, pressure pin, and sealing ring. All of these parts are removable quite easily with instructions from the manual. It is important to note that these parts are small. They could easily be lost or misplaced if not cleaned and replaced immediately. Otherwise, the lid is dishwasher-safe or easily cleaned with dish soap and water.
How Would I Improve the Instant Pot Duo Crisp Air Fryer?
Testing this machine was a lot of fun, and I was quite surprised by its range of applications in the home kitchen. For my family of four, it is a great size for pressure cooking. I feel confident that I will use it for many future meals. However, I am reluctant to say that I would use the air fryer function on its own, due to the limited cooking surface. I would prefer to have a larger air fryer basket that is not as deep but a bit wider.
Another design flaw is the length of the electrical cord. I found this really limited where I was able to use this rather large appliance. The manual suggests that this short cord is designed for safety in order to prevent entanglement or tripping, which left me very little room for maneuvering it around my countertop. In the end, I had to relocate my coffee maker to accommodate this machine, which was fine in the short term but could be a problem for some kitchens with limited outlets and space.
What’s the Warranty?
As with the purchase of any appliance, it is good to have a look at the warranty. In this case, the limited warranty is effective for one year from the date of the original consumer purchase, which is pretty standard for this type of kitchen gear.
Instant Pot also offers customer care through phone, email, or online chat. Their website seems to be a good resource for support, troubleshooting, and frequently asked questions. The Getting Started Guide has a QR code on the front that directs you to their website, where you will find many helpful resources, including recipes, cooking tips, videos, and additional support. There is even an Instant Pot recipe app, though reviews are mixed and suggest that it does not support this model.
Verdict
While my initial chicken wing air fryer experience in my kitchen with the Instant Pot Duo Crisp was a bit lukewarm, I feel this machine redeemed itself with the pressure cook function. The truth is, this is not an ideal dry cooking experience if your goal is exclusively to use it as such. In other words, I would not recommend this model for someone wanting just an air fryer.
Since my first attempt, I have given a lot of thought to how the air fryer function would be best applied in a practical home kitchen. I know there are many accounts of home cooks using it to pick up some nice browning after first using the pressure cook function.
For example, after preparing a whole chicken with the pressure cooker lid, a few minutes with the air fryer lid would help crisp the skin. Beyond that, I think that making macaroni and cheese in the Instant Pot could be nicely browned with a bread crumb topping under the air fryer lid in place to finish it off.
Outside of the cooking functions and limitations, it is certainly worth noting the size of this appliance.
The Instant Pot Duo Crisp that I tested is the 8-quart size, which is really nice for families of 4 or larger. If you are someone who cooks for a small crowd, this may be suited to your needs, but a smaller household may find this size to be overwhelming.
In the case of chicken wings, I don't think this would necessarily be too large for a small family, but I am reluctant to recommend this large cooker if you plan to use it for the sole purpose of cooking chicken wings.
Overall, my experience with the Instant Pot Duo Crisp was eye-opening. This type of cooking is somewhat new to me, due to the fact that much of my kitchen experience is more old-school in nature, utilizing stockpots, sauté pans, and commercial deep fryers. That is not to say there isn't a place in my kitchen for a multi-cooker.
The real test that all kitchen tools must pass before finding a space in my arsenal is this: Does it perform more than one task that in turn, makes cooking somehow better or easier? I can honestly say that this machine passes the test.
How Does It Compare?
With a number of multicookers available these days, I think it is wise to compare this one with some other options of similar function and size. After all, what is best for one cook or household will not necessarily serve everyone in the same way. With that in mind, I had a closer look at three models that offer similar options so that you can make a better-informed decision for your needs.
Instant Pot Duo Crisp Air Fryer vs Ninja Foodi Deluxe
 Instant Pot Duo Crisp $199.95 | 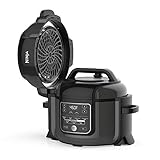 Ninja Foodi Deluxe $217.99 |
|
| Capacity | 8Qt | 6.5Qt |
| Functions | 11 | 9 |
| Watts | 1500 | 1400 |
| Basket Shape | Round | Round |
| Max Temp | 400F | 450F |
| Pot Coating | Stainless Steel | Ceramic |
| Safety Features | 10 | 14 |
| Check Price on Amazon | Check Price on Amazon |
In searching for comparable multicookers with pressure cooking and air-frying capabilities, the Ninja Foodi Deluxe was the premier model that had many more reviews than the Instant Pot model. That told me a little bit about how passionate Ninja users are about their cookery, so I thought it was a great place to start.
At first glance, the most obvious difference between these two cookers is the unremovable hinged air fryer lid on the Ninja Foodi. This lid is always attached to the machine, so when using the pressure cook function, the air fry lid must be left open in order to accommodate the alternate lid. This feature makes things a bit cumbersome when you are using it to do anything other than air fry, but fans seem to have accepted this about their beloved Ninja Foodi Deluxe.
Overall, the Ninja is a model with a considerably large footprint. At over 3 inches wider in the base than the Instant Pot model, its size is certainly something to take into consideration.
Another noticeable difference is in the inner pot. The Instant Pot model has a stainless steel pot, while the Ninja has a non-stick ceramic pot that is about ¾ inch larger in diameter. For some cooks, the differences in the inner pot lining may not be a deal-breaker. Some may love that it is non-stick for easy cleaning, while others, like me, may be in favor of a stainless steel interior. My preference comes from my experience with stainless steel cookware. I love its durability and low maintenance in the kitchen—a personal preference, certainly, but one that is worth considering.
In the end, the choice between these two will probably come down to space. The Ninja Foodi Deluxe is a monster of a multicooker, which will likely be the reason this model will not work in many home kitchens.
Instant Pot Duo Crisp vs Emeril Everyday 8-QT Pressure Air Fryer
 Instant Pot Duo Crisp $199.95 |  Emeril 8qt Pressure Air Fryer |
|
| Capacity | 8Qt | 8Qt |
| Functions | 11 | 8 |
| Sous Vide | No | Yes |
| Watts | 1500 | 1550 |
| Accessory Pack | No | Yes |
| Weight | 33lbs | 28lbs |
| Pot Coating | Stainless Steel | Stainless Steel |
| Safety Features | 10 | 14 |
| Check Price on Amazon | Check Price on Amazon |
My next consideration was the Emeril Everyday Pressure Air Fryer. First of all, both multicookers have two removable lids that perform similarly between different functions: one for air frying and dry cooking, the other for pressure cooking and steaming. The air fryer lid on the Emeril Everyday model has a pretty strong magnet keeping it in place, which some users felt was awkward to put into place and remove.
One of the main differences between these cookers is the air fryer basket. There seems to be a number of users of the Emeril model who are dissatisfied with the basket, which is stainless steel and not well designed. It seemed like a pretty big flaw and an oversight in the design of this package. There were a number of reviews that indicated a fryer basket had to be purchased separately, which was a source of frustration. If you plan to use the air fryer function on a regular basis, I would say that this is probably not the model for you.
These two multi cookers are very comparable in price, but I would be reluctant to recommend the Emeril Everday Pressure Air Fryer over the Instant Pot Duo Crisp based largely on consumer reviews of the parts and accessories. The air fry basket alone is a major flaw if you intend to use this machine for that particular function. The Instant Pot seems to have this beat.
Instant Pot Duo Crisp vs Crock-Pot Express Crisp
My third contender is the Crock-Pot Express Crisp. With a long history of slow cookers, Crock-Pot is a familiar brand to many home cooks. This model is similar to the Instant Pot Duo Crisp in that it also has two removable lids, one for pressure cooking and the other for air frying. The Crock-Pot inner pot is made of aluminum with a non-stick ceramic coating, which some may love, though I do not. It also has a detachable cord that is 24 inches long, giving a bit more flexibility in regards to kitchen placement and storage.
The biggest difference between these two multi-cookers has to do with the preset functions. As I mentioned, the Instant Pot version has 11 functions, each with its own button. The Crock-Pot model is equipped with 14 separate cooking functions, including settings for meat, poultry, beans, and rice. The benefit of this machine is that it is more adapted to the less-experienced home cook, who may want to try their hand at this type of cooking but needs a bit more guidance to get started. These machines are quite comparable in terms of price and size, so the real question here is: how much knowledge of this type of cooking are you bringing to the table?


Leave a Reply