My journey into the world of air fryers has been an eye-opening experience. Before getting my hands on one of these appliances I admit that I initially thought they were mostly for cooking chicken wings and frozen french fries. While it is certainly true that the air fryer can do a pretty nice job with those things, I have discovered a great many more ways they can broaden their scope in your home kitchen.
I am a professional cook by trade, but that just scratches the surface of my cooking experience. I also spend a great deal of time cooking for myself and my family. We are busy and active which can make cooking at home challenging when time is short. I am continually looking for ways to bring healthy delicious meals to my kitchen table and it turns out the air fryer plays nicely into that plan.
In this article, I will test and review the Chefman 6.3 Quart Digital Air Fryer. I went so far as to test out three different cooking functions that will give you an idea of what this machine can do. Beyond that, I will go on to compare it with three other air fryers to see how they stack up. In the end, I hope to guide you towards the model that suits your needs so that you can make a well-informed decision before heading out to buy one of your own.
Table of Contents
What’s in the Box?
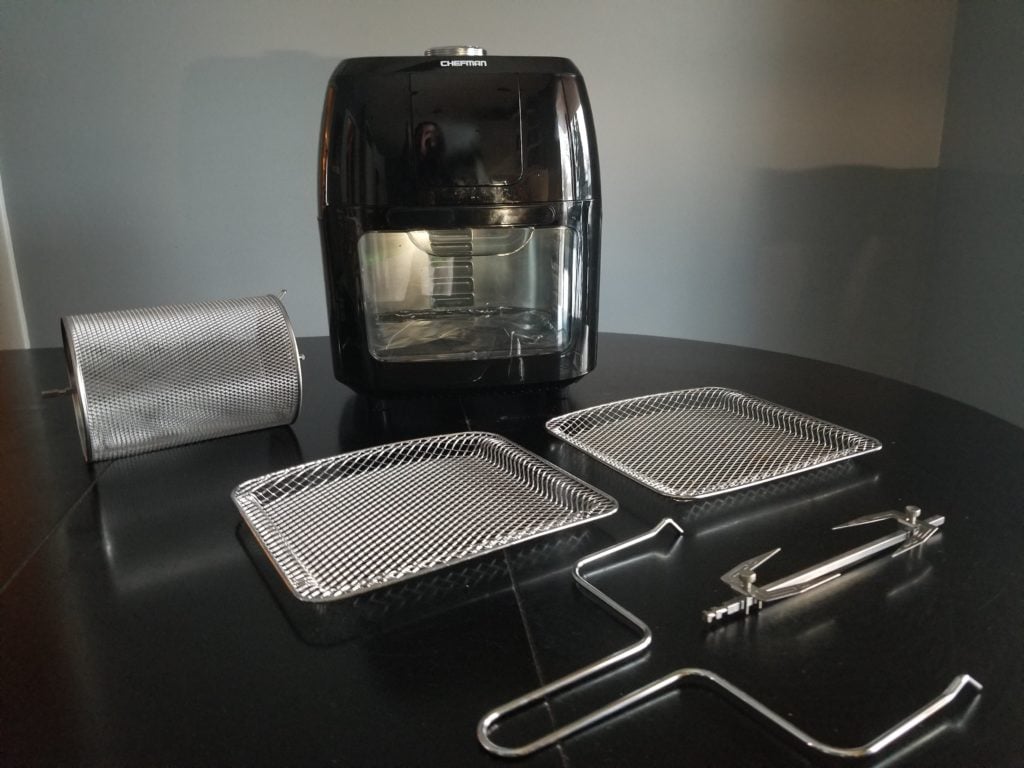
When the box arrived I was eager to check it out. I knew that this machine had a number of preset functions including a rotisserie, so I was already prepared for a number of parts. Neatly tucked into the packaging were the rotisserie spit, retrieving tool, and forks which I set aside in order to get the oven out of the box. Inside were the non-stick drip tray, two stainless steel air flow racks, and the rotating basket.
- air fryer/oven
- 2 wire air flow racks
- rotisserie spit and forks
- rotating basket
- retrieval tool
- drip tray
How Does the Chefman Air Fryer Oven Look/Feel/Sit?
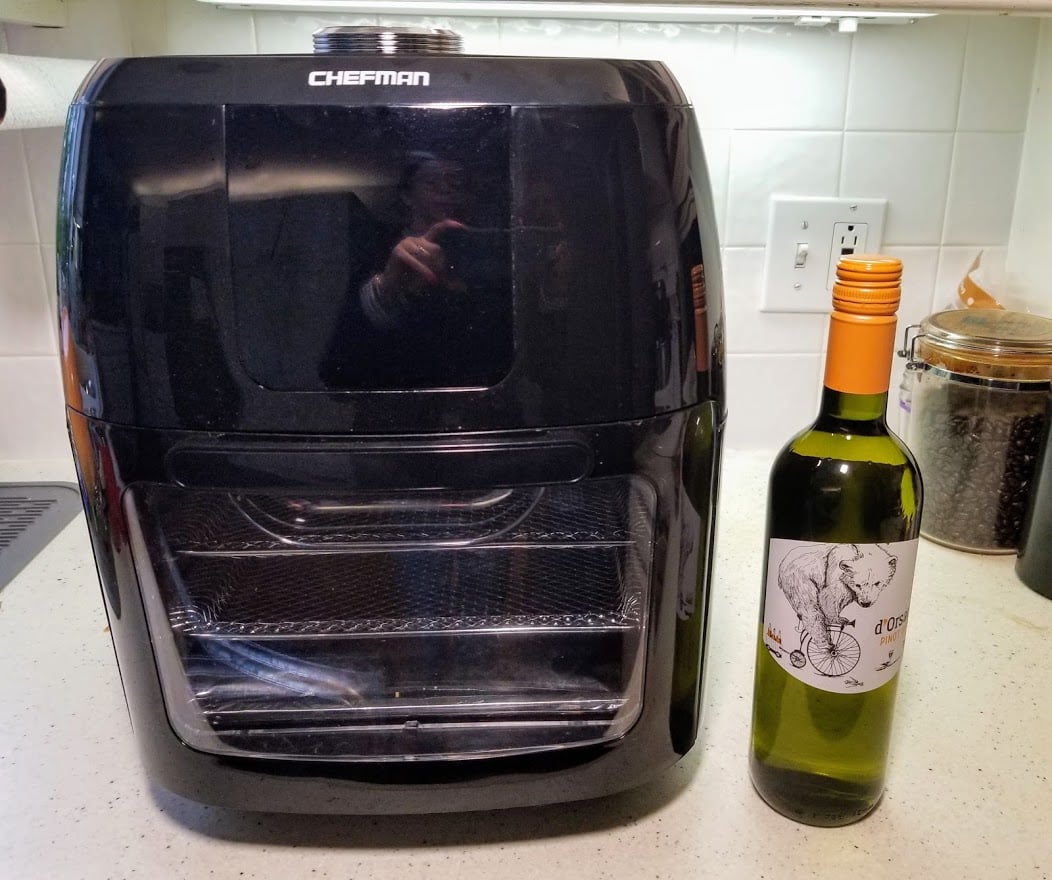
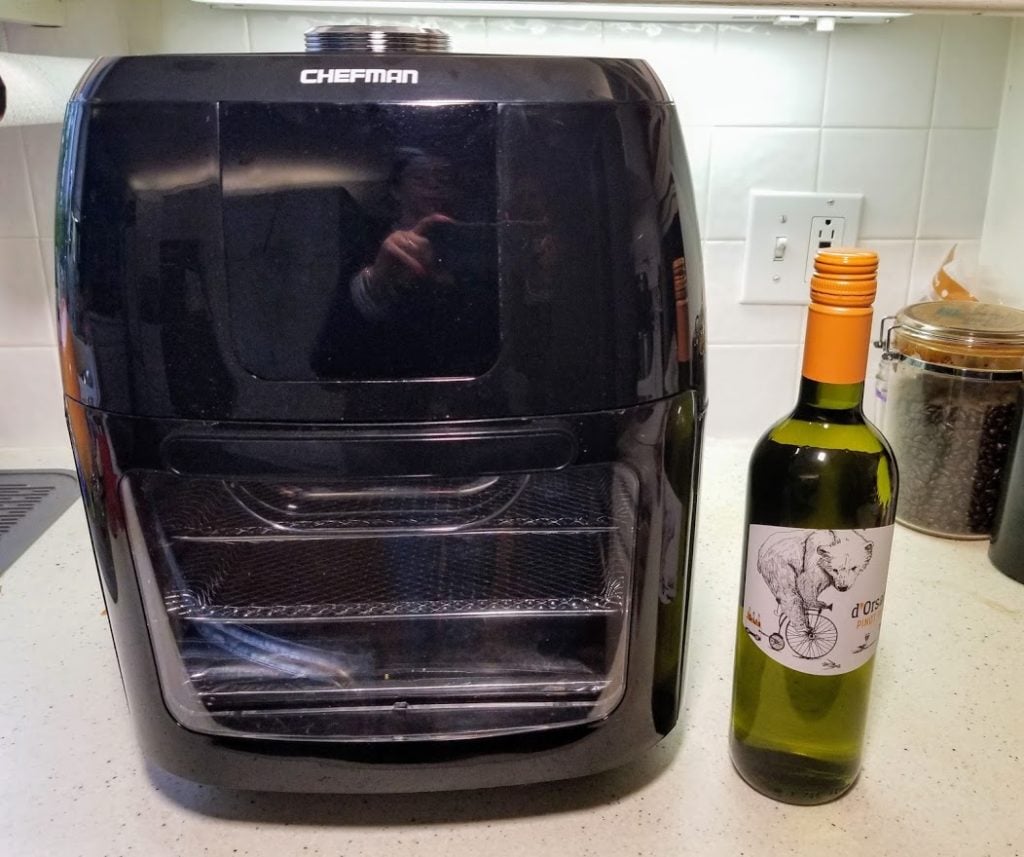
Once I got the oven to my countertop I was able to take in its modern design. It is made of shiny black plastic with an LCD screen that illuminates in blue when it is on. There is a large clear window on the front door that provides an ample view of the oven's interior. The top of the oven has a large on/off button and dial that allows you to adjust temperature and time.
The machine itself is quite heavy, coming in at over 19 pounds. It feels sturdy and compact, taking up just 11 inches by 10.5 inches of counter space which seems relatively small when I took into consideration the fact that this machine boasts a 6.3-quart interior cooking space. With a height of over 14 inches, this model was certainly on the tall side.
How Easy is it to Set Up?
The manual that was included with the Chefman Air Fryer Oven is surprisingly brief. It covers a number of safety instructions and important safeguards and an overview of the machine's features. The operating instructions give a step-by-step process that should be reviewed before getting started.
Within 10 minutes I was feeling pretty comfortable. I had familiarized myself with the parts and functions. There is a chart that offers a rather limited time and temperature guide to get things started. This machine seemed pretty self-explanatory with an LCD screen that really guides the user along with the 8 preset functions which automatically suggest temperature and time.
I familiarized myself with the rotisserie attachments and practiced getting them into place properly which was really easy. The rotisserie spit is further labeled with 'R' on one end and 'L' on the other to ensure that you are inserting this properly. Smart move, I thought, making it almost foolproof for first-timers like me.
Cooking Frozen Pizza
Preparing frozen foods seems to be an obvious choice for cooking in the air fryer, so it seemed a reasonable place to start. I opted for a frozen pizza because I thought it would give me a good idea of how well this oven could handle its size, but more importantly how it would turn out a melted cheesy topping with a desirable crisp crust.
I have said it before in my other articles about air fryers but it certainly bears repeating: an air fryer is not a fryer, at all. It really is a small convection oven that functions by circulating hot air. With that knowledge, I was able to adjust the suggested temperature on the pizza box. Convection ovens tend to run about 25-50 degrees hotter than a conventional oven, so I selected a bake temperature of 375 degrees for 8 minutes, rather than the recommended 425 for 12-15 minutes, by turning the dial on top.
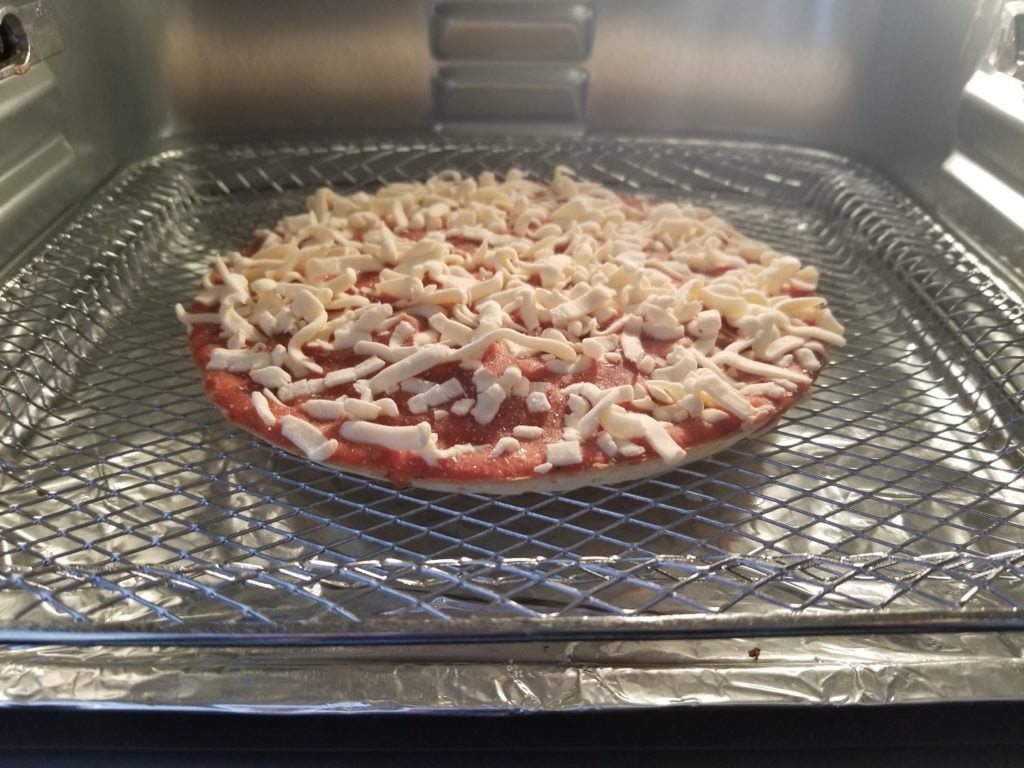
I placed the 6-inch pizza onto one of the mesh cooking trays, slid it into the middle of the oven, pressed start, and was soon greeted by the sound of the fan as the oven began to heat up. After 10 minutes it was definitely looking golden brown and seemed to be done. Time to check out the results.
The Results
What came out of the oven certainly did not look like the pizza that was pictured on the pizza box with its soft, melted-looking cheese. Rather, my pizza was more browned and a bit dry looking on top. I attribute this to the upper fan that circulates hot air throughout the machine. I suspect it caused the cheese to dry out and brown before it had a chance to melt.
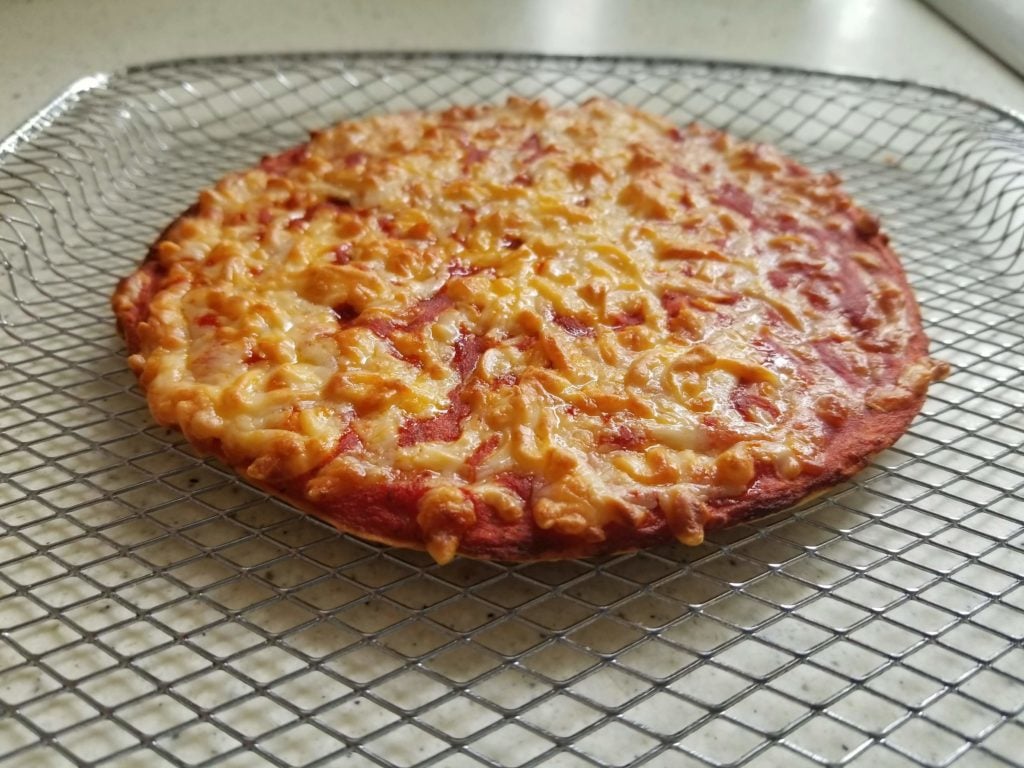
And as far as the bottom crust goes, it was a bit crisp. Perhaps not as crisp if it would have been had there been a lower heat source, but I realized what I was working with here. I think that in its favor, the Chefman Air Fryer Oven mesh racks allow for better circulation under the pizza crust which wasn't necessarily the case of the Instant Vortex Oven that I recently tested. I much preferred the racks that accompanied the Chefman model for their increase of airflow.
I will assert here that air frying is really not the best choice for cooking a frozen pizza, but in an effort to save time it can certainly work. I suspect that other frozen foods (for example thinly cut sweet potato fries) may be a better match for this type of heat and high fan that will ensure more browning and surface crisping.
Rotisserie Chicken
I would be remiss if I didn't test the rotisserie function on this machine, so a roast chicken was an obvious choice here. According to the manual, this rotisserie spit could handle a 4-pound item. I thought I would see if that was truly the case, so I trussed, tied and seasoned my 3.7-pound chicken before inserting the spit and fastening the rotisserie forks to properly keep them in place. A few turns of a thumbscrew kept things from moving, at least for now.
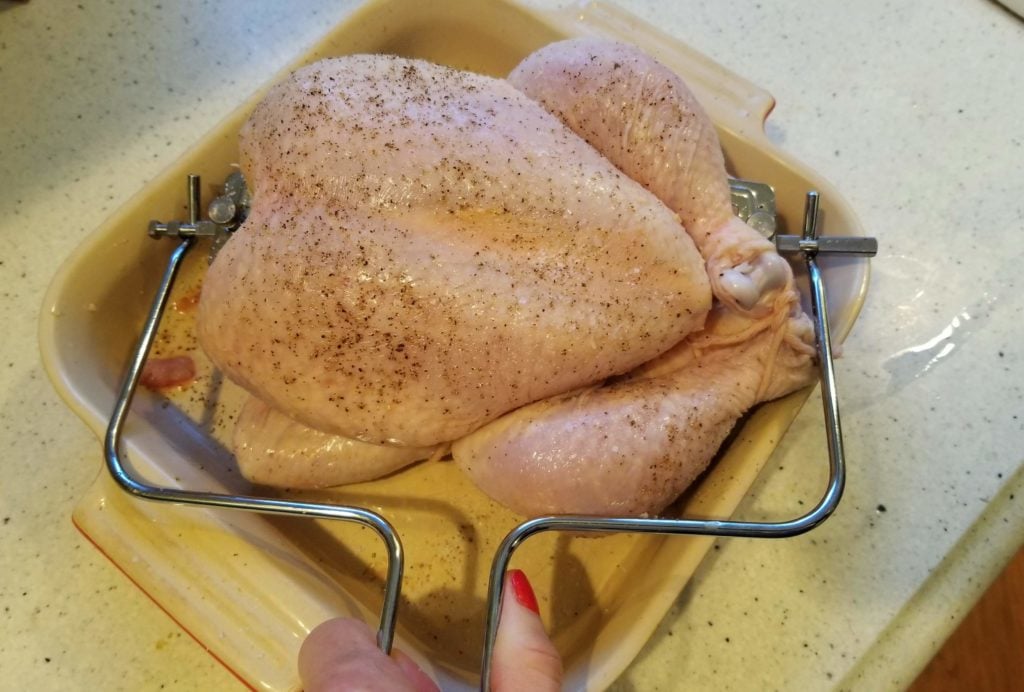
Keep in mind that if you are somewhat new to this technique, you may want to give yourself an extra 10 minutes or so to get things right. A Youtube video may be in your best interest, as well. Once seemingly situated, I used the rotisserie retrieving tool, which is a Y-shaped device designed to lift the spit and insert it into the oven, making sure the right end went into the machine as indicated with an 'R' inscribed into the rotisserie spit.
The spit slid pretty easily into place, aided by the internal light that allowed me to better see what I was doing.
I selected the rotisserie function which automatically set the temperature to 400 degrees for 40 minutes. Again, relying on what I know about convection ovens, I moved this down to 370 degrees.
I shut the door, pressed the rotate button, and watched carefully as my chicken began to turn.
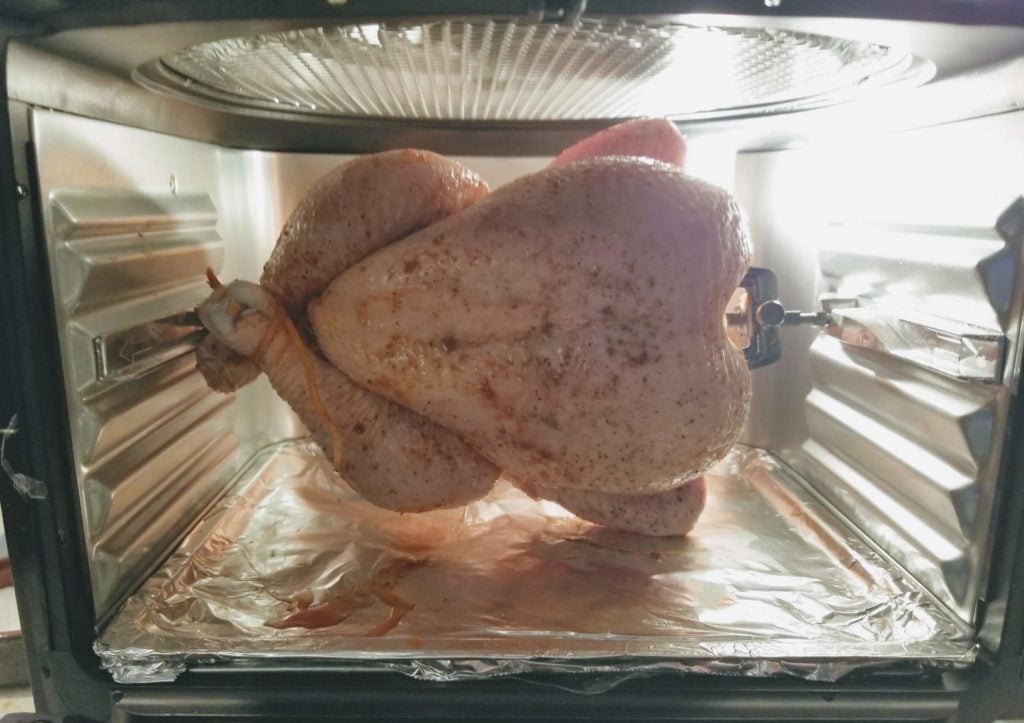
Unfortunately, the legs of my chicken did not quite clear the drip tray that was set in the lowest oven position, but it seemed to move along regardless. I watched carefully for the first 10 minutes to make sure the machine was not struggling to keep this thing in motion.
Generally, it was going pretty well, but the forks did not really hold the chicken in place as well as I had hoped. I had to pause the cooking in order to better secure the chicken with some more butcher's twine. In the end, it seemed to have cooked it quite evenly. After 40 minutes I checked the temperature of the meat in the thigh. It registered a pleasing 165 degrees so I removed it again with the retrieval tool and let it rest for 20 minutes before I cut into it in order to allow the juices to redistribute.
The Results
The end results here were really quite favorable! Most notably was the even brown color and crisp skin upon taking it out of the oven. This type of result is really not as easily achieved in my home kitchen when I roast a chicken which is somewhat of a disappointment. In that case, the underside tends to steam a bit and remain a bit pale in comparison to the golden brown breast. But with the use of the rotisserie, the chicken had a chance to pick up a nice even color on all sides which was really great.
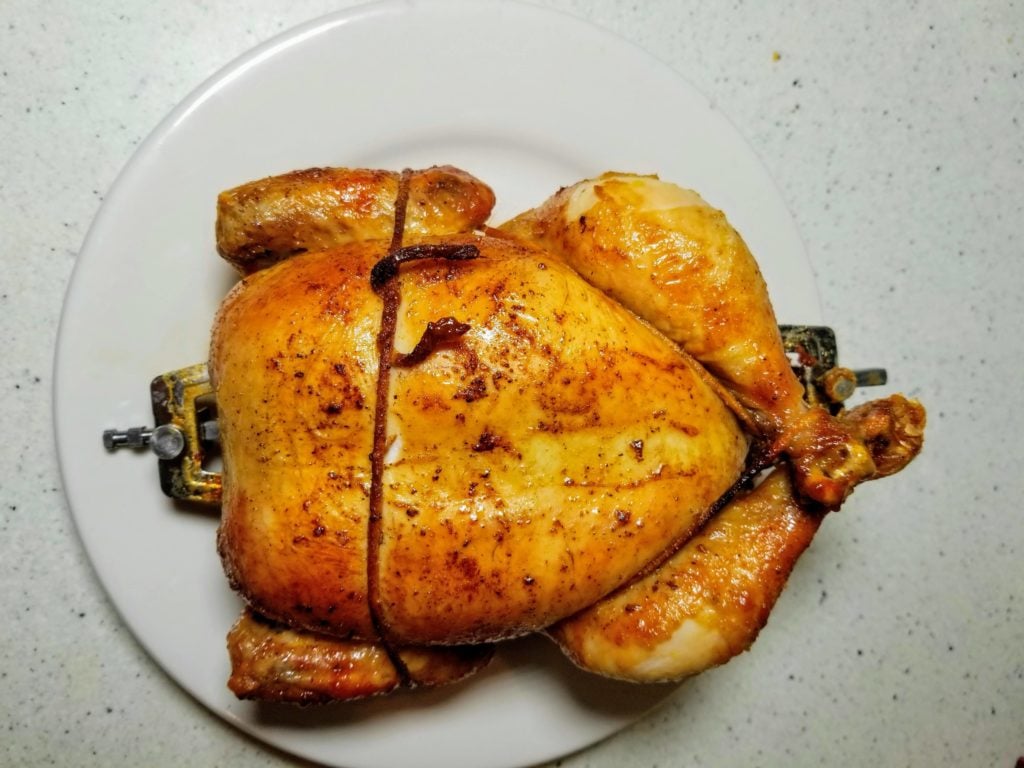
The true test would be in the flavor of this chicken.
By the time I had cut it up and brought it to the table, my family did not realize I had employed an air fryer to cook it. I wanted to keep that under wraps to see if there really was a difference. It was my husband who noted that it was really juicy, especially the white meat which can sometimes be a bit dry. I admitted that I had used the rotisserie and we all agreed that this is a method we would use again in the future.
I am determined to find the right size bird and the right trussing technique to get it to stay put. A few minor adjustments ought to take care of that.
Dehydrated Apple Chips
I could not ignore the fact that this air fryer brought a little something different to the table with its dehydrate function, so naturally, I wanted to see if this is something that would be worthwhile for the home cook. I decided to make apple chips.
To make these apple chips I wanted to make sure the slices were perfectly even and thin so that they would dehydrate evenly. I used my mandoline for this task, though it can certainly be done by hand. I was looking for something just a few millimeters thick, so I found that by cutting the apple in half, top to bottom, I would be able to get a nice half-moon shaped apple slice. After slicing just one apple this way I arranged them on the wire mesh cooking racks with the edges slightly overlapping.
I slid these two trays into the oven, pressed the dehydrate function button, and set the timer to one hour. The temperature defaulted to 140 degrees which is the lowest temperature setting for this machine. I kept a careful eye on the apple slices, noticing that they started to blow around a little as they began to dry out.
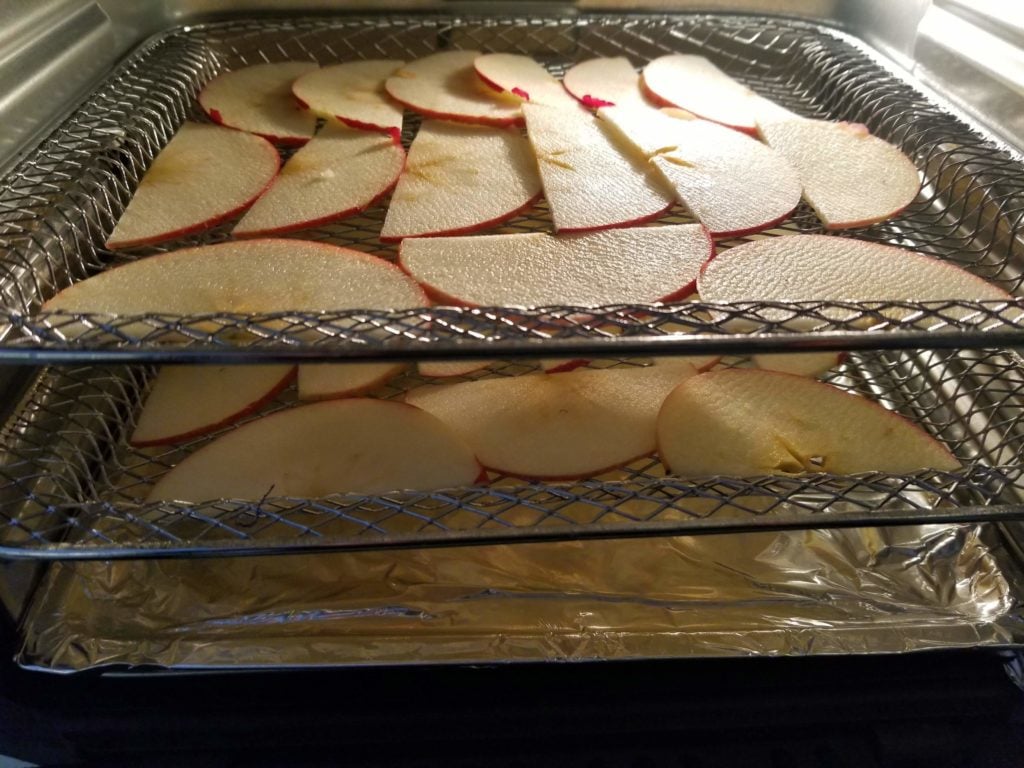
After an hour I tested the apple chips by removing one from the oven and allowing it to cool. It was close, but still a bit chewy. After another 30 minutes, they felt quite dry and they crisped up nicely as they cooled to room temperature. I slid them into a bowl and quietly left them on the counter to see if anyone interested would come along to let me know what they thought.
The Results
Before long, the apple chips had disappeared. My kids really loved them which was every bit of evidence I needed to determine that this was a worthwhile cooking function for the Chefman Air Fryer Oven. I will acknowledge that they did take quite a long time, but most of that time was inactive.
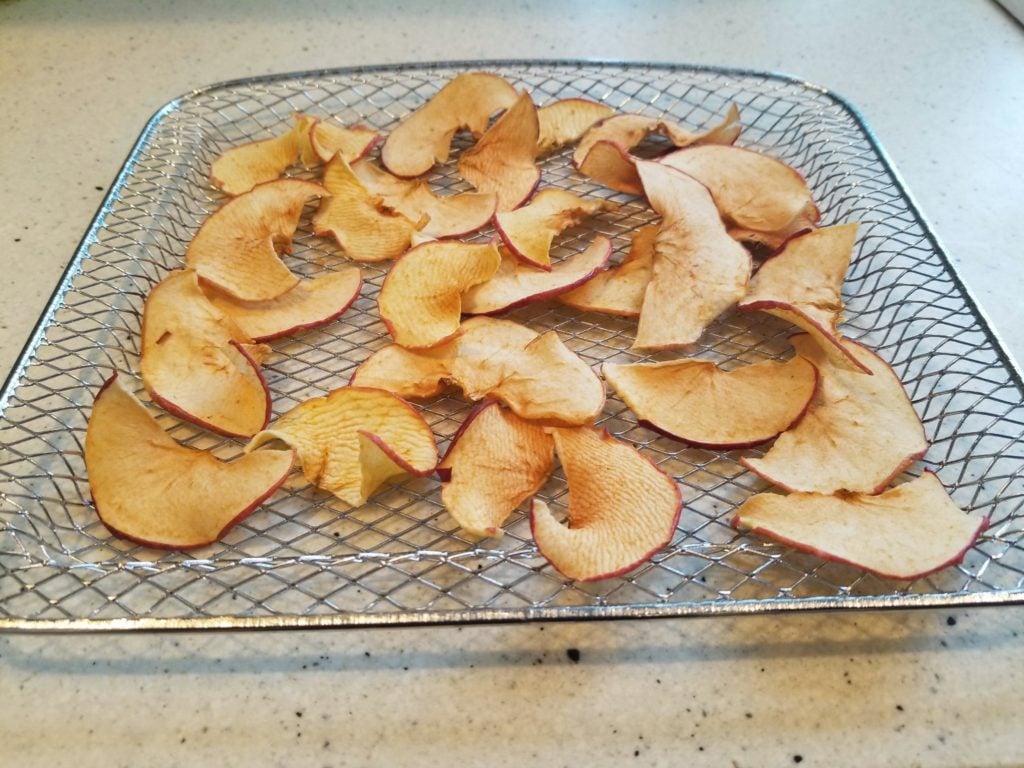
I think these apple chips would be so nice to have around and would make a great addition to a green salad with goat cheese, toasted pecans, and a light vinaigrette. Beyond that, I would add them to a trail mix with salted almonds, toasted walnuts, and dried tart cherries. They would be awesome crushed slightly and sprinkled over a bowl of oatmeal or dipped in a bowl of vanilla yogurt. The options are endless. I will be moving on to bananas, strawberries, and pears. Even beef jerky is a possibility as this oven-dehydrator can operate for up to 8 hours!
How Easy Is It To Clean
The exterior of this oven is really easy to clean with a spray of kitchen cleaner and a soft cloth or sponge. It is easily restored to its glossy shine.
As far as the interior goes, the door is a little challenging to clean, especially the hinge that can accumulate crumbs. I would recommend brushing that out after each use. Unlike the Instant Vortex Plus, the door is not removable, which will require a bit more attention. The interior walls are best maintained between uses with a damp cloth or paper towel
The accessories are all dishwasher safe, according to the manual. I would recommend soaking the mesh trays and rotisserie attachments in hot soapy water immediately after use in order to loosen any bits before lightly scrubbing. Leaving any oil or food on these parts between uses will cause them to darken, but I found it to be quite easy to maintain.
The drip tray will probably take the brunt of the use in this machine, especially when roasting chicken or other items that will generate drippings. An easy way to make clean up easier is to cover it with aluminum foil before use. I found this the best way to keep it like new and made the mess a lot more easy to clean in the end.
How Would I Improve the Chefman Air Fryer Oven?
As with any of these air fryers, none of them is perfect. This particular oven would benefit from a removable oven door. After a few uses, I could already see that keeping this pristine would be a challenge. Let's face it, we use these types of appliances for convenience and nobody wants to spend a lot of time maintaining them. I appreciate the window that is built into the oven door, but it will only continue to serve me well if I keep it spotless, and removing it would make that so much easier.
The other thing that I think really could use improvement is the depth of the drip pan. For much of my cooking it did not present a problem, but roasting a chicken on the rotisserie generated a lot of drippings that accumulated in the pan. It became challenging when it was time to remove it for cleaning. Not impossible, but again, something that could use improvement
What’s the Warranty?
All Chefman products are backed by a limited 1-year warranty. In order to register your appliance, there are instructions on the Chefman Warranty Registration page in this User Guide. They offer a limited 1-year warranty from the date of purchase which is reasonable for this type of oven.
They offer a link for support at: Chefman.com/contact. Email or phone support at: [email protected] - 888.315.6553
The warranty is available through there website at https://chefman.com/
Verdict
My overall view on this air fryer oven is quite favorable, but with that said, it isn't for everyone. As far as size goes, I think it would certainly accommodate a small family of up to four, especially with its two food racks that provide a decent amount of cooking surface.
My family found this really handy for heating up leftovers or smaller items. We used it for heating burritos, especially since it heated up more quickly than our conventional oven. For this reason, I think it would be great for smaller apartment dwellers who don't necessarily use their ovens for a lot of cooking. Because it does require a bit of counter space, you would have to determine if it would fit into your kitchen landscape. I think less-experienced cooks would find this really easy and fun to use!
How Does it Compare?
There are so many air fryers out there and I really believe that some are better suited to your needs than others. That is why I will see how the Chefman Air Fryer oven stacks up to a few of the other makes and models out there.
I will take into consideration factors such as size, cost, and preset functions in this next section. My goal here is to help you sort through some of the features so you can make the best decision for your needs.
Chefman Air Fryer Oven Vs No products found.
 Chefman Air Fryer Oven $134.21 | No products found. No products found. No products found. |
|
| Watts: | 1700w | 1700w |
| Capacity: | 6.3-qt | 5.8qt |
| Basket/rack: | Rectangular | square |
| Presets: | 8 | 11 |
| Temperature range: | 130-400 degrees | 180-400 degrees |
| Rotisserie: | Yes | No |
| Check Price on Amazon | No products found. |
While these two air fryers are almost evenly matched in price, the most noticeable difference is the style. I consider the Cosori more of a "pod" air fryer (as opposed to an "oven style" air fryer) with a removable drawer that pulls out making it easy to arrange food before reinserting it into the machine. This drawer offers a non-stick surface which is handy for cooks who prefer this ease of cleanup.
In terms of ease of use, these two machines are quite evenly matched with the icons that help novice cooks by offering time and temperature suggestions. While you can certainly cook a whole chicken in the Cosori XL, it does not offer the rotisserie capabilities that you get with the Chefman model. This may or may not be a dealbreaker, depending on if you are likely to use your air fryer for cooking large cuts of meat or whole birds.
Finally, the size of the Cosori is a bit wider at the base, but shorter in height than the Chefman. This is something to take into consideration if you have limited counter space. I highly recommend measuring your allotted space before making a decision about the right air fryer for you as these appliances can take up a lot of kitchen real estate.
Chefman Air Fryer Oven Vs No products found.
 Chefman Air Fryer Oven $134.21 | No products found. No products found. No products found. |
|
| Watts: | 1700w | 1500w |
| Capacity: | 6.3-qt | 10-qt |
| Basket/rack: | Rectangular | Rectangular |
| Presets: | 8 | 7 |
| Temperature range: | 130-400 degrees | 95-400 degrees |
| Rotisserie: | Yes | Yes |
| Check Price on Amazon | No products found. |
Let's have a look at the Instant Vortex Plus to see how it measures up to the Chefman Air Fryer Oven. Upon first glance, these two models are similar in style in that they both have an oven door with a window that allows you to see inside.
In addition, both have a rotisserie function with a spit and rotisserie basket that operate in much the same way. I found the Instant Vortex Plus rotisserie a little more challenging to set up with the red release lever that must be released in order to insert and retrieve the spit, but both were very similar otherwise.
The oven racks are a relatively big difference between these two machines. The Instant model has perforated, non-stick pans that do not offer as much air circulation as the Chefman model. This really made a difference in cooking, dehydrating, and crisping the bottom side of things. I preferred to cook on the wire rack that accompanied the Chefman version, though if you are a fan of cooking on non-stick surfaces, you may opt for the Instant model.
The removable door of the Instant Vortex Plus is really an asset to the Instant Vortex Plus. When it came time to clean up after use, especially with something greasy, this feature proved to be helpful. While it isn't imperative to the way the oven operates, I can imagine that over a long period of use, the Chefman would not retain the same appearance with an accumulation of crumbs and grease.
These two air fryer ovens are matched almost identically in price. The Instant model has a slightly larger footprint which may matter to some. What it comes down to for me is the cooking surface of the oven trays. Those who prefer non-stick will be happiest with the Instant brand while the Chefman will appeal to those who prefer to cook on the mesh stainless steel pans which, in the end, provided better air circulation overall.
Chefman Air Fryer Oven Vs Cuisinart TOA-65 Digital Convection Toaster Oven Airfryer
 Chefman Air Fryer Oven $134.21 |  Cuisinart TOA-65 Digital Convection Toaster Oven Airfryer $156.95 |
|
| Watts: | 1700w | 1800w |
| Capacity: | 6.3-qt | .6 cubic feet, 3 pounds |
| Basket/rack: | Rectangular | Rectangular |
| Presets: | 8 | 9 |
| Temperature range: | 130-400 degrees | 80-450 degrees |
| Rotisserie: | Yes | No |
| Check Price on Amazon | Check Price on Amazon |
In my last comparison, I wanted to have a look at the Cuisinart TOA-65 which is another air fryer toaster oven combo model that has been popular in recent years. At twice the price of the Chefman Air Fryer Oven, I thought it would be interesting to see if that price is justified.
Upon first impression, the Cuisinart model has a different look with a brushed stainless steel exterior. It has a much larger footprint than the Chefman, measuring almost twice as wide at its base. This does translate to a larger cooking surface, allowing you to take advantage of a twelve-inch wide space.
The Cuisinart offers 9 cooking functions, as well as the option to control the fan speed. In this way, it gives you more control over your food. There is also a dual cook function that allows you to combine two cooking methods at once giving you even more options and expanding the range of this oven.
There is no rotisserie attachment or function with the Cuisinart, though it can accommodate a whole chicken or roast up to 3 pounds. Fans of the rotisserie may miss the even browning you can achieve with the constant turning, while others may prefer the ease of roasting a chicken without having to situate it on the spit.
The toast function really sets these two models apart. What this means is that the Cuisinart has a lower heating element that allows you to brown your food from both sides. It offers the space to toast 6 bagel halves at once. Of course, if you already have a toaster that you love, this may not be a real asset. On the other hand, if you are looking to introduce an appliance that can really multi-task, this may suit your needs.
The temperature range of the Cuisinart allows you to reach temperatures of just 80 degrees at the low end and up to 450 degrees, which is higher than any other air fryers I have tested. Some cooks may not realize the benefit of this, especially at the lower end, but bread bakers may appreciate the ability to proof dough in a warm, draft-free environment. The bake function could also turn out smaller yeast doughs with even baking and low-to-high fan options.
Beyond space, I think that cost is a big difference here. Perhaps the Cuisinart TOA-65 is a bit of an investment, but what you are getting is a lot more kitchen muscle for those cooks who intend to use their air fryer for a great deal more than this base function
Before heading out and making an impulse purchase on an appliance of this sort, it is definitely in your best interest to consider size, function, and cost. If not the Chefman Air Fryer Oven, I am confident that you will find one that will prove to be the proper fit for you, making your time in the kitchen more enjoyable and efficient.


Leave a Reply